DaVinci Resolve is known for its powerful video editing and compositing tools, but it can be complex for beginners and even intermediate-level users. Nevertheless, it’s a popular video editing software for creating sequences, merging clips, color grading, and composition.
In today’s article, you’ll learn how to merge clips in DaVinci Resolve using its built-in tools, and I’ll also show you how to merge two images in one video using one of our plug-ins.
Let’s dive in!
Step By Step: How to Merge Clips in DaVinci Resolve
In DaVinci Resolve, choose the clips to merge from your timeline, right-click and select “New Compound Clip”. This will merge all clips into one, allowing you to apply transitions, effects, and edits simultaneously to all of them.
There are a few ways to merge clips in DaVinci Resolve. I’ll show you two methods using DaVinci Resolve tools and a third alternative method using Continuum.

How to Merge Clips in DaVinci Resolve Creating a Compound Clip
Step 1: Set Up Your DaVinci Resolve Project
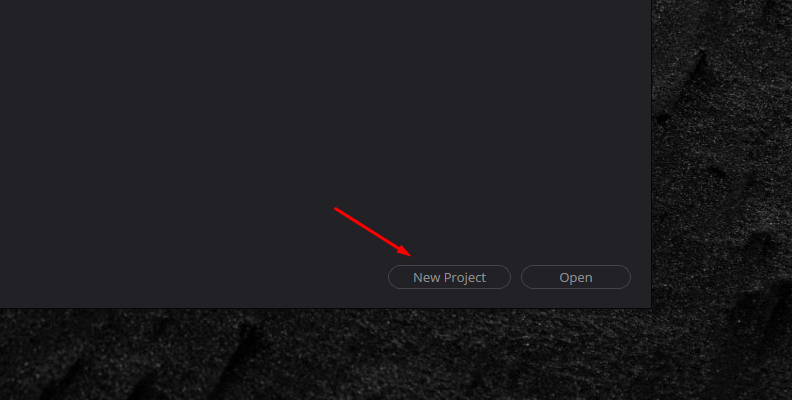
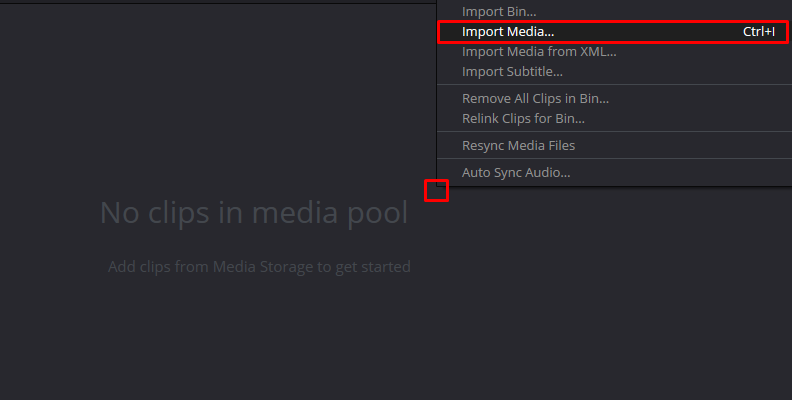
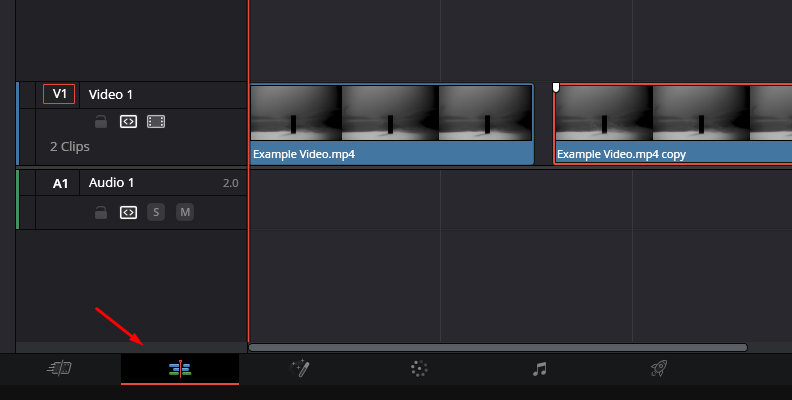
Create a new project or open an existing one. Import the two clips (or more) you want to merge into the timeline and place them together to create the sequence. When you work from the Cut page, the video will automatically join clips as you drag them closer. On the Edit page, you must be careful not to trim the clips when pulling them closer.
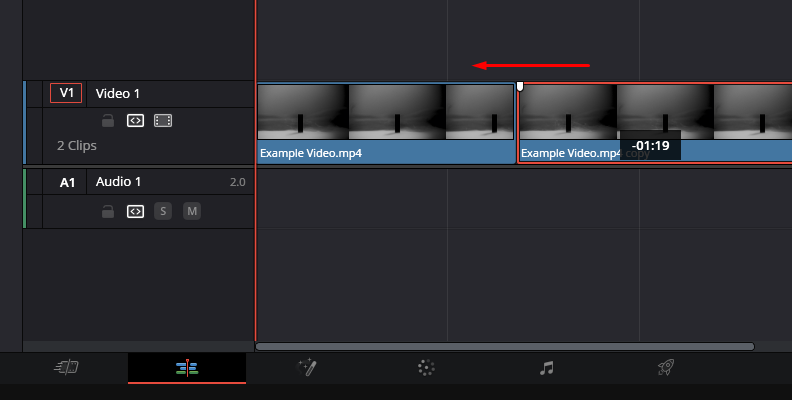
Step 2: Select All Clips to Merge
If you’re working on an existing project with many clips in the project, you will need to select the clips you want to merge.
Press CTRL + Click on Windows or Command + Click on Mac on the clips you want to merge to select only the needed ones. If the only clips in the timeline are the ones you want to merge, you can use the keyboard shortcut to select all with CTRL + A on Windows or Command + A on Mac.
Step 3: Creating a New Compound Clip
Right-click the selected clips and choose New Compound Clip from the dropdown menu.
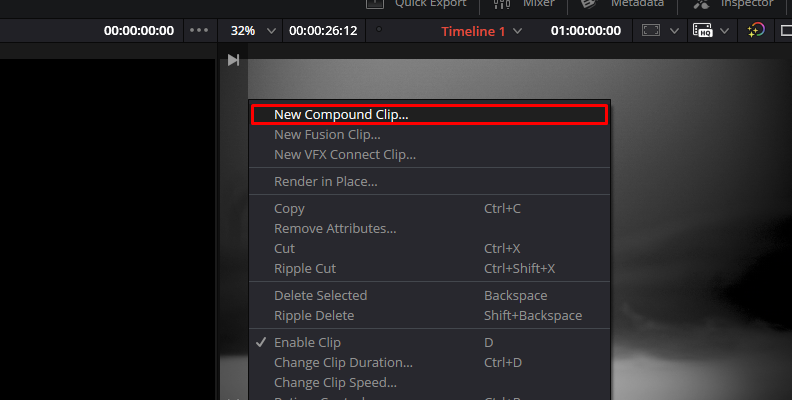
The New Compound Clip window will pop up, and you can type a name for the new compound clip. Then, click Create to close the pop-up window. Now, you'll have all the clips merged into a single clip.
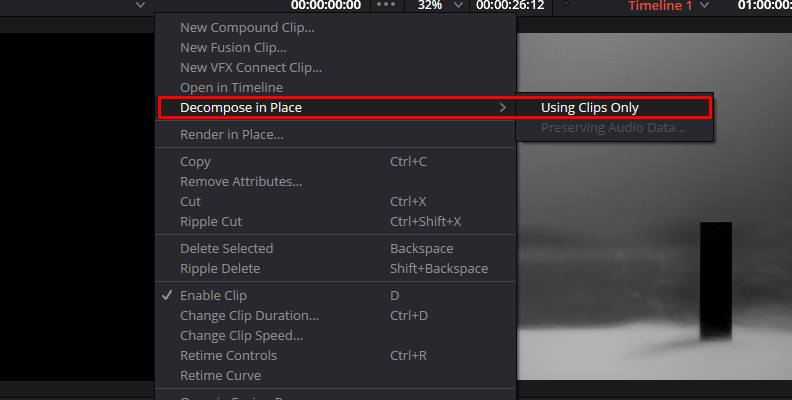
If you selected a clip you didn’t want to merge, right-click the new compound clip and choose Decompose in Place > Using Clips Only to restore the individual clips. Ensure you select both audio and video clips to undo the merging.
How to Merge Clips in DaVinci Resolve from a Timeline
Step 1: Create a Timeline
Create a timeline with all the clips you want to merge. Select the clips from the Media Pool and drag them to the timeline to create a clean timeline with only the clips you want to merge.
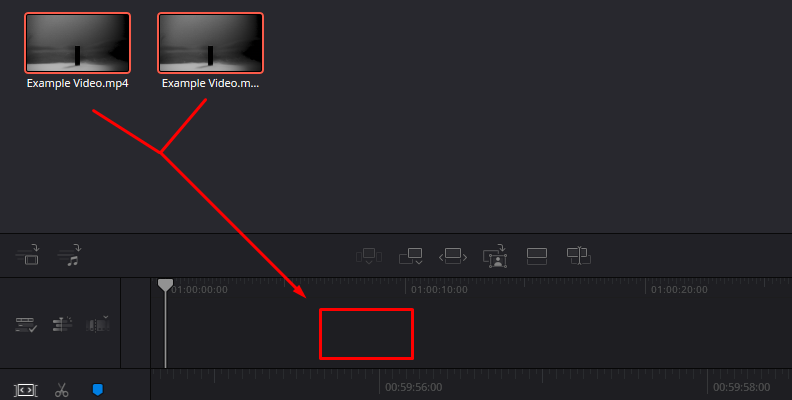
Step 2: Merging Clips from the Timeline
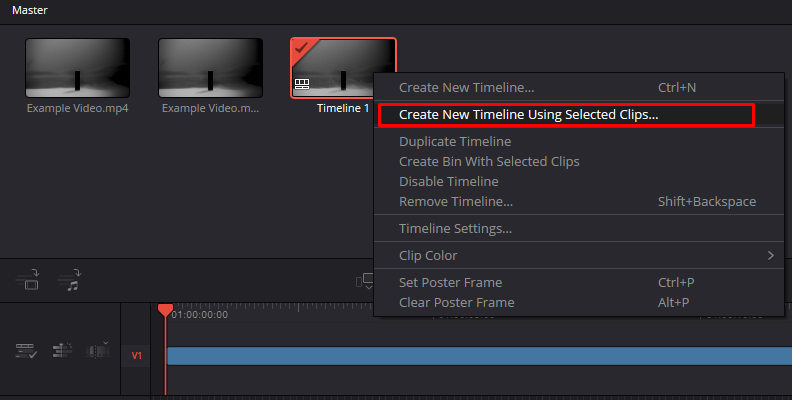
Right-click the new timeline from the Media Pool and click Create New Timeline Using Selected Clips. Type a name for the create new timeline window, and click Create. Open the new timeline to find all your clips merge into one video clip.
Alternative Method: Merge Clips in DaVinci Resolve with BCC+ Math Composite
Now, you’ll learn how to merge clips in DaVinci Resolve with BCC+ Math Composite, a Boris FX Continuum plug-in to merge video clips into one frame. It uses blending modes to composite a unique new clip from a background and a foreground clip in your Fusion timeline.
Downloadcontinuum
Step 1: Set Up your DaVinci Resolve Project
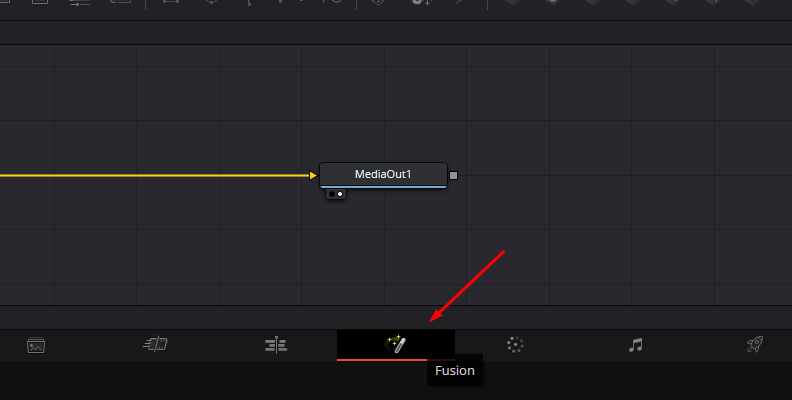
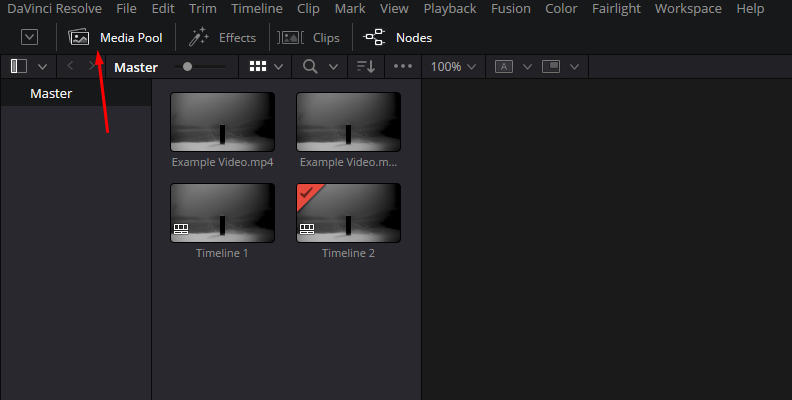
Create a new project in DaVinci Resolve and proceed to the Fusion tab. Click the Media Pool button on the top left corner to enable the Media Pool panel. Right-click anywhere in the Media Pool panel, select Import Media, or press CTRL/Command + I. Browse the video clips you want to merge into a single frame and click open.
Step 2: Create the Fusion Timeline
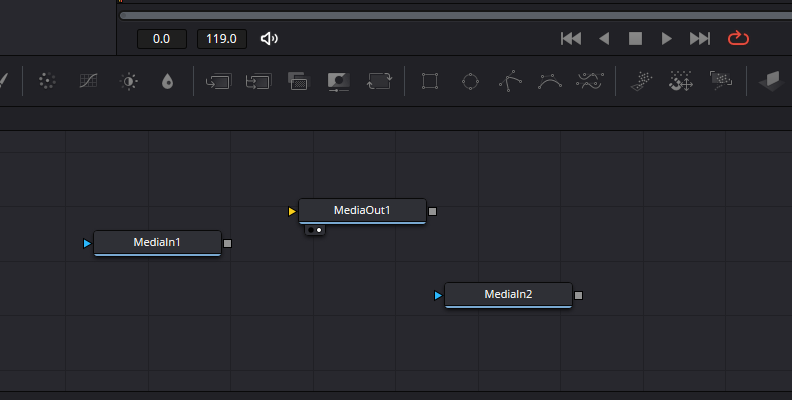
Begin by dragging the video clips to the Node area to create the Fusion timeline. If you don't see the Node area, click the Nodes icon next to the Clips button to enable the view. First, drag the foreground video to add the MediaIn1 node connected to the MediaOut1. Then, drag the second clip to the Node Graph to create a new MediaIn2, and click on the line connecting MediaIn1 with MediaOut1 to remove it.
Step 3: Apply BCC+ Math Composite
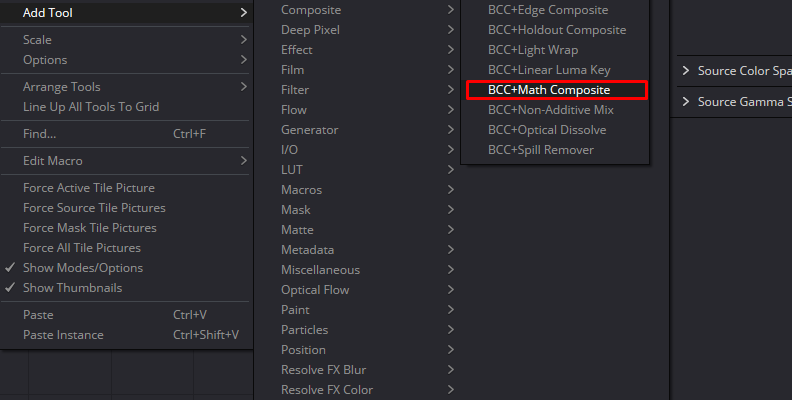
Right-click the Node area and select Add Tool > BCC Key and Blend > BCC+ Math Composite. Now, you have to connect the dots.
Connect MediaIn1, your foreground video, to the yellow arrow as the source clip.
Next, connect MediaIn2, the background video, to the upper green arrow to designate it as the background clip.
Finally, connect the gray square (Output) from the BCCMathComposite1 node to the yellow arrow of the MediaOut1.
Once you have connected them all, you’ll see the two clips merge in the preview. Move to the next step to configure the filter.
Step 4: BCC+ Math Composite Settings
Select the BCCMathComposite1 node and open the Inspector to see the effect parameters. You can change the view from the output to the foreground or background clips and a general mix for the background clip with the foreground.
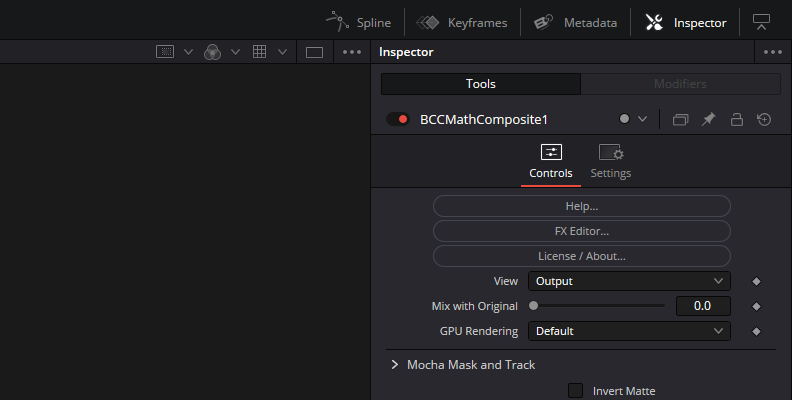
Click the Blend menu to select the blend mode in which you prefer to combine the video clips. Adjust the Level until you find a look you like. The Level slider determines how much you can see the foreground clip over the background.
The Black Clip parameter helps you fight milky blacks and adjust the Black to improve the blacks in your composition.
Step 5: PixelChooser and Mocha for Mask and Track
As part of the Continuum plug-in, BCC+ Math Composite includes Mocha for masking and tracking. PixelChooser and Mocha allow you to select part of the image of the source or foreground video to be affected by the effect. With Mocha, you can additionally track masks for motion.

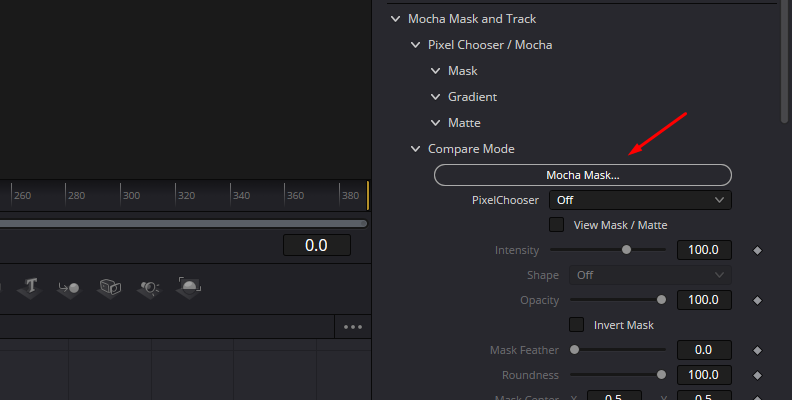
These options are in the Inspector under Mocha Mask and Track > Pixel Chooser Mocha, then click the Mocha Mask button. If you can’t see the button, close the Mask, Gradient, and Matte parameters. It will launch Mocha to work in its user interface.
Step 6: Working in Mocha
You can use Mocha to mask and track motion for the BCC+ Math Composite. You can restrict the filter to a part of the image or attach it to a moving object.
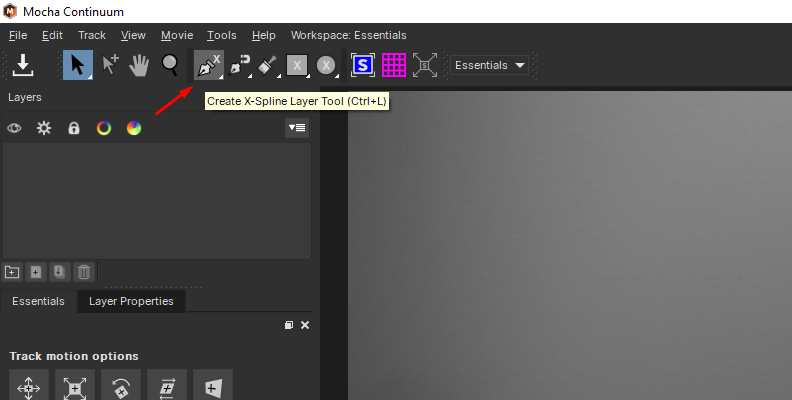
Once in the Mocha UI, you will see the foreground clip. To create a mask, select a spline tool from the tools menu. You also have shapes and brushes to paint the zones where you want to see the background video. The mask will appear on the layer panel.
Go below the layers panel to find the Track motion options to track a layer. You can track the layer mask's translation, scale, rotation, skew, and perspective. Use the track forward and backward buttons to track motion.
To exit Mocha and return to DaVinci Resolve, click the save button and close the Mocha window. If you close the window without saving, you’ll receive a prompt asking you to save or close without saving. Edit the masks using the Pixel Chooser / Mocha settings. Play with the intensity and opacity, or invert the mask to have the foreground clip visible throughout the masks.
After editing all the clips, continue editing your project in DaVinci Resolve. Your Fusion composition will appear on the Edit page as a merged clip in the timeline.
Final Words
Video editing requires you to know many tricks and tools to create appealing compositions. Merging clips is often used in video editing to combine or merge two clips into one frame, as we did with the BCC+ Math Composite effect, or to make a single clip from two or more video clips.
DaVinci Resolve is a top-quality editing software for merging clips. It has even more to offer with Fusion, built-in tools, and the possibility of using external plugins like Continuum, which provides an arsenal of effects for your clips.
Whether you want to merge clips quickly by creating a compound clip or composition in Fusion, now you're ready to merge clips in DaVinci Resolve for your next projects.
Good luck!


