


Taking a picture of a special moment, only to later find out that it came out blurry can be a real mood-breaker, especially if retaking it is not an option.
Unfortunately, this happens more often than we'd like to admit. Sometimes, due to the camera's inability to focus properly or human error, like accidentally touching the screen and setting the focus to something else right before the capture.
Either way, blurry pictures are common, even with today's modern technology, but there are ways to make them usable even when you think there's no hope.
That's exactly what we'll talk about in this guide, so if you're willing to learn more, stick with us until the end. Without further ado, let's get into it.
What Causes an Image to Blur?
There are numerous reasons why an image comes out blurry.
Some of them are not always in our control, but they are still a reason your image may be out of focus and need correcting.
- Camera Shake: If the camera moves while taking a picture, it can cause the entire image to blur. This is common in low light conditions where slower shutter speeds are required.
- Subject Movement: If the subject of the photograph moves while the picture is being taken, it can result in motion blur. Faster shutter speeds can help reduce this effect.
- Focus Issues: If the camera is not properly focused on the subject, the image can appear blurry. This can happen if the autofocus system focuses on the wrong part of the scene or if the manual focus is not set correctly.
- Depth of Field: A shallow depth of field (often used in portrait photography) can cause areas outside the focused plane to blur. This is often an artistic choice, but it can make parts of the image appear blurry.
- Lens Quality: Poor quality lenses or dirty lenses can cause images to appear soft or blurry. High-quality lenses with proper maintenance can produce sharper images.
- Low Light Conditions: In low light, cameras may struggle to focus accurately and may use slower shutter speeds, both of which can contribute to blurry images.
- High ISO Noise: Using a high ISO setting can introduce noise and reduce image clarity, leading to a perception of blurriness.
- Image Processing: Over-processing, such as excessive noise reduction or aggressive compression, can reduce the sharpness of an image, making it appear blurry.
- Diffraction: When the aperture is set too small (high f-number), diffraction can occur, causing the image to lose sharpness.
- Sensor Movement: In some advanced cameras, sensor stabilization might malfunction, leading to blurred images if not properly controlled.
Keep in mind that some blur types can't be fixed. More information on this topic is in our final section down below.
How to Make Blurry Pictures Clear With Continuum
If you're dealing with blurry photos, ultimately trying to turn a blurry picture clear, there are tools in the Continuum creator's pack that can be of great help. One specific tool we'll focus on is BCC Magic Sharp.
Before we get into the details of how to unblur an image, let's give a brief introduction to Continuum.

Continuum is a renowned collection of plug-ins and tools made by Boris FX that you can download for your video editing software of choice.
It works with Adobe Premiere Pro and After Effects, Avid, Vegas Pro, DaVinci Resolve, Final Cut, and more, meaning you don't have to leave your familiar workspace to take advantage of its helpful tools.
Within Continuum, you'll find a myriad of helpful transitions, filters, image restoration tools, motion graphics, and tons of other helpful features that will help you take your work to the next level, both as an amateur and professional editor/creator.
It's also worth mentioning that even though Continuum is not officially available for photo editing software like Adobe Photoshop, there are many tools within that can be used with images as well, not only videos.
Such is the case with BCC Magic Sharp, which is what we'll use to fix blurry photos during the following steps below.
Here's how to use Magic Sharp within Premiere Pro to fix blurry pictures. Follow along, and you'll get the task done in no time.
Step 1: Load Premiere Pro and Create a New Project

As we already mentioned, even though Premiere Pro is not one of the photo editing apps we regularly use, you can still use it in combination with Continuum to fix blurry images. So, the first step would be to launch Premiere Pro and create a new project.
To do this, once you launch the software, click the "New Project" button on the home/start screen.

Choose the desired settings and create the project.
Step 2: Import Media and Create a Timeline
Now you're already into the software, and the next step is to import some media to work with. In this case, this is the blurry photo we want to fix using Magic Sharp.
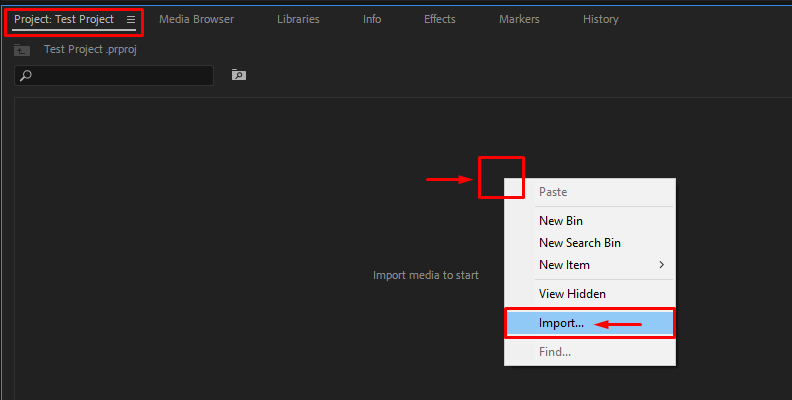
So, go over to the "Project" tab and right-click anywhere in the empty area with the "Import media to start" text then choose "Import" from the list of options, as shown below.
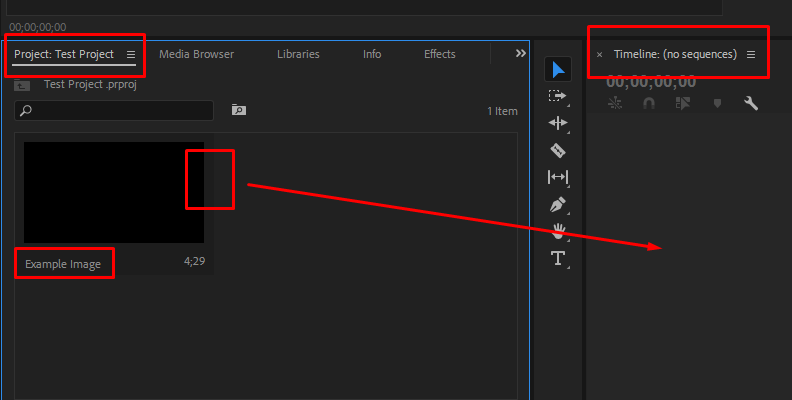
Now that your image is imported within Premiere Pro, it's time to create a sequence from it by dragging it onto the timeline area.
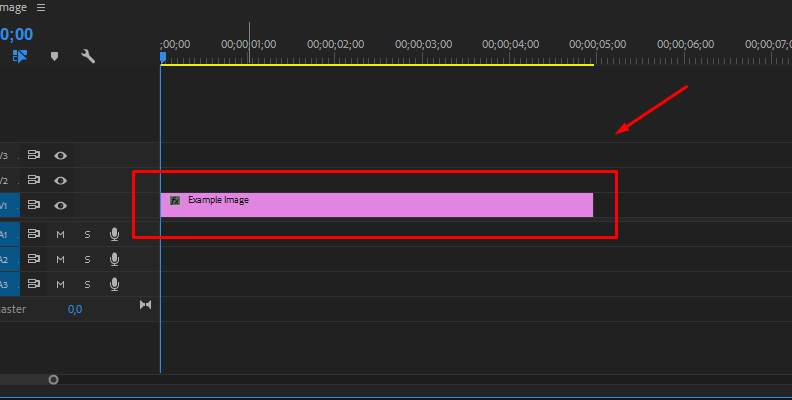
When done, it should look like this.
Step 3: Find and Apply Magic Sharp to Your Image
Now it's time to find the BCC Magic Sharp effect and add it to your image.
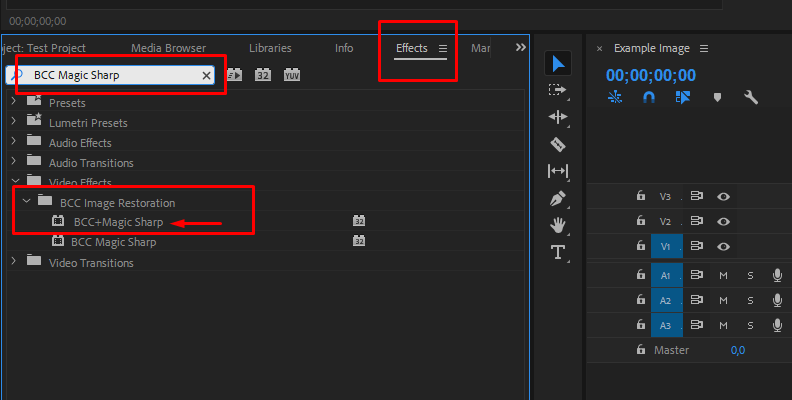
If you have Continuum properly installed, you should be able to see all effects available within the pack when you browse the effects in Premiere Pro.
Since there are so many available, it's best to use the search bar. So, simply type in BCC Magic Sharp, and you'll find the effect under the "BCC Image Restoration" folder. We'll use the "BCC+ Magic Sharp" version.
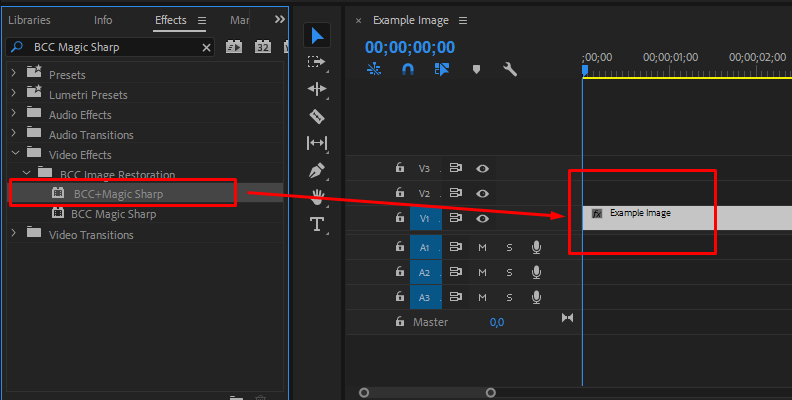
Drag and drop the effect over your blurry image on your timeline to apply it.
Step 4: Adjust Settings in Effect Controls Panel
When we're trying to make a blurry image clear using BCC Magic Sharp, after applying the effect, we need to open the Effect Controls panel to adjust the settings that best match our project's needs.
In Premiere Pro, the Effect Controls panel is located in the top-left corner of the screen.
Simply click on the image on your timeline and then open the Effect Controls panel to access all of BCC+ Magic Sharp's settings.
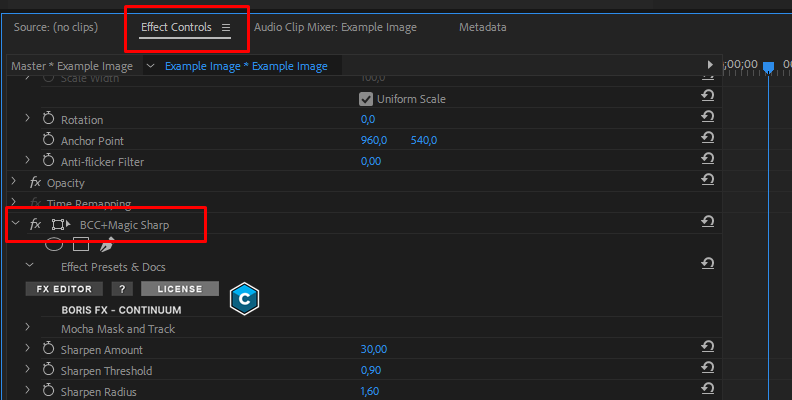
From here, you can adjust each setting individually, and for more information on what each one of the parameters does, take a look at the BCC Magic Sharp webpage once again.
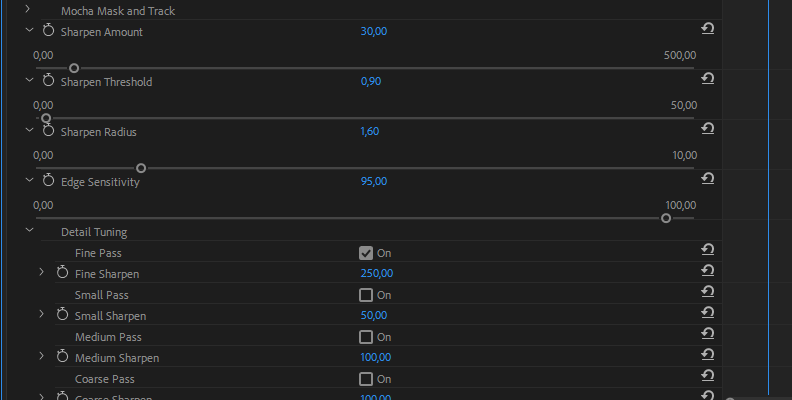
You can also combine BCC Magic Sharp with BCC Pixel Chooser, which will help you target one part of the image specifically, leaving the rest untouched. This works great for when you need to make a blurry picture clear only in one specific spot.
Step 5: Save and Export
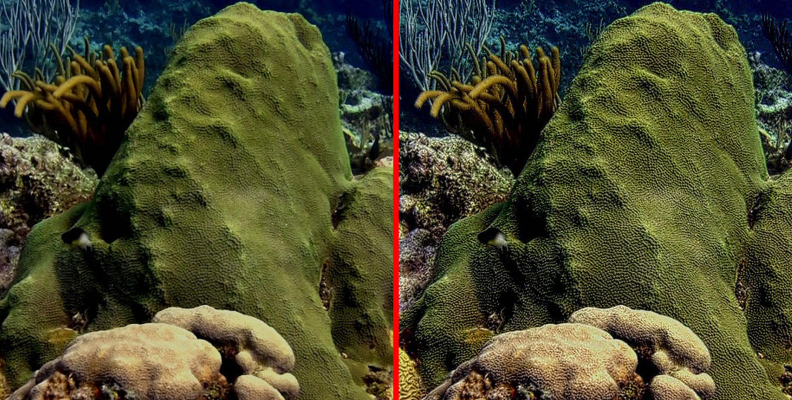
You can unblur images with Magic Sharp for as long as you want, and the process will always remain the same, besides the different settings that may be required depending on the blur image type and the nature of the photo you're working on.
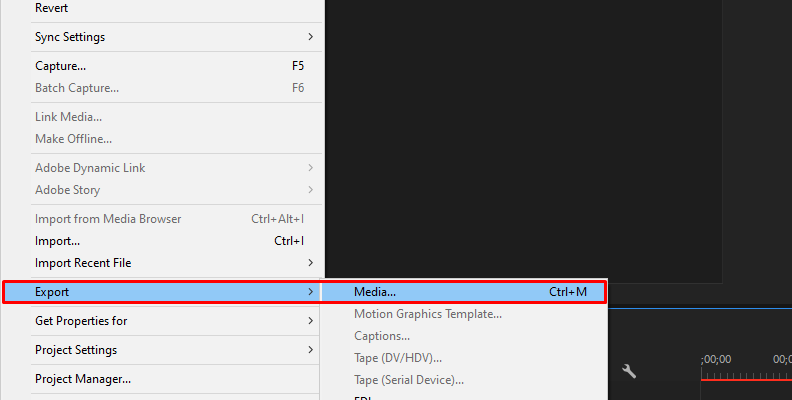
When done, you can save and export by going to "File" -> "Export" -> "Media" and choosing the storage location.
That's all there's to it!
How to Make Blurry Pictures Clear in Photoshop

There are numerous ways to sharpen photos in Photoshop, as it's one of the world's most detailed photo editing software.
We'll show you one of the possible approaches for getting a sharper image, so just follow the steps below to get the task done quickly and efficiently.
Step 1: Launch Photoshop and Create a New Project
First, we launch Photoshop on our PC so that we can create a new project. We recommend this over working on an already-started project so that we don't make any unwanted changes that are irreversible.
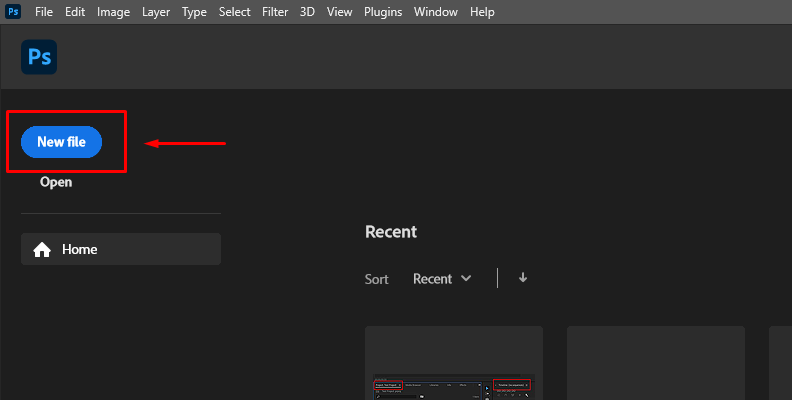
To create a new project, click "New File" within Photoshop's home screen menu.
Select your desired settings, and create the file.
Step 2: Open Your Blurry Image Within Photoshop
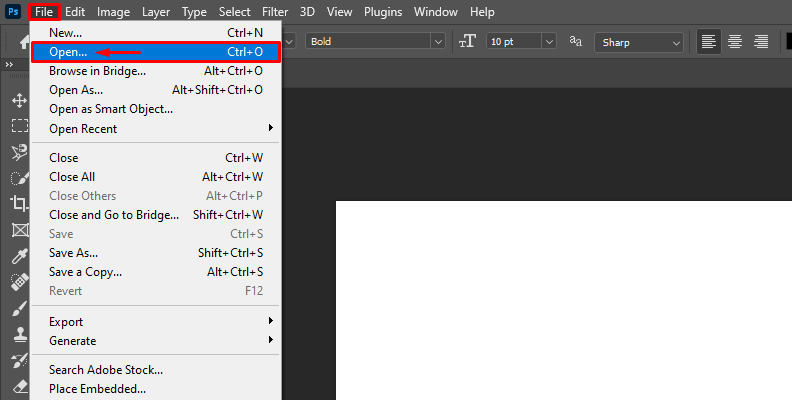
Now that we're into the new project file, we can open our blurry image by clicking on "File" -> "Open" as shown in the image below.
Once the image is fully loaded into Photoshop, we can start working on it.
Step 3: Duplicate Your Original Image Layer
The best practice when working in Photoshop is to duplicate your original image layer before making any changes. This way, you can always revert with one click to see how much of an impact your edits made, as well as be able to undo specific steps if you have separate layers for every change you do.
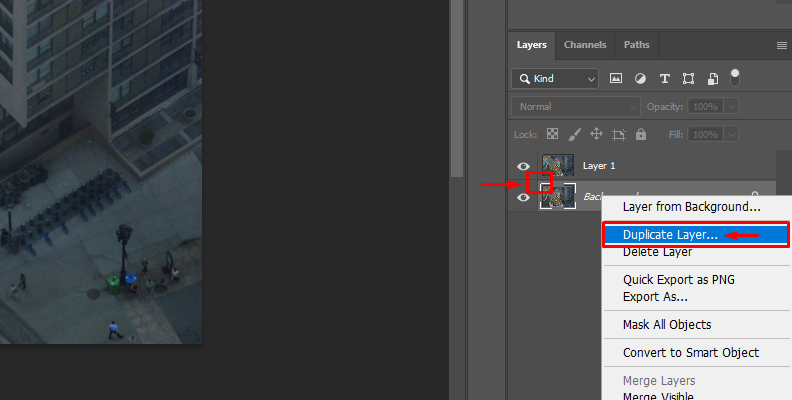
To do this, simply navigate to the layers panel then right-click your background image and select "Duplicate Layer" or just the CTRL+J keyboard shortcut.
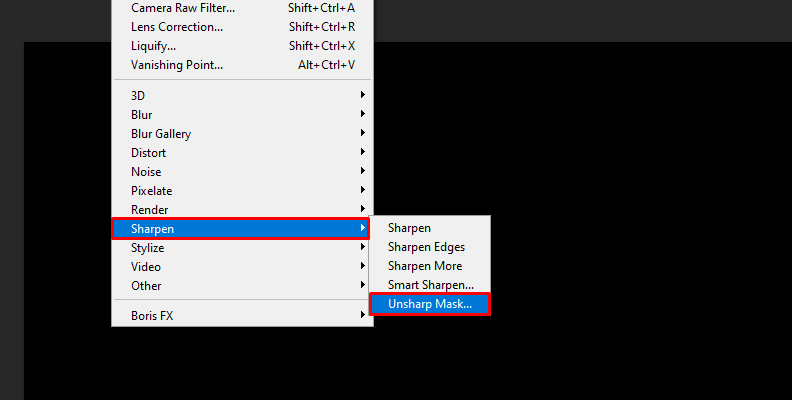
Step 4: Apply the Unsharp Mask/Effect
Select the duplicated layer you just created, then head over to "Filter" -> "Sharpen" -> "Unsharp Mask" as shown in the image below.
Adjust the values in the settings panel that pops up right after you apply the effect based on your photo's needs.

Please note that you will likely need to readjust this multiple times until you get the best results.
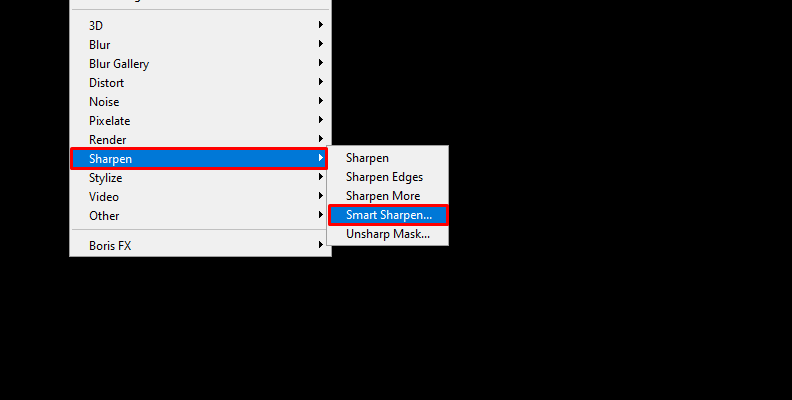
Step 5: Apply the Smart Sharpen Filter
The next step is to apply the smart sharpen filter by going to "Filter" -> "Sharpen" -> "Smart Sharpen".
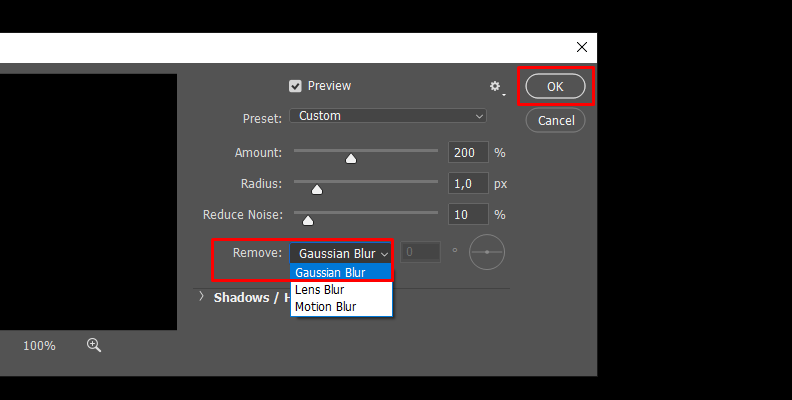
Once again, adjust the Amount and Radius based on your photo's needs.
Then, choose "Gaussian Blur" in the "Remove:" section, as shown in the image below.
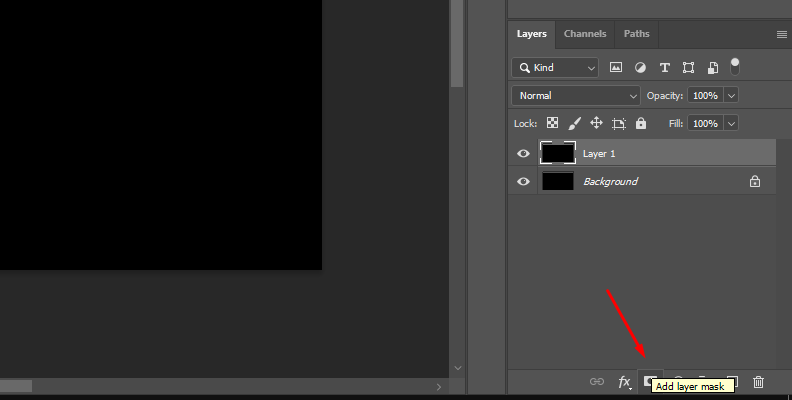
Step 7: Masks and Layers
Last but not least, you can use layers and masks to target specific parts of your image.
Select the layer to which you added the High Pass filter, which should be your latest layer, and click the "Add Layer Mask" button within the Layers panel to create a new mask.
Now, use a soft brush tool to paint over the areas where you don't require much sharpening, or where the sharpen creates noise and an unnatural look.
That's all there's to it! Fine-tune until you get the best results, then save and export the image.
Blur Types That Can't Be Fixed
Although we have impressive technology nowadays, and it keeps improving as we speak, it's important to note there are some cases of photography blur that cannot be fixed.
These include:
- Severe Camera Shake: If the camera moves significantly during the exposure, it can cause a complex, multi-directional blur that is difficult to correct. While a slightly shaky camera can sometimes be mitigated using software, a significant shake often results in an irrecoverable loss of detail.
- Severe Motion Blur: When the subject moves rapidly during the exposure, it can blur photos extensively. This is particularly challenging to correct if the motion is unpredictable or non-linear. Some minor motion blur can be reduced using de-blurring software, but heavy blur typically cannot be fully corrected.
- Out-of-Focus Blur: If the image is not focused correctly and the blur is substantial, it is generally impossible to recover the lost detail. Minor focus issues might be improved with sharpening techniques, but significant out-of-focus blur results in a permanent loss of detail.
- Lens Aberrations: Optical flaws such as chromatic aberration, spherical aberration, and other lens defects can cause parts of the image to appear blurry. While some software can reduce these effects, they cannot completely restore the lost detail, especially if the aberrations are severe.
- Depth of Field Blur: When using a shallow depth of field, areas outside the focus plane are intentionally blurred. This is an artistic effect and cannot be reversed. The parts of the image that are out of focus remain blurred because there is no detail to recover.
- Diffraction Blur: Caused by using very small apertures, diffraction results in a general softness across the image. While minor diffraction effects can sometimes be mitigated, severe diffraction cannot be fully corrected.
- Severe Compression Artifacts: If an image has been heavily compressed, especially with lossy formats like JPEG, the resulting artifacts can create a blur-like effect. These artifacts permanently remove details that cannot be restored.
Final Words
That covers everything you need to know about making blurry photos clear in both Adobe Premiere Pro and Adobe Photoshop, as well as some of the main reasons photos come out blurry and the types of blur that cannot be fixed.
Hopefully, this will help you with all your work in the future.
Good luck, and thank you for reading!


