Today, you're going to learn how to create a dynamic and eye-catching Cinemagraph in Photoshop. Cinemagraphs are the perfect combination of the quick consumption of images and the entertainment value of a video in a smaller file size than a full video.
A cinemagraph is a still image with subtle, repetitive movements, such as those of clothes, hair, smoke, water, lights, or wind, in the background or foreground. They're a great way to draw people's attention for longer than a classic image.
What do you need to create a cinemagraph and follow this tutorial? You’ll need an original video file or a still image (you’ll learn how to create stunning cinemagraphs from both sources), the latest version of Photoshop, and Boris FX Optics (only for the last section of this tutorial).
Let’s create cinemagraphs from scratch!
How to Make a Cinemagraph in Photoshop

Creating a cinemagraph from a video can take more planning than you think. But I’ll show you how to prepare and achieve the flow movement in a photo.
Step 1: Plan the Video
If you want to create a cinemagraph from video footage that you recorded or obtained from a stock video library, first ensure the video is stable, with minimal to no camera movement. If you are about to record, use a tripod or place the camera on a flat surface to ensure a steady video recording and avoid any occlusions.
Remember that the final cinemagraph is a still image with slight movement, so the only movement, or the main movement, should be the one you want to be the star of the cinemagraph.
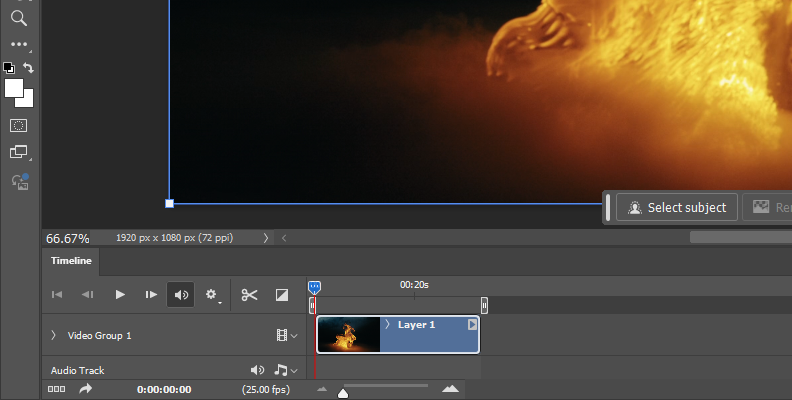
Step 2: Import Video into Photoshop
Import the video file into Photoshop by selecting File > Open and then selecting the video file on your computer.
The video should appear as a layer in the layers panel and in the video timeline below.
If you can't see the timeline window, go to Window and click Timeline to enable the timeline view.
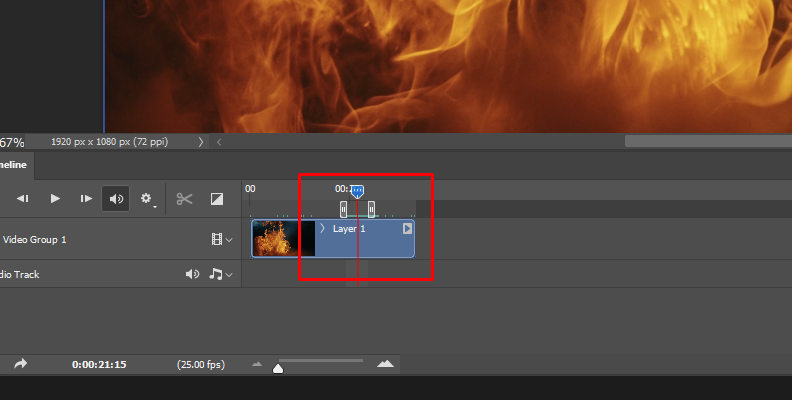
Step 3: Trim the Video
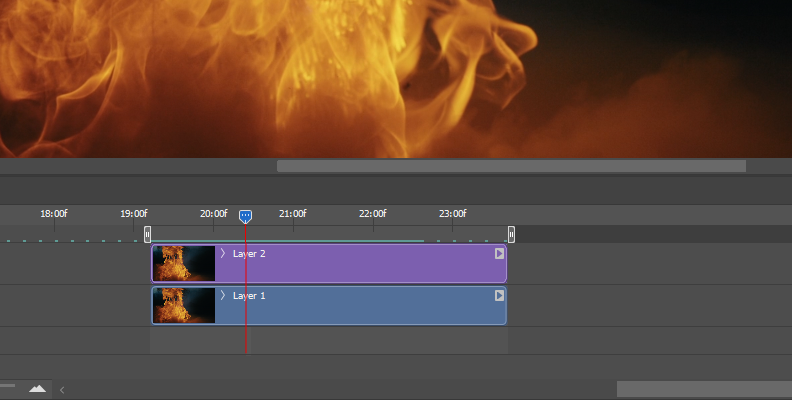
Because the cinemagraph is a short, seamless loop video, you need to trim the video footage to create a seamless loop. Unless you already have a short video of about 3 to 10 seconds. The cinemagraph will be in a continuous loop, so it’s more important to focus on the quality of the loop than the length of the video.
Click and drag the edge brackets to trim the video clip, leaving only the part with the movement that will make up the majority of the loop. Use the playhead as a guide to the parts you want to trim.
Play the video clip to ensure you have a seamless looping video.
Step 4: Choose the Still Frame
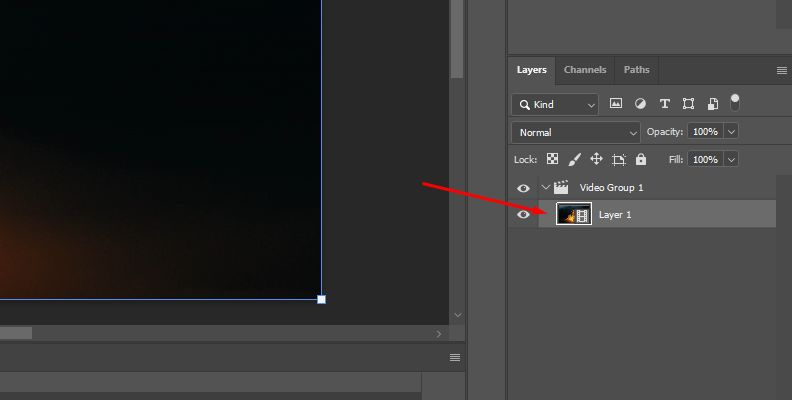
With the video trimmed, it's time to select the frame that will become the still image, which freezes the video. Play the video and find a frame that you like to be the main frame for the cinemagraph. Then, copy it into a separate layer by pressing Ctrl + Alt + Shift + E on Windows or Cmd + Opt + Shift + E on Mac.
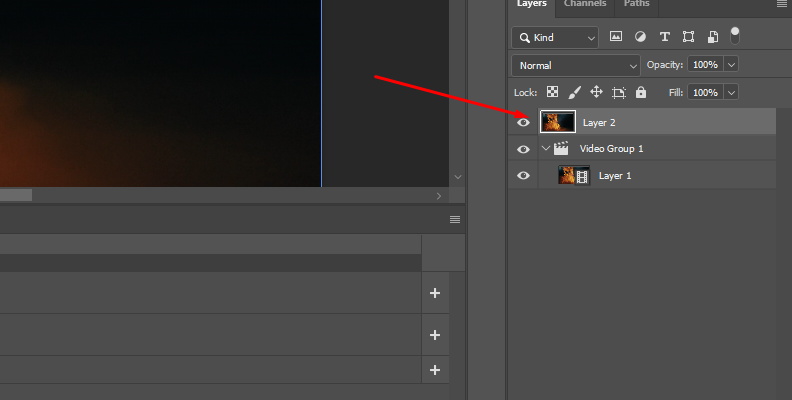
Drag the new layer copy above the video clip in the timeline panel. Adjust the length of the layer to the length of the video clip in the layer below using the brackets. Similar to how you trim the first video layer.
Step 5: Create a Layer Mask
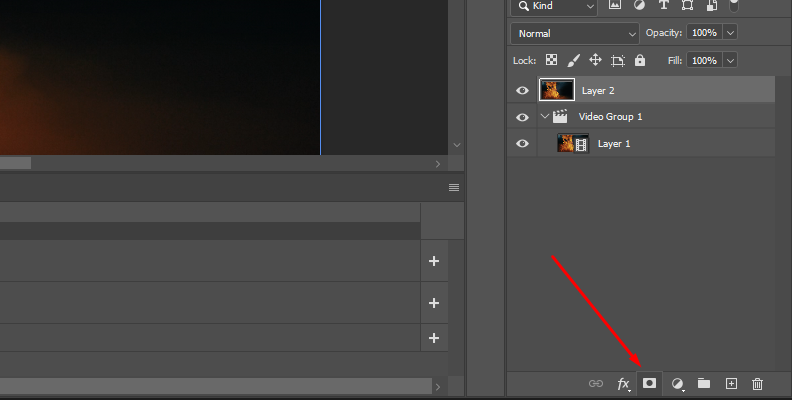
If you play the video, you will only see the still frame. You need to create a mask for that layer to reveal the layer behind where the movement is.
Click on Add Layer Mask at the bottom of the layers panel (the icon with a rectangle with a circle inside).
Step 6: Isolate Movement
Select the layer mask and click the Brush tool.
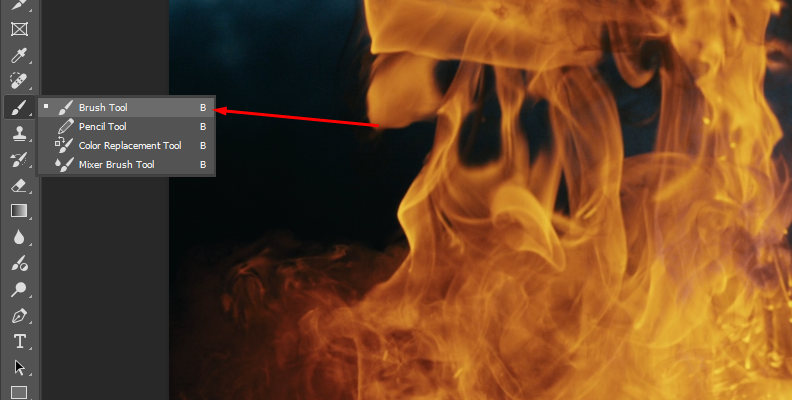
We'll use the Brush tool to create the cutout, revealing the video layer below.
Ensure the foreground color is black, adjust the size and hardness of the brush, and begin painting over the area of the image with the desired movement to isolate.
This can be the easiest or most time-consuming part of the process, depending on the image and the movement that you want to highlight in the cinemagraph. Take your time painting the mask to achieve a smooth transition. If you want to hide certain parts, change the brush color to white and paint over those areas of the mask.
Step 7: Export Cinemagraph as a GIF File
Play the sequence to verify that everything looks as desired. When you're ready to export the cinemagraph, go to the File menu and select Export > Save for Web (Legacy).
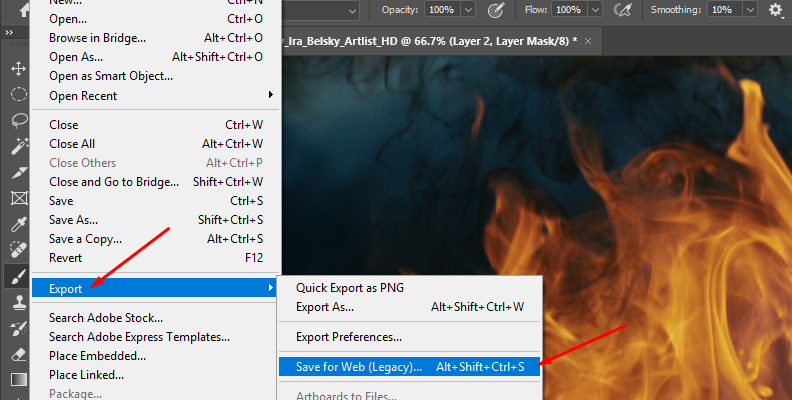
In the dialog box, select GIF as the export file format and set "Forever" in the Looping options.
Make a Cinemagraph in Photoshop with Optics
You just learned how to create your own cinemagraph in Photoshop from a video clip. Now, let's make a cinemagraph from a still image and animate it to add the subtle movement. For this process, you will need the Boris FX plug-in Optics. Optics features hundreds of cinematic effects to create beautiful cinemagraphs and edit and enhance photos.
Among the many filters and tools provided by Optics, Particle Illusion will allow you to craft your cinemagraph from scratch by animating your image with particles such as smoke, water, fire, rain, and more.
If you’re new to Optics, you can download the free trial to follow the tutorial and try all of its features for 14 days.
Step 1: Choose Your Image
Starting a cinemagraph from an image requires some planning, too. Before beginning the shoot, think about which part of the image could be animated with particles. If there is natural light or flame from a candle, you could add fire movement. If there's a river, you can add a flowing movement to it. Or, if there's a hot drink, a cigarette, or a candle, you can add a light trace of smoke going up from the cup.
We'll be using this image for this example:

The same analysis works if you use an image from a stock image library. Search for an image that you like and has the potential to be animated with a looping particle animation.
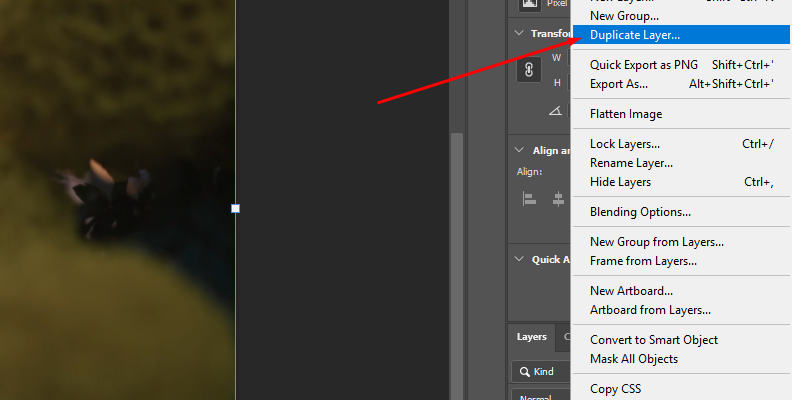
Step 2: Import Photo to Photoshop
From the Photoshop window, create a new document and import the photo to transform into a cinemagraph.
Duplicate the original image layer and then convert the duplicate layer into a smart object (right-click and select the “Convert to Smart Object” option).
Step 3: Apply Optics to the Smart Layer
With the smart object layer selected, go to File > Boris FX > Optics and wait for the Optics user interface to launch.

If it asks you about applying previous masks and filters, click No. This will be helpful in the case that you finish your cinemagraph and need to return to Optics to make additional changes.
Step 4: Add the Particle Illusion Filter
Select the Current Layer in the Layer panel and navigate to the filter library in the panel below the viewer. Click the Particle Illusion tab to access the particles category with several different effects.
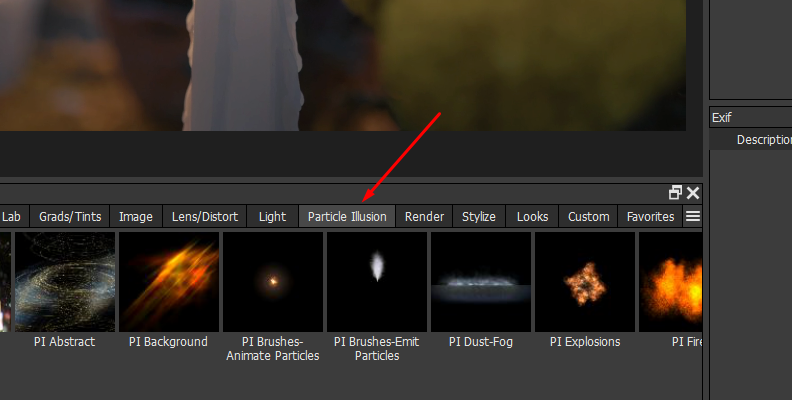
These effects are grouped into libraries you can navigate and then select a type of particle from the presets library.
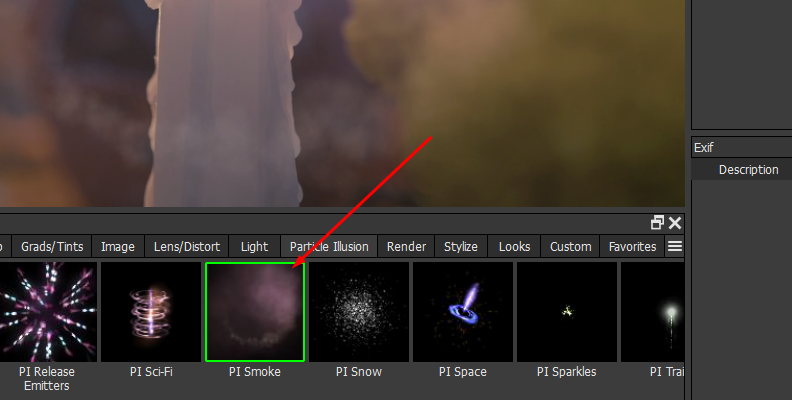
You can also select "PI Complete", which displays all the Particle Illusion library presets in the preset panel. From there, you can search for a specific type of particle using the search box.
Step 5: Change Position and Time of the Particles
You can move the particle in the viewer to place it exactly where you want to add movement by dragging the emitter in the viewer.

Also, you can move the particles in time using the Time parameter in the parameters panel. Increase or decrease the Time value to see the particles animation in motion.
Step 6: Particle Settings
Below the parameters panel, click the Particle Properties parameter group.
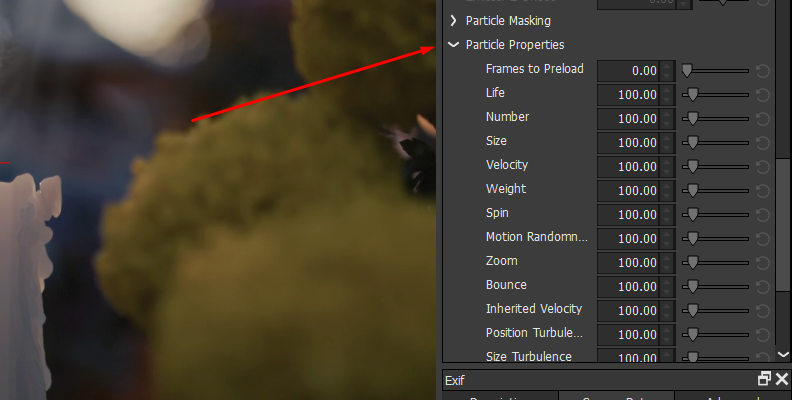
These setting allows you to change the look and behavior of the particles without launching the Particle Illusions user interface.
Adjust the lifetime of the particles, the size, number, velocity, weight, rotation, and zoom to change the way the particles look and to adjust them to the area with movement for the cinemagraph. Add randomness to the particle motion with "Motion Randomness" and the "Random Seed". You can also simulate fast-moving particles by adding Motion Blur.
Step 7: Particle Composite
If you change the Composite Style to Alpha + Apply Mode, you can change the Apply Mode to use a different blend mode. You can also change the colors of the particles by choosing a different Tint Color and adjusting the Tint Strength.
Step 8: Masking the Particles Effect
If the particles take up more than the area you want to animate in the image, you can add a mask to limit the particle effect. Click the "Add Mask" button in the Layers panel and select one of the Mask tools from the menu.
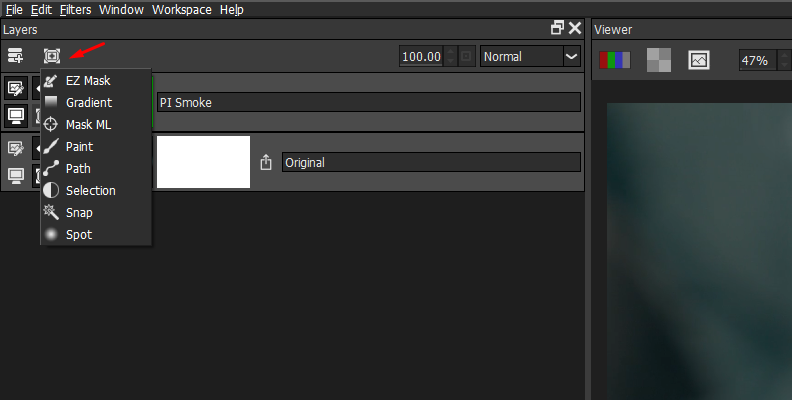
Depending on the image, you may prefer to use a path mask, a brush to manually paint the mask as in Photoshop, or one of the AI-powered masking tools available in Optics. Once you have the mask, click the filter thumbnail to keep adjusting the settings to make the animation look more realistic.
Step 9: Applying Multiple Particles Illusion Effects
You can add multiple particle effects to the image by adding a new layer and applying another instance of the Particle Illusion filter to the new layer. For example, you can combine water and smoke particles, fire with smoke, or rain with lights. Then, adjust the parameters for the new layer in the parameters panel.
Step 10: Render the Final Cinemagraph
Once you have finished editing the particles, you must render and export the image as a video file. We'll do this from the Particle Illusions UI. Click the PI Launch button to open the Particle illusions window.

You can further customize the particles or even create them from scratch from this window, following our other Particle Illusion tutorials that you can find on the Boris FX website.
Click the Render button, located on the right side of the playback bar, and select the output folder. Once the rendering concludes, close Particle Illusions and Optics.

Final Words
Cinemagraph are engaging because the looping video can tell more than an image in less time than a full video. As you've learned from this guide, they're not that difficult to make! They may look complicated and time-consuming at first, but the secret is learning how to use your tools and preparing before shooting the video or photos.
Whether you start with a picture or a video, Photoshop and Optics can help you achieve the best-looking cinemagraph and use it for your personal and professional social media platforms or website.
Subscribe to Optics or purchase a perpetual license to use as a standalone application or as a plug-in within Adobe Photoshop and Lightroom.
Good luck!