


Text is an essential element when editing films, music videos, and documentaries. They can be used for titles, lower thirds, captions, and can enhance the intro and ending sequences and lyric music videos.
In today's tutorial, you'll learn how to create 3D texts in DaVinci Resolve. We'll try two different methods: one using built-in tools in Fusion, and the other with tools from the Boris FX Continuum plug-in.
Let’s dive in!
How to Make 3D Text in DaVinci Resolve

Step 1: Set Up Video Clip for Fusion
Create or open a project in DaVinci Resolve. Import the video clip and drag it to the timeline to create the sequence.
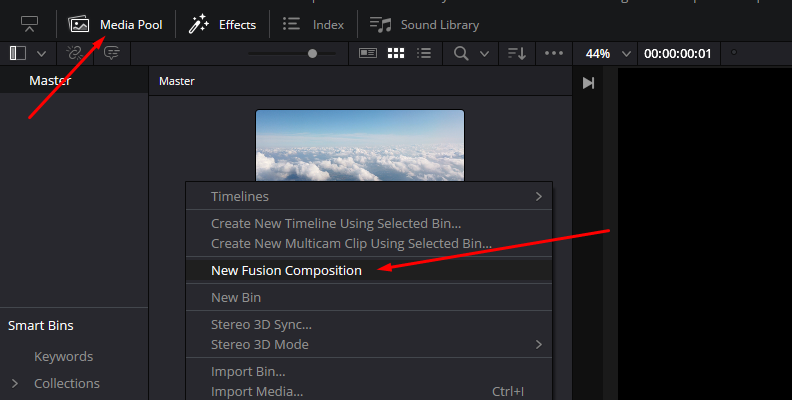
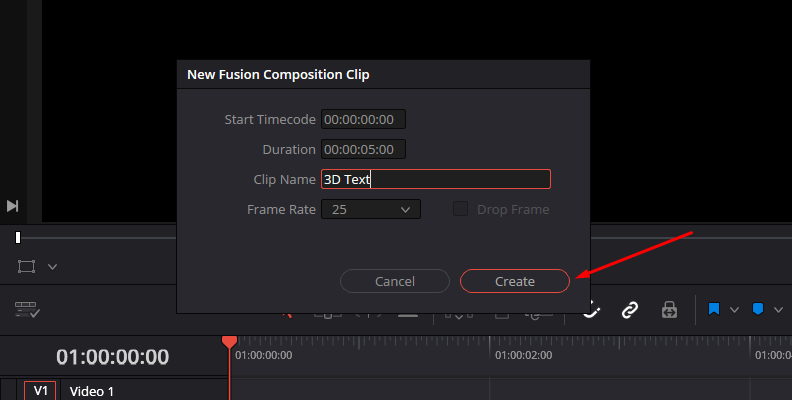
If you’re on the Cut page, switch to the Edit page from the bottom tab. In the edit page, display the Media Pool panel, right-click on it, and select “New Fusion Composition” and name it 3D Text.
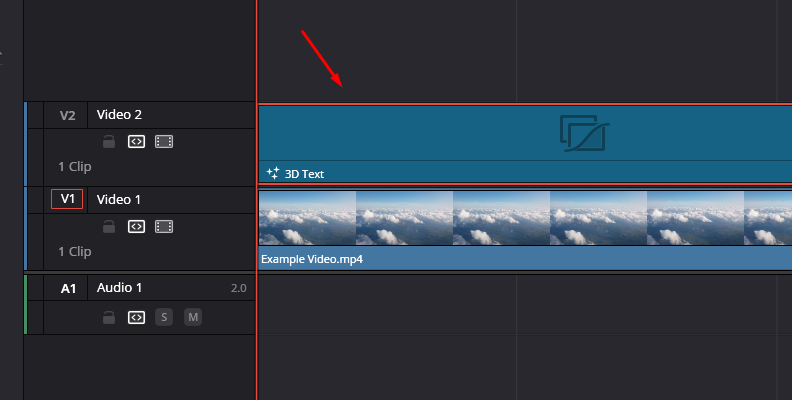
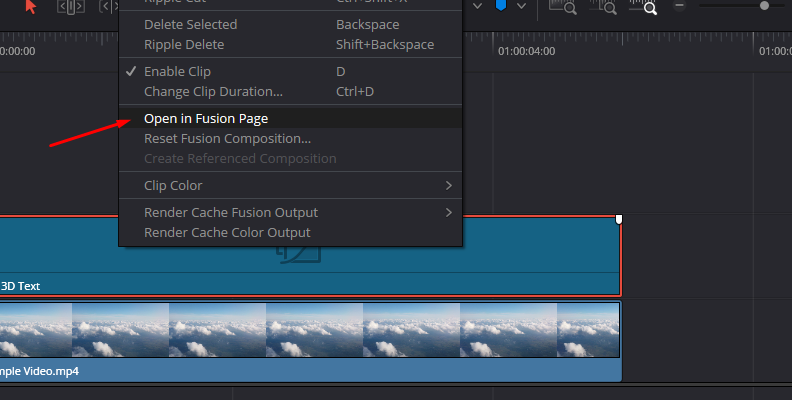
Drag the new fusion composition from the Media Pool to the timeline, above the clip where you want to add the text. Right-click the new Fusion Composition in the timeline and select “Open in Fusion Page.”
Step 2: Organize Grid Node
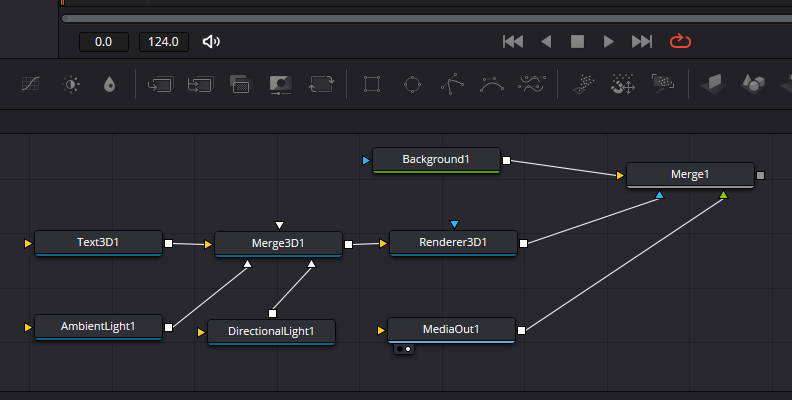
Once in the Fusion page, press Shift+Spacebar to display the Select tool, which you’ll use to search for all the tools and effects you’ll be using.
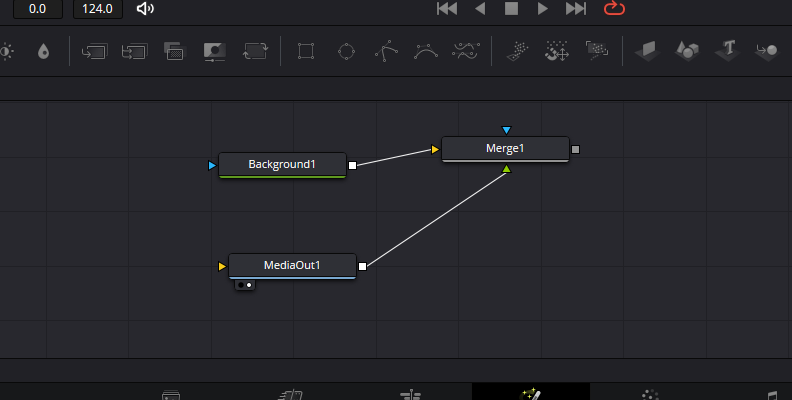
Start by adding a Background and Merge nodes. Connect the two nodes, and then connect the Merge node to the MediaOut1 node.
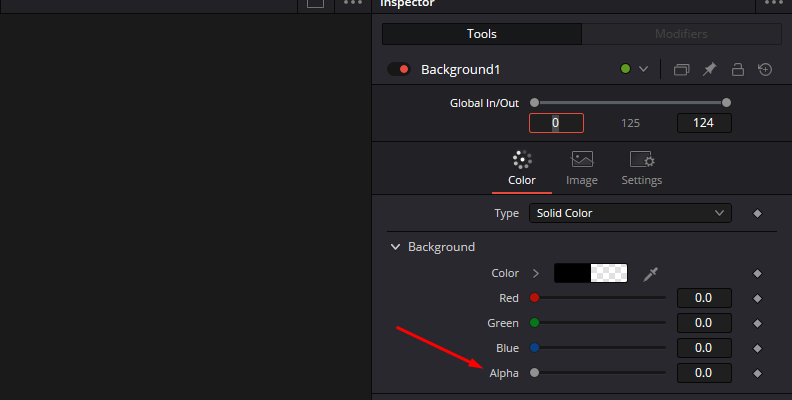
Click the Background node and open the Inspector panel. Change the Alpha setting to 0 to make it transparent.
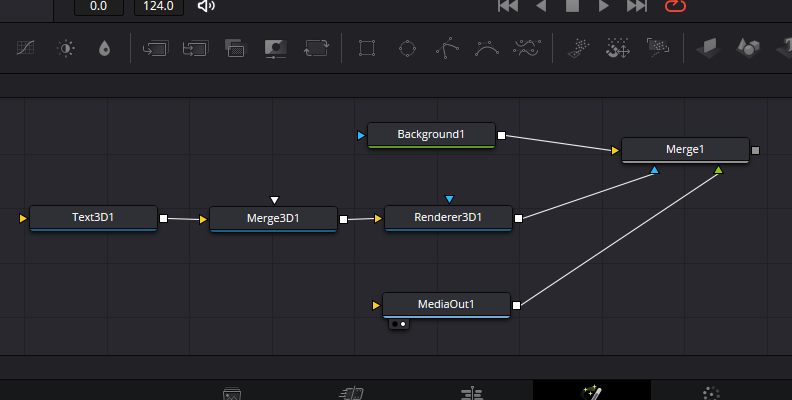
Add a Text 3D, Merge3D, and Renderer3D nodes. You can use the Shift+Spacebar to search for them or drag them from the menu bar below the viewer to the grid node. Once you have the three nodes, connect them in the following order: Text3D - Merge3D - Renderer3D. Then, connect the Renderer3D to the Merge node connected to the MediaOut.
Step 3: Lights
Next, let’s add some lighting. Add an Ambient Light and a Directional Light node and connect them to the Merge3D node.
Adjust the Ambient Light and Directional Light Intensity, and play with the Directional Light Shadows. You can also adjust the Transform settings for each light. If needed, you can return to these nodes to change the lighting at later steps.
Step 4: Edit Text
Click the Text3D Node editor and click the left circle below the node, or press 1 to display the Text3D node on the left viewer. Then, select the MediaOut node and click the right circle or press 2, to see the node in the right viewer.
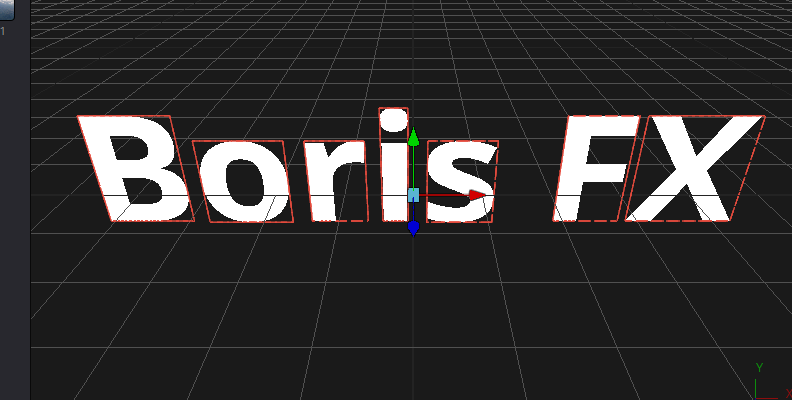
Click the Text3D node and open the Inspector panel, and type your text in the text box. Below the text box, you have all the formatting options you can configure, as with any other text. Choose your font, size, and color.
Step 5: Extrusion
Below the formatting settings in the Text3D parameters, click the Extrusion group to display more settings. You can choose between Classic and Custom. The Classic mode gives you control over Extrusion Depth to add volume to your text, Bavel Depth and Width to shape the extrusion bevel, and Smoothing Angle to smooth the sharp edges.
Next, you can move to the Transform tab to adjust rotation, shear, and size. You can choose to modify characters, words, or lines. There’s a second Transform with general transform controls for the text. Use them to adjust how your text is displayed on screen.
Step 6: Shading
In the Shading tab, you can add shades or texture to your text. Uncheck the “Use One Material” checkbox to use different colors for the bevel. You can also use an Image to add texture to the bevel. Adjust the Material settings to change color, intensity, and select the Image for textures.
Once you achieve a desired 3D text, go back to the Edit tab and arrange the 3D text clip. You can make changes to the 3D text by opening the clip in Fusion.
How to Make 3D Text with BCC Extruded Text

BCC Extruded Text is a Boris FX Continuum plug-in for creating 3D text. In this part of the tutorial, you'll work in the Edit tab in DaVinci Resolve.
Step 1: Apply BCC Extruded Text to a Clip
You can apply the effect directly to your clip or to an Adjustment clip. Consider that if you apply it to the clip, it will last for the entire duration of the source clip. So, you'll either need to split the clip or use an adjustment clip instead.
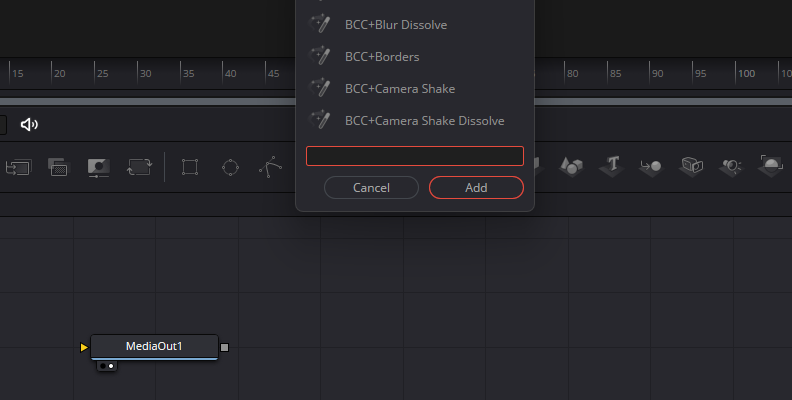
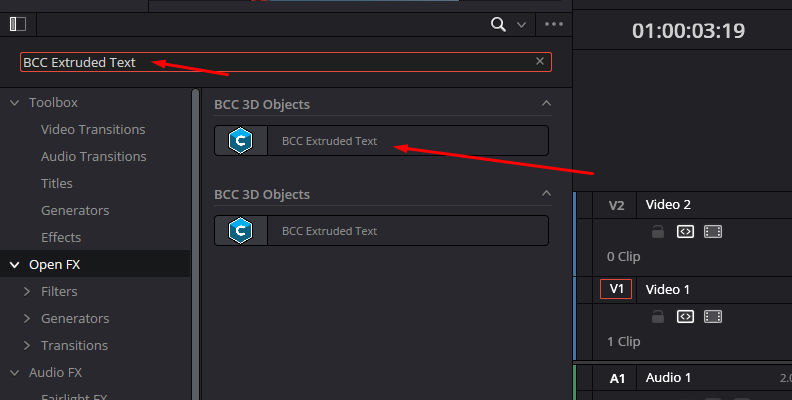
Search for BCC Extruded Text in the Effect Library under the Open FX section and click and drag the effect to the clip.
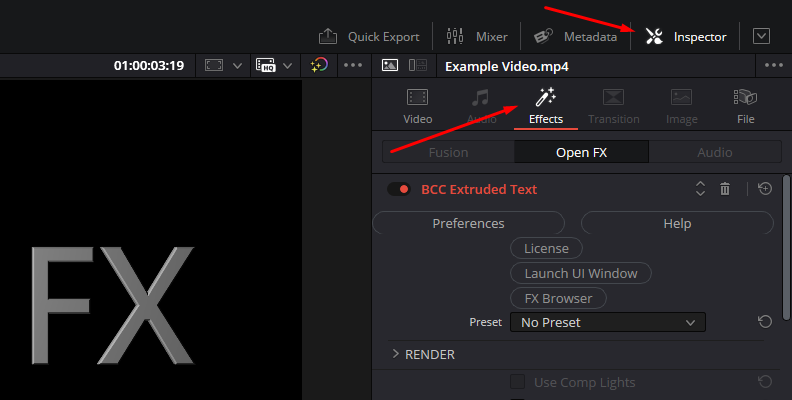
Display the Inspector panel and click the Effects tab to see all the BCC Extruded Text filter parameters.
Step 2: Text Window
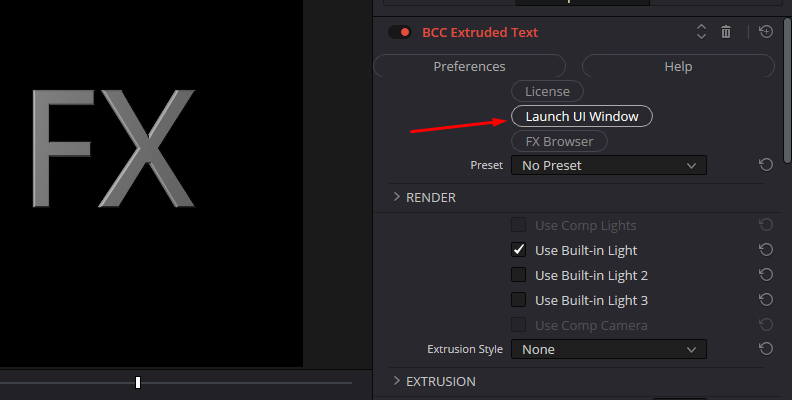
First thing to do is type in your text. In the Inspector panel, click Launch UI Window to see the Text Window if it doesn’t display automatically.
Here you can enter your text and select the font, size, style, and other formatting options such as tracking, kerning, leading, and more.
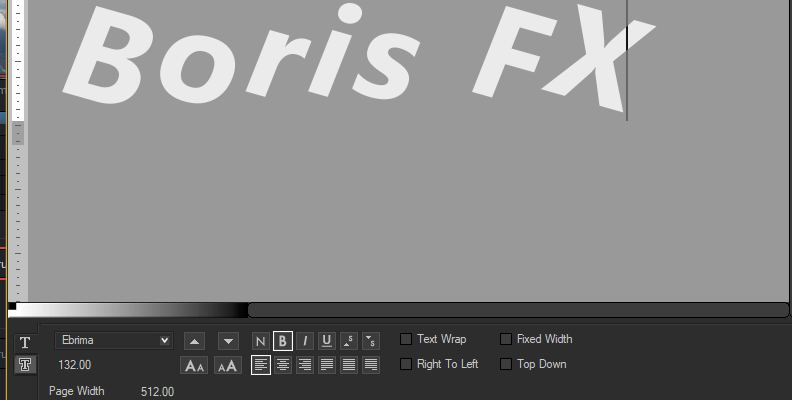
These settings can be changed independently for every selected work in the Text Window, meaning you can have each word in your text with a different style and font. Click Apply when you finish editing your text to see it on screen.
You can further control the style of the extruded text under the Letter Transformations parameter group.
Step 3: BCC Extruded Text Parameters
Display the Extrusion parameter group and adjust the Extrusion Depth, Bevel Style, and Amount to shape the 3D text. Use the Ambient slider to change the ambient light on your text.

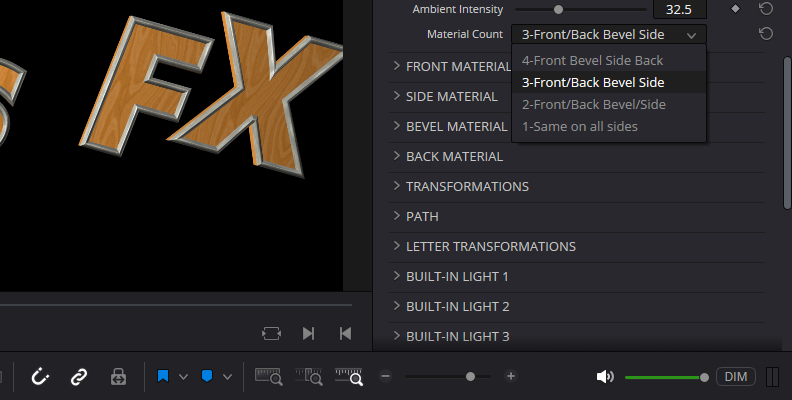
Next are materials. Choose whether you want the same material on all sides or different materials per side. Below the Material Count menu, you'll find independent settings for the front, side, bevel, and back materials, which are enabled depending on the Material Count option selected.
On the material parameters, you’re able to choose a material preset or choose from the preinstalled textures and bump maps, change the material colors, and offset the texture and bump maps to create different looks.
Use the Transformation parameters to control rotations, position, and scaling of the extruded text. You can play around with these settings and use keyframes to add animation to the 3D text.
Step 4: Lights and Camera
By default, you have one set of built-in lights enabled, but you can enable up to three lights. If you enabled more built-in lights, you can configure each light under the Built-in Light parameter groups to adjust the light sources and select light types such as Point, Spot, and Spot + Shadows.
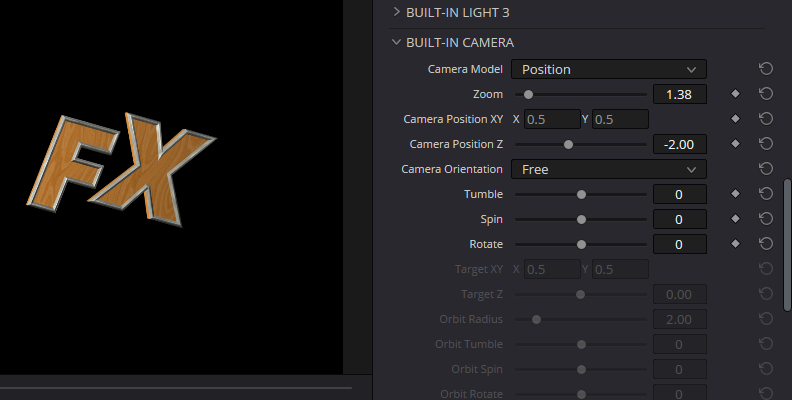
To adjust your text perspective, use the settings in the Built-in Camera parameter. Select one of the camera models to change the position, zoom, and panning of the 3D text.
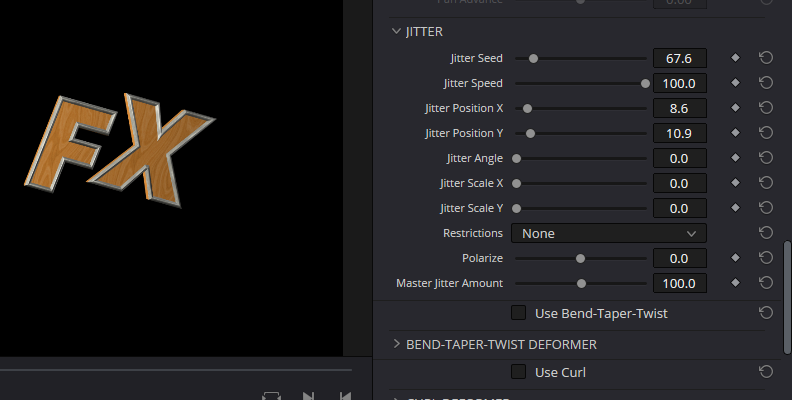
Step 5: Deform Text
At the bottom of the settings, you have options to deform your 3D text with the Jitter, Bend, Taper, Twist, Curl, Shatter, Ripple, and Pulse. Choose one by clicking the checkbox to enable its settings. You can keyframe these parameters to bring your 3D text alive with movements and deformations.
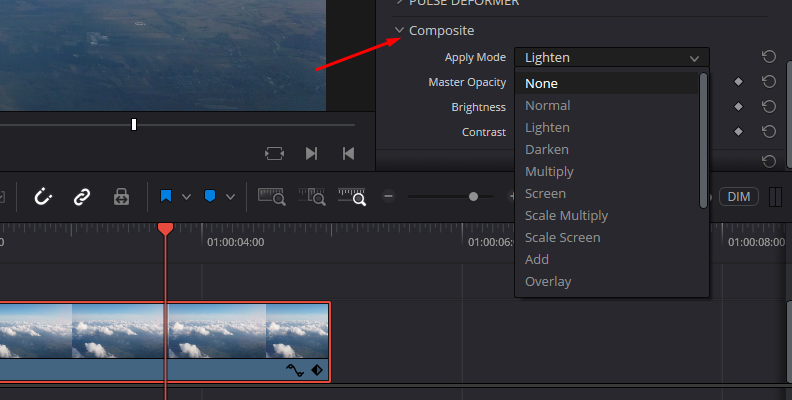
Step 6: Composition Adjustments
Once you have achieved a desired look for your 3D text, return to the Edit page. Then, go to the Inspector and scroll down the BCC Extruded Text filter settings to find the Composite parameter. Click and select one of the modes to composite the 3D text over the video clip or image.
Final Words
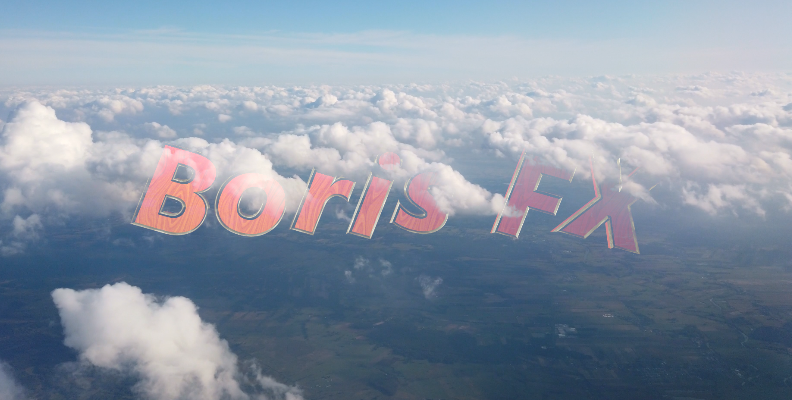
Now you know how to create 3D text! The BCC Extruded Text is a versatile and fully customizable tool, so take your time to explore all the ways it can help you make professional 3D texts for videos.
If you don’t have Continuum, you can download your free trial and learn the power it unlocks for crafting unique cinematic 3D text.a
Good luck!


