


Audio editing is of great importance for almost all types of video content. A carefully edited soundtrack, dialogue, background music, or sound effects will greatly enhance the viewer's experience, even when the visuals are the "main" focus.
Many tools nowadays allow you to edit both video frames and audio files, but in this guide, we'll focus on Adobe Premiere Pro.
Adobe Premiere Pro is incredibly user-friendly and straightforward: ideal for first-timers, students, and professionals. Despite its simplicity, editors worldwide use it to create top-notch content.
Looking to learn the best tips for editing audio in your projects, or perhaps how to split audio in Premiere Pro? We've got you covered.
Let’s dive in!
Why Audio Editing Makes a Big Impact
You can record in the best circumstances and produce the best visual shots, but that alone is not enough to fully immerse the viewer in your content. Sound is a crucial part that increases attention, excitement, suspense, and realism.
Showcasing dense forest without the sound of trees and wind won't impress much, but add those two elements and the viewer will have a whole new experience.
Every great content creator knows sound is equally as important as visuals.
Start Editing Audio in Premiere Pro
Let's go step-by-step through audio editing in Premiere, starting with the basics and then moving to more advanced sound editing features.
Step 1: Import Video and Audio Clips
Open Premiere Pro and start a new project.
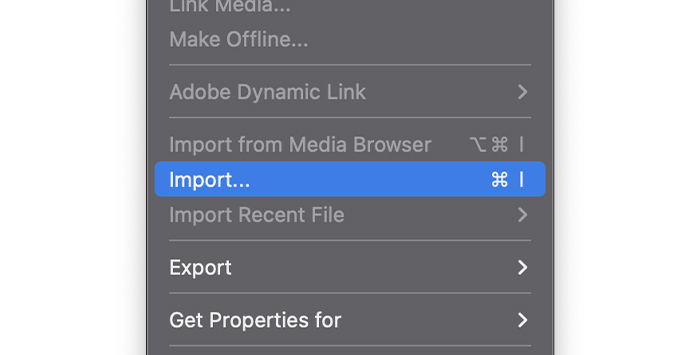
In the "Project" tab, go to "File" > "Import" to import your clips.
Find the media on your disk and finalize the import.
All imported video and audio clip files will be displayed in the "Project" tab, where you can edit them or drag them to the timeline to begin the audio editing.
Step 2: Create a Sequence

Select the video and audio files and add them to the timeline area to create a sequence.
Do this by dragging and dropping them or by selecting them and choosing "File" > "New" > "Sequence".
With your sequence ready, you can move the audio clip in its track to adjust where it should start and you can have multiple in a single track.
Step 3: Organize Your Audio Workspace
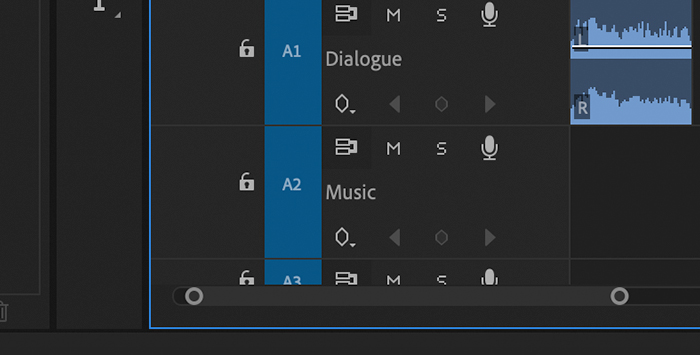
To keep your audio clips organized, you can add each type of sound and music to separate tracks and rename them by type.
For example, add all dialogue clips to a track that you can rename to "Dialogue," all sound effects to a track renamed "Sounds", and background music to a track named "Music".
This way it's easy to edit background music independently from dialogue or sounds. To change a track's name, right-click it and select "Rename".

You can also change the clip's color to stay organized within the audio tracks. Right-click on the clip, then select Label, and then a color.
Step 3: Cut, Trim, and Crop
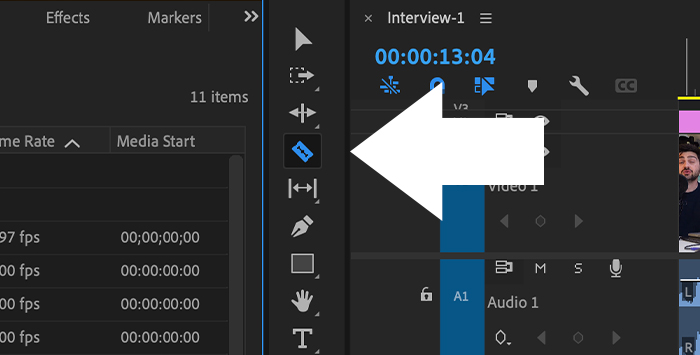
You can use the Razor Tool to split an audio clip.
Press "C" and click where you want to cut.

Another more accurate method is moving the play head to a point where you want to cut the audio track and pressing "Ctrl" + "K" or "Command" + "K".
Trimming is when you cut an audio file to shorten it.
If you need only a specific section of a sound, trim the clip to the length required by placing your cursor at its start or end, then clicking and dragging, essentially "shortening" it.
This will affect both tracks if your video and audio are linked. To unlink them, right-click on the clips and select "unlink".
Now, you can edit the audio without affecting the video track.
You may also like: Step by Step Guide on How to Crop a Video in Premiere ProStep 4: Adjust Gain and Audio Levels
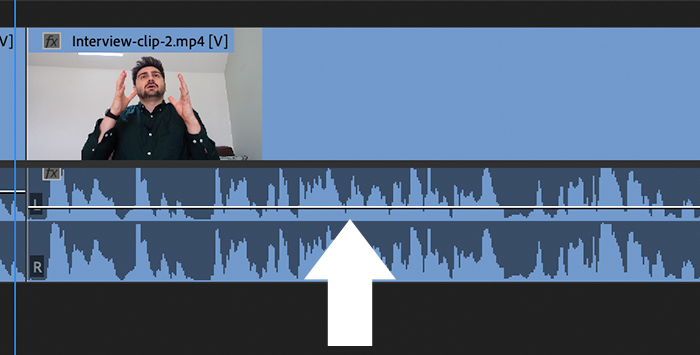
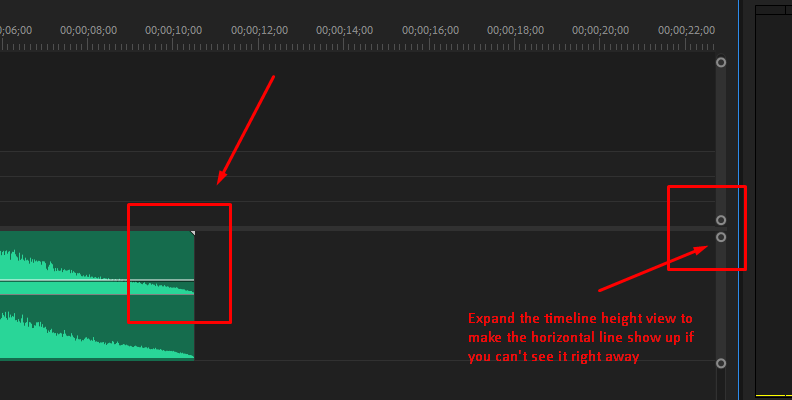
If part of an audio clip is too low or loud, you can fix the volume using the vertical line in the middle.
Select the audio clip, then drag the horizontal line up and down to increase or decrease volume.
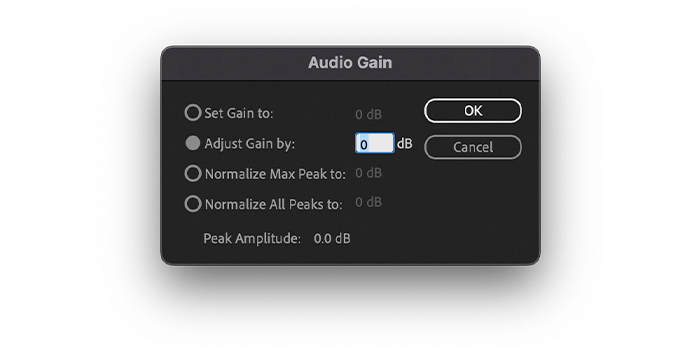
To adjust input gain, select the clip by right-clicking and choose Audio Gain. You can set the gain in the Audio Gain dialogue box by typing the values in dB.
Step 5: Audio Effects: Crossfade Transitions

Premiere Pro offers many audio effects, including EQ, delays and echo effects, and crossfade transitions. You can use effects to create smoother transitions between scenes or fade-ins and outs to the beginning or end of an audio clip.
First, ensure you have the effects panel active in Window > Effect. Once it's visible on your audio workspace, search for Audio Transitions > Crossfades. Select the transition you want and drag it to the desired audio clip.
Advanced Tips for Working with Audio in Premiere Pro
This section will focus on more advanced functions, like keyframing, the essential sound panel, third-party VSTs, audio normalization, and the audio track mixer.
Keyframing
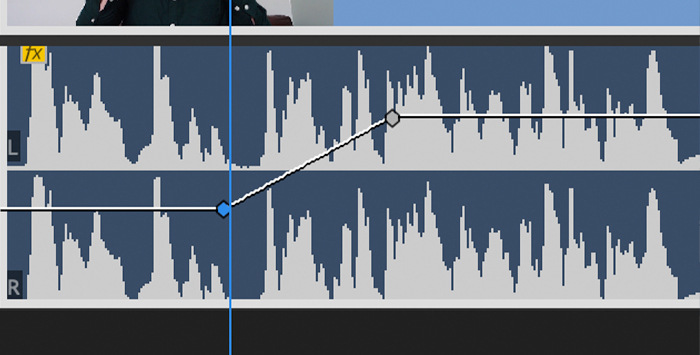
Keyframes allow you to control the volume of an audio clip or create a ducking effect to increase and decrease it at different times.
Let’s create a ducking effect for a speech section where you want the background music to be lower.
Move the playhead to where you want to start ducking the music and select the Pen tool ("P" key). Create a second keyframe using the Pen tool where you want the audio to return to the original volume. Click and drag the keyframes up and down to increase or decrease audio levels.
Preview the track and return to the Pen tool to create more keyframes if needed.
Essential Sounds Panel
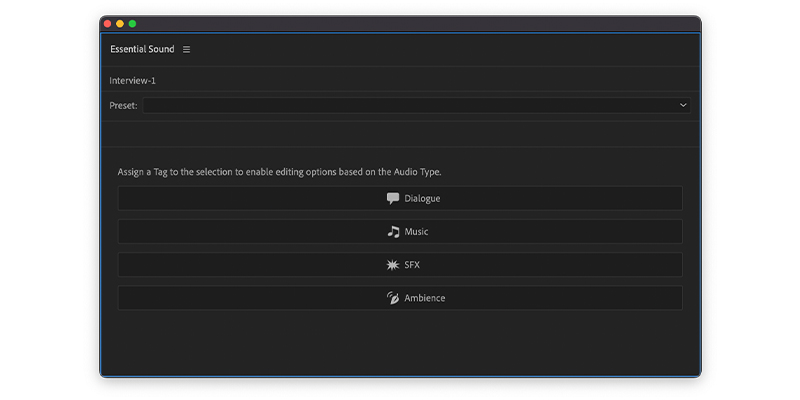
With the essential sounds panel, you can tag each audio file as an audio type: dialogue, music, sound effects, and ambiance. Defining every audio type will give you access to a specific set of tools to adjust individual parameters for each and create a better mix.
Production VST Plug-ins
Adobe Premiere allows you to use third-party audio production VST plug-ins.
For instance, you can use our WindRemover plug-in in Adobe Premiere Pro to reduce wind noise from your video.
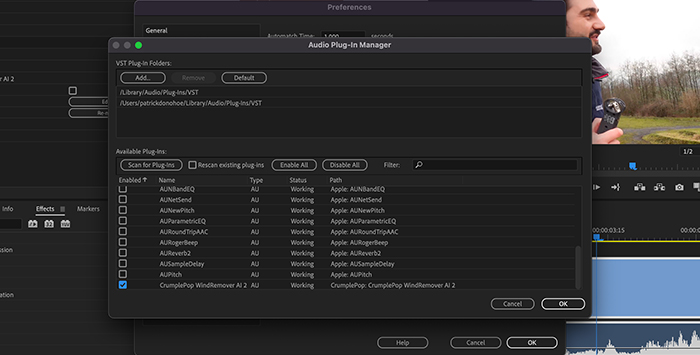
Go to "Preferences" > "Audio". At the bottom, click on Plug-in Manager.
Select the folder with CrumplePop VSTs installed. Now click on Scan for plug-ins and wait until it’s finished. When complete, all plug-ins will be listed.
All third-party VST will be available to use in your audio effects panel. Locate, then click and drag them to your clip and adjust controls in the plug-in interface.
You may also like: 10 Best Free VST3 Plugins Available in 2024Audio Normalization
Audio normalization is a tool that will make all your audio play at the same volume level. It's useful when you record interviews individually, and the volume differs for each audio clip.
To use audio normalization, select the audio clips with right-click and choose Audio Gain. At the bottom of the Audio Gain dialogue, you’ll see Premiere Pro determines the peak amplitude for those audio clips. Now you can select Normalize peaks at a specific value under 0dB.
Audio Track Mixer
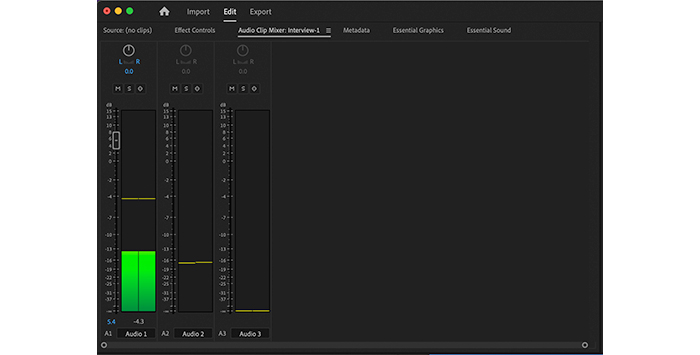
From the Mixer, you can do many things you’d do in a digital audio workstation (DAW).
You can record audio directly from Premiere Pro, change the track's name, manage audio channels, use panning for sound effects, add effects to the whole track (instead of adding effects for each clip), control volume, create a submix, and keep an eye on clipping.
When you're done with all final changes, it's time to export your content. We have a guide on how to export video from Premiere Pro that you might find helpful if you're not yet familiar with the settings.
Hear It For Yourself
Advanced audio AI removes noise and boosts your vocal quality.
Toggle it on/off to hear the difference.
Remove Wind
Remove Noise
Remove Pops & Plosives
Level Audio
Remove Rustle
Remove Echo
Remove Wind
Final Thoughts
Audio editing in Adobe Premiere Pro is straightforward, but its most advanced features will no doubt satisfy the needs of even the most demanding filmmakers.
Once you get familiar with all Premiere Pro features, your editing skills will improve dramatically.
Good luck!


