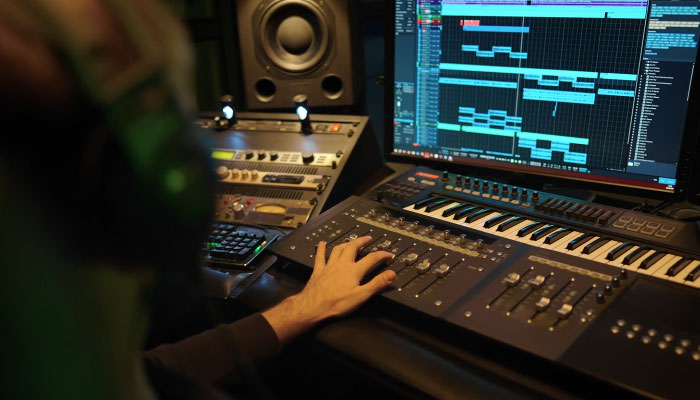
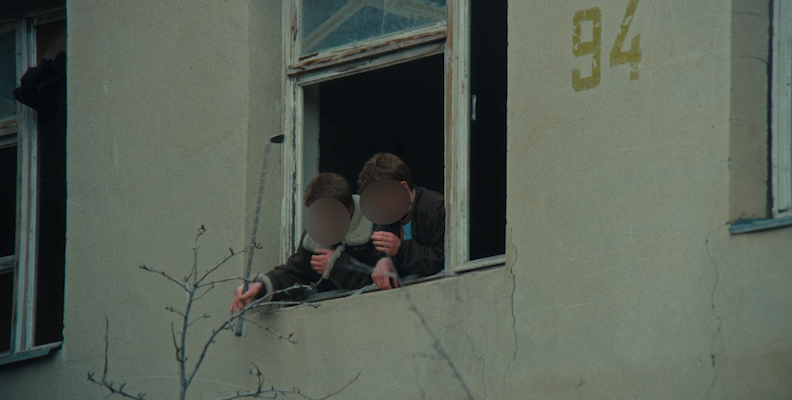
Blurring someone's face when working on video content is a common task many editors encounter during their creative journeys. Depending on the type of video material you're working with, you may face this task occasionally or daily.
Fortunately, most modern, versatile video editing software, such as Adobe Premiere Pro, offers different tools and approaches to make accomplishing this task straightforward.
In this guide, we cover blurring faces in Premiere Pro, some reasons to consider doing so, best practices, and multiple methods that you might find helpful in various situations. If you are interested in learning more about this topic, we'll explain everything in the sections below.
Without further ado, let's get straight into it!
Why Do You Need to Blur Faces in Videos?
Blurring faces isn’t just a stylistic choice—it’s often a necessary step to protect privacy, maintain professionalism, or comply with legal and ethical standards. Here are some of the most common reasons you might need to blur faces in your videos.
Protecting Privacy
One of the most important reasons to blur faces is to safeguard people’s privacy. If your footage includes strangers, bystanders, or even children who haven’t consented to being filmed, blurring ensures their identities remain hidden. This is especially crucial in public spaces where it’s difficult to get permission from everyone in the background. By applying a blur, you respect the rights of individuals while still being able to use the footage for your project.
Legal and Compliance Requirements
In many countries, data protection laws and broadcasting regulations require video creators to anonymize individuals who haven’t given explicit permission to appear on camera. For instance, news outlets often blur faces when reporting on sensitive topics or when minors are involved. Similarly, businesses may need to blur employees, customers, or patients in training, promotional, or instructional videos to stay compliant with workplace or healthcare privacy rules. Failing to do so could lead to legal consequences.
Ethical Storytelling
Beyond the law, there’s an ethical responsibility in video production. If you’re working on documentaries, investigative pieces, or journalistic content, blurring faces can protect vulnerable individuals—such as whistleblowers, survivors of trauma, or people in at-risk communities. This allows their stories to be told without exposing them to potential harm, harassment, or unwanted attention. It’s a way of balancing truthful storytelling with respect for personal safety.
Maintaining Focus on the Subject
Sometimes, blurring faces isn’t about privacy at all—it’s about directing attention. If your main subject is delivering an important message, you don’t want the viewer distracted by background people. A blurred face in the background ensures that the audience’s eyes stay where they’re supposed to—on the story, product, or character that matters most. This subtle editing choice can make your video look more professional and polished.
Protecting Brand Image
If you’re creating content for a business, blurring faces can prevent unintentional associations. For example, if an unknown person in the background makes an inappropriate gesture or wears clothing with controversial messages, it could reflect poorly on the brand. By blurring those faces, you reduce the risk of misunderstandings and ensure the brand is represented in the best possible light.
Content Monetization and Platform Policies
Platforms like YouTube, TikTok, and Facebook have community guidelines that restrict the exposure of personal information without consent. Videos showing identifiable individuals without permission may be flagged, demonetized, or even removed. Blurring faces is a safeguard to keep your content compliant with these rules so that your hard work continues to reach an audience—and, if monetized, keeps generating revenue.
Creative and Cinematic Purposes
Finally, face blurring can be a creative tool. Filmmakers and content creators sometimes use it for stylistic effects, such as creating a sense of mystery, anonymity, or surveillance. Blurred faces can add atmosphere to thrillers, documentaries, or music videos, helping to reinforce a theme or mood while still serving a narrative purpose.
How to Blur Faces in Premiere Pro

Premiere Pro, which is as beginner-friendly and versatile as it gets, is a video editing software that offers all the tools you need to apply any blur effect to your whole video or a part of it.
In this software, you will find various blur effects available to use, including the Gaussian blur effect, motion blur, directional blur, and others. Applying any of these to your video clip is easy using the built-in functions of Premiere Pro. In this section, we'll show you exactly how to do it, step by step.
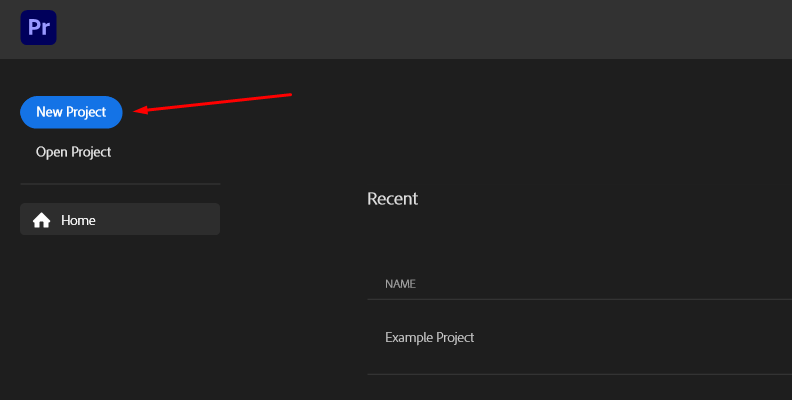
Step 1: Create a New Project, Import Media, and Create a Timeline
As a video editor, the first step is always to set a solid foundation when looking to complete a specific task. This means creating a new project so that you don't make any unwanted changes to a project that's already started, especially when trying out new methods and/or experimenting with features.
So, launch Premiere Pro, click the "New Project" button, and finalize the process.
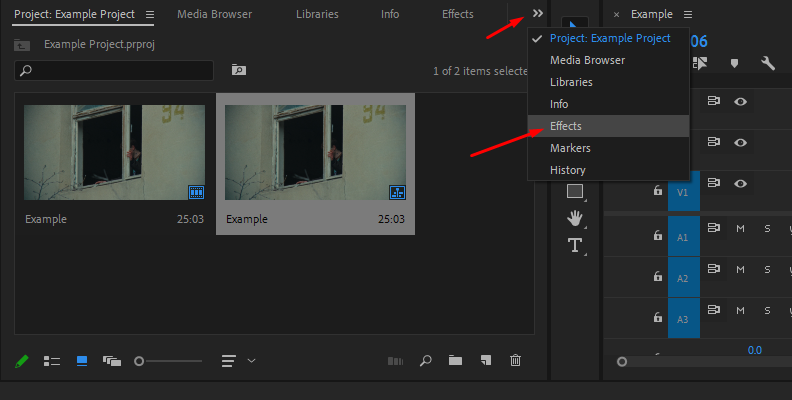
After you have a new project ready to work on, import media from the "Project" panel/tab by clicking the blue "Import" button or right-clicking anywhere in the empty area and choosing "Import..." from the list of options.
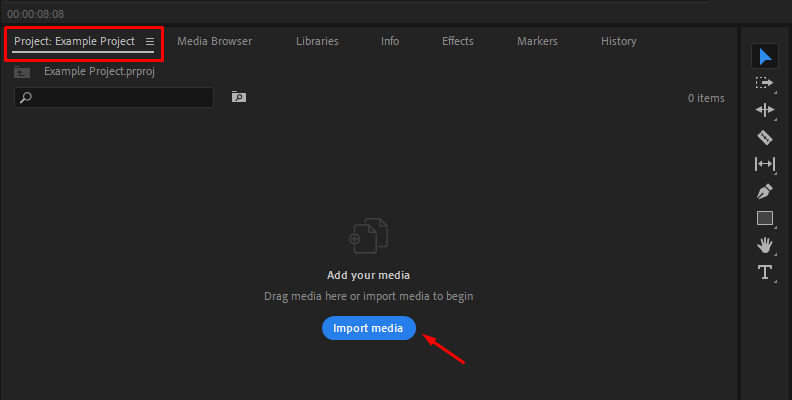
Find the video material on your disk and double-click to import.
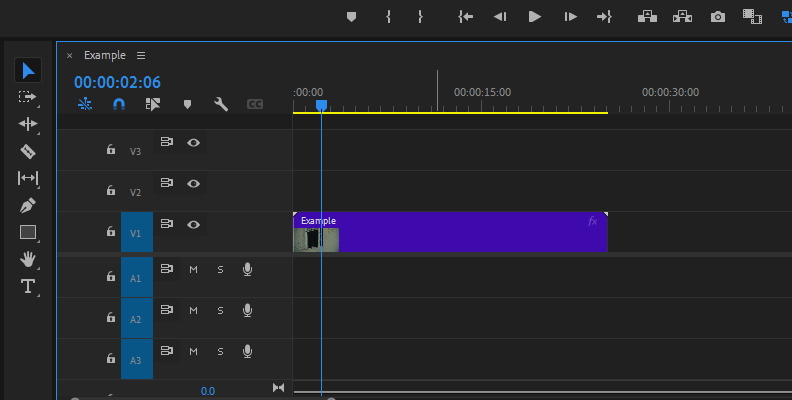
Once you import the video you want to work on, simply drag it from the "Project" panel onto the timeline area. This will create an editable sequence that we can apply effects to and make any type of changes.
Step 2: Choose the Type of Blur You Want to Add and Apply It
Now that we have our video on the timeline, it's time to choose the blur type we want to add and start blurring faces.
To do this, let's first open the effects panel in Premiere Pro.
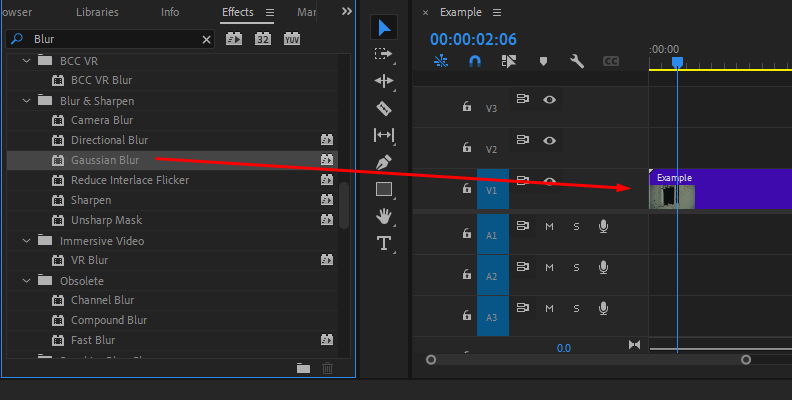
Now, use the search bar to type "Blur" and you will see all blur effects come up on the list. Feel free to choose the one you want to use for this specific task, then drag and drop it onto your video.
For this example, we'll be using the Gaussian Blur effect.
Now the blur is applied to your video. However, it will affect the whole video at once, meaning everything will be blurred. Since this is a guide for blurring faces only, we will need to adjust some blur settings before we get that result.
Note: If you plan to apply multiple blurs and effects to your video, you can create an adjustment layer and apply the effects to it instead, rather than the original clip.Step 3: Adjust Settings in the Effect Controls Panel
The next step after applying the blur is to access the Effect Controls panel in the top-left corner of Premiere Pro.
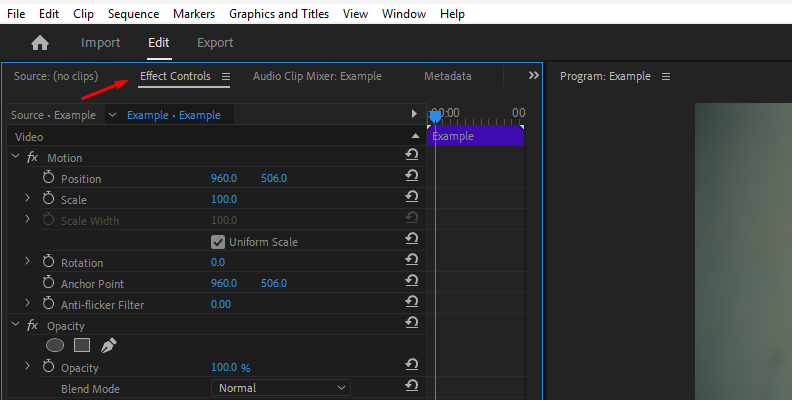
Scroll down to find the section for your applied effect.

The first step is to adjust the blurriness parameter, which basically controls the total blur amount. Set this to however much you prefer the faces to be blurred.
You can use the Repeat Edge Pixels option for a smoother effect as well.
Step 4: Create a Mask to Isolate Only Faces in the Video
Now, it's time to make the blur show only on the parts within the video where you want it, in this case, on faces.
To do this, we'll need to rely on a function that, within the world of video editing, is referred to as masking.
To "mask" means to isolate a specific part of the video where the effect will be applied.
In Premiere Pro, you can do this by choosing one of the three masking tools available, as shown in the image below.
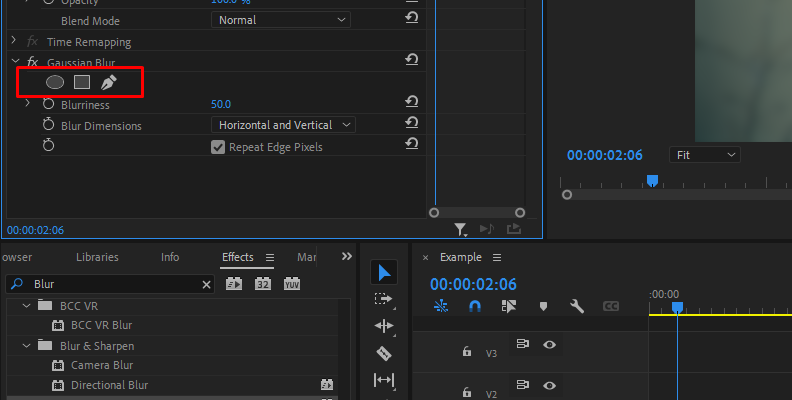
For this specific task, we suggest using either the ellipse option, since we're working with faces, or the free draw bezier.
Let's use the ellipse option for simplicity.
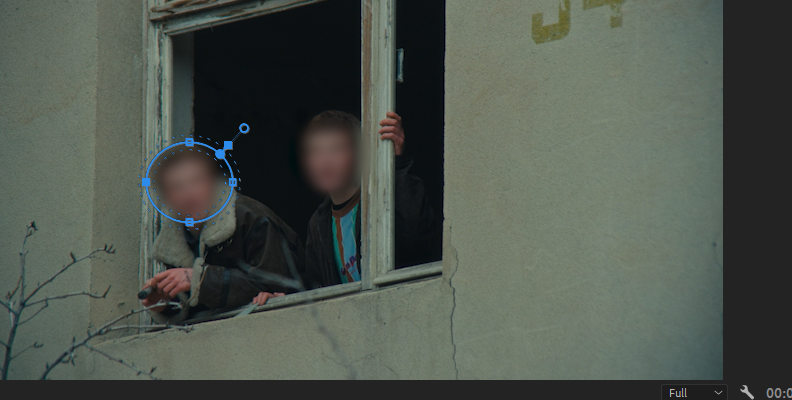
Click on the ellipse mask option, and you will notice a circle in your preview window. This is your mask. You can resize it or reshape it as you want, and as you can notice, the effect is only applied within that area.
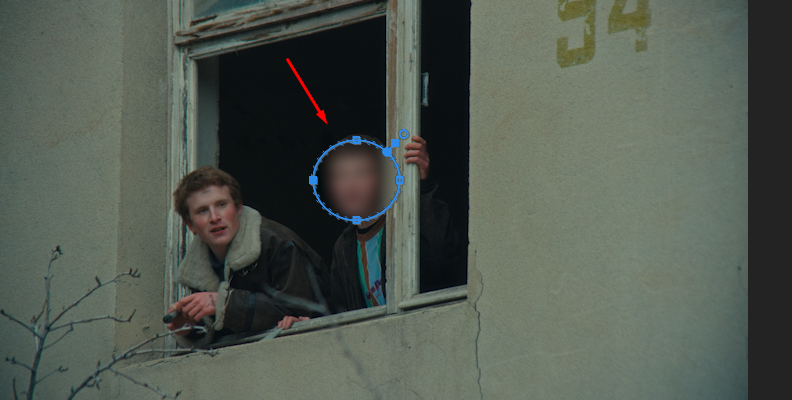
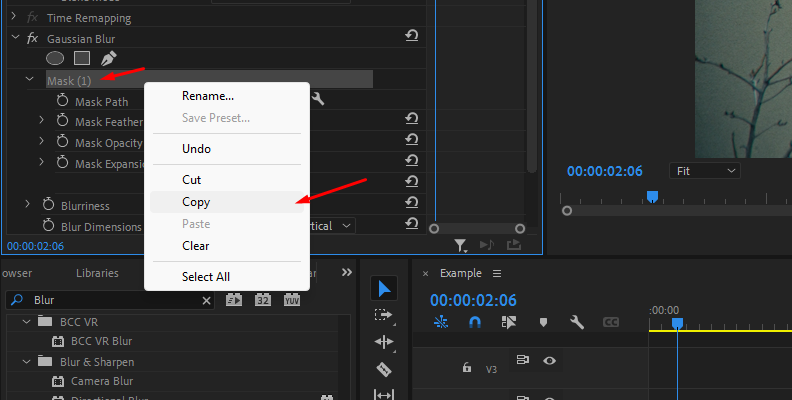
Now, if you have multiple faces, simply copy the first mask and paste it to create a new one (CTRL + C / CTRL + V on Windows or CMD + C / CMD + V on Mac), then place it on a different face, and that's all there's to it!
You can adjust settings such as mask feather to make the mask look smoother if you want to pay more attention to aesthetics in your video.
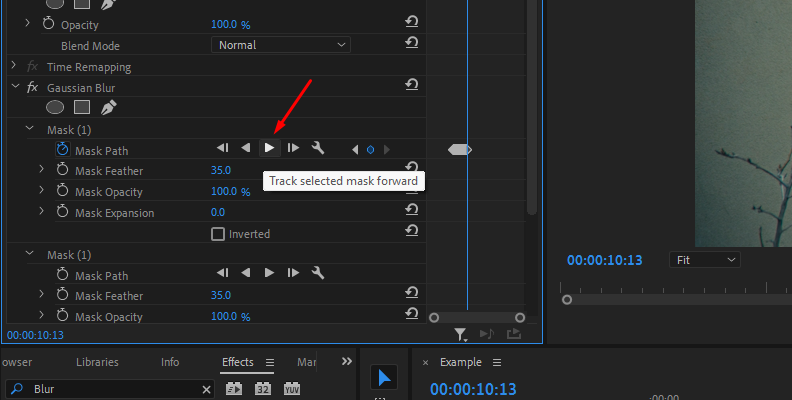
Step 5: Animate the Mask
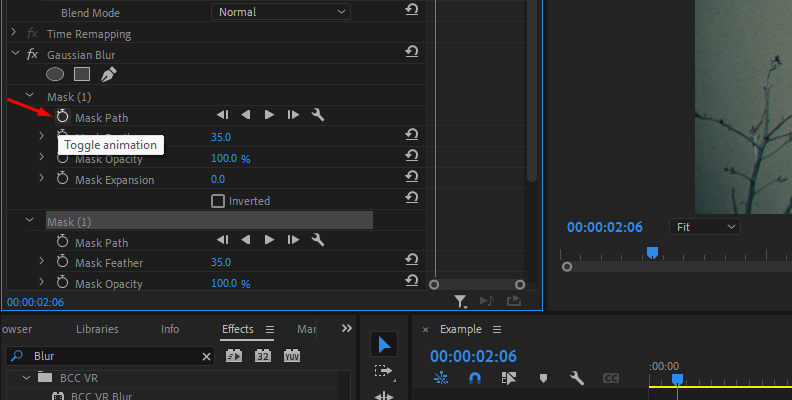
Since this is a video and not a photograph, the subjects' faces will likely change position with each frame. This means you'll need to use some sort of motion tracking for your selected mask to ensure that the face blur effect stays on target after pressing the play button.
For this, you will need to manually add keyframes by clicking the stopwatch icon next to the "Mask Path" option or use the "Track selected mask forward" function for Premiere's autotracking option.
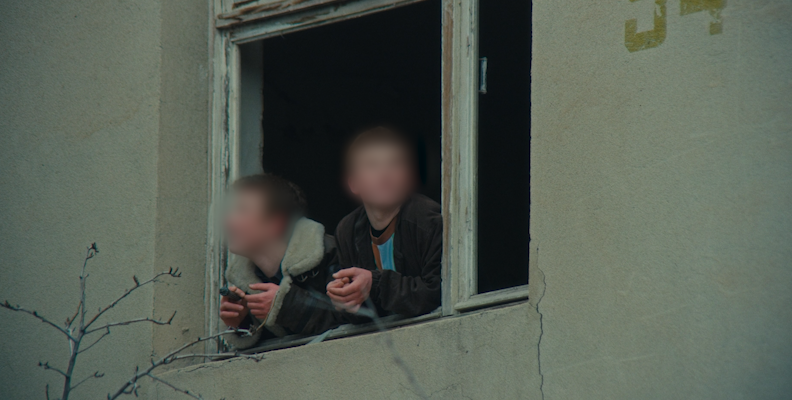
When you're done, the faces in your video should be blurred flawlessly.
Blur Faces in Premiere Pro with Continuum's AI BCC+ Witness Protection ML
Another way of completing this task in a much quicker and simpler, automated way is by using Continuum's tools.
Continuum is a plug-in by Boris FX compatible with all popular video editing programs, such as Adobe After Effects, Adobe Premiere, Avid Media Composer, DaVinci Resolve, VEGAS Pro, and others.
Once you download and install Continuum for your software of choice, in this case, Premiere Pro, you can simply apply the Witness Protection tool and accomplish your task easily in just a few seconds.
Here's how it works:
Step 1: Prepare Your Video Clip
As shown in the previous section, you first need to create a new project (optional) and drag a video onto the timeline area to create a sequence of it.
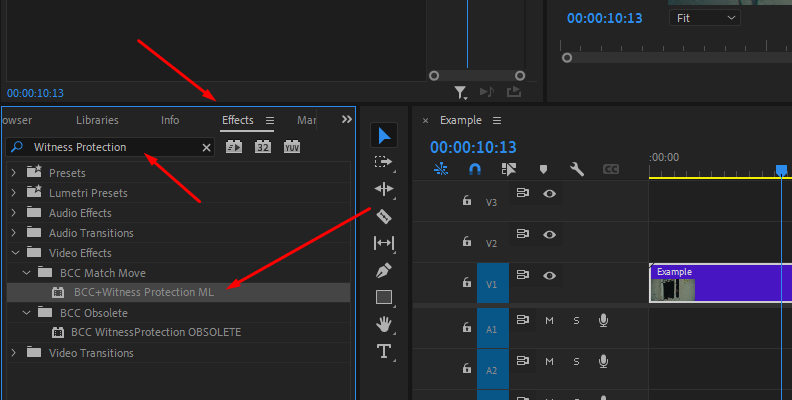
Then, you access the "Effects" panel and use the search bar to find Witness Protection. You should see all the Continuum tools on your screen when looking for effects.
Step 2: Apply BCC+ Witness Protection ML
Once you find Witness Protection, drag and drop it over your video.
Unlike the manual method listed above, you won't need to create masks for specific areas of your scenes when using this tool, as it automatically detects and blurs faces for you.
Once you apply it to your video, simply access the Effect Controls panel and take a look at the settings that you may want to tweak. In the meantime, the software will automatically detect and blur faces for you, so you can simply focus on adjusting things like feather, size, scale, etc...
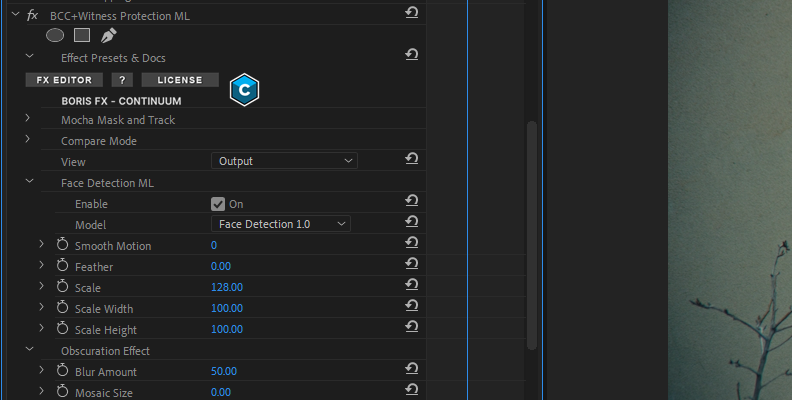
And just like that, with a click of a button, all faces in your video will be accurately tracked and blurred throughout the entire clip. It works like magic!
Final Words
That covers everything about blurring faces in Premiere. We hope we made it easier for you to accomplish this common task.
Knowing how to blur faces in your preferred software is crucial for your video editing journey, so if we did help, we're more than glad to hear it.
We thank you for reading and wish you the best of luck with all your future projects!