Sometimes, for privacy reasons, you cannot post a photo or a video on social media or publish it via a news channel, as a person whose face is in the shot may not want their identity exposed. But, if you were to "scrap" all content where a bystander seems to be captured walking around and going about their day, you would rarely be able to post anything.
This doesn't only apply to people's faces, though, as other types of sensitive information often caught in photos and videos also need to be protected, such as car license plates, credit card numbers, or IDs and passports.
Luckily, there are methods to blur all sensitive information in photos and videos using modern video editing software, and that's exactly what we'll be talking about in this guide.
If you're willing to learn more on this subject, let's get straight into it.
Reasons You May Need to Blur People's Faces in a Video
Here are some of the main reasons why you may want to consider blurring people's faces in your own content or a video project you're working on.
Privacy Protection
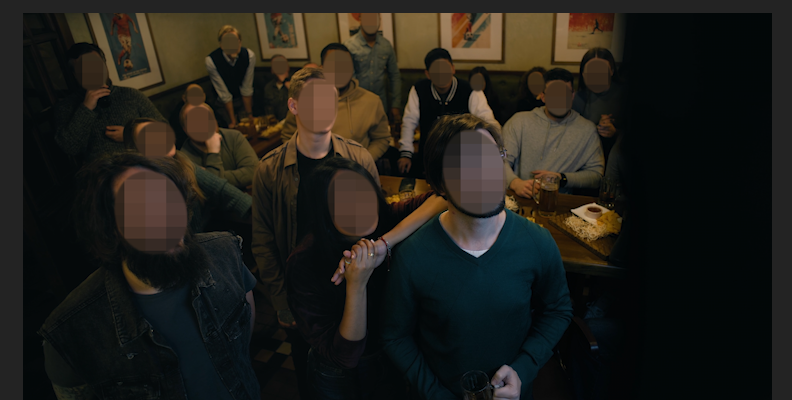
One of the primary reasons for blurring faces in videos is to protect individuals' privacy. In today's digital age, people are increasingly concerned about their personal information and identity being exposed without consent.
Blurring faces ensures that identifiable features are obscured, helping to prevent the misuse of someone's image, especially in sensitive contexts like public spaces, protests, or vulnerable situations. For instance, individuals attending a public event may not want their participation recorded and shared widely, and face blurring helps respect that.
Compliance with Legal Requirements
In many regions, data protection laws, such as the General Data Protection Regulation (GDPR) in Europe, mandate that organizations obtain consent before using individuals' identifiable information, including images and video footage.
In cases where it is impossible or impractical to get consent from every individual captured on video, blurring faces becomes a practical solution to ensure compliance. This is particularly relevant for content creators, journalists, or businesses filming in public spaces. By blurring faces, they can avoid potential legal consequences related to privacy violations.
Protection of Vulnerable Groups
Blurring faces is especially important when filming or sharing videos involving vulnerable groups such as children, victims of crime, or individuals in sensitive environments like hospitals or shelters. These individuals may be at risk of exploitation, harassment, or stigmatization if their identities are revealed.
For example, in news reports involving minors or victims of violence, blurring faces can help shield them from unwanted attention or further harm.
Journalistic Ethics
In journalism, there is a strong emphasis on protecting the privacy and dignity of individuals, particularly those involved in sensitive stories.
Blurring faces in certain situations, such as reporting on crime, protests, or disasters, helps protect the identities of those who may not want or need public exposure. Journalists often blur faces and publish the edited video material instead to avoid exposing witnesses, victims, or people expressing controversial viewpoints to potential threats or retaliation.
This practice is crucial in ensuring that vulnerable people are not further victimized or harmed by media coverage.
Avoiding Misrepresentation or Misinformation
In some cases, showing a person’s face in a particular context could misrepresent their involvement in a situation or lead to misidentification. For example, during protests or public demonstrations, someone might inadvertently be captured on video without participating in the event.
Sharing such footage without blurring faces can result in individuals being wrongly accused of involvement, which could lead to negative consequences for them. The blurred video version with anonymized faces helps mitigate these risks and ensures that no one is unfairly implicated.
Respecting Cultural or Religious Sensitivities
In some cultures and religions, there are strict guidelines about how a person’s image is used or shared.
Blurred videos where specific elements and identities are anonymized can demonstrate respect for these traditions, especially when filming in multicultural environments where participants may have different beliefs about privacy and image use.
Blur Faces in a Video With Continuum's BCC+ Witness Protection ML
Most modern editing programs offer some way to blur a specific part of your video clip. This can be done through masking and by applying some type of blur effect. Using keyframes is also common practice as a tracking feature if the mask needs to move and follow the subject within the shot.
However, despite these video editing apps offering ways to blur someone's face through the use of built-in, general-purpose tools, there are plug-ins available that allow you to blur faces in videos much more easily as they're specifically designed for that purpose.
In this section, we'll be showing you how to edit videos in a way that protects sensitive information while not having to spend too much time learning how general-purpose editing tools work, relying on Continuum BCC+ Witness Protection ML, a tool designed specifically for this task.

Keep in mind that Continuum, Boris FX's popular creator pack featuring hundreds of transitions, tools, effects, and presets for video editing, is compatible with most modern video editing software, so you can use it in your favorite workspace.
In this case, we'll be using Adobe Premiere Pro, so here's what you need to do if you want to blur faces in a video using Continuum BCC+ Witness Protection ML.
Step 1: Create a New Project and Import Media
The first step to using the blur feature of the Continuum Witness Protection tool is to load up Premiere Pro and create a new project.
After the software launches, click the "New Project" button.
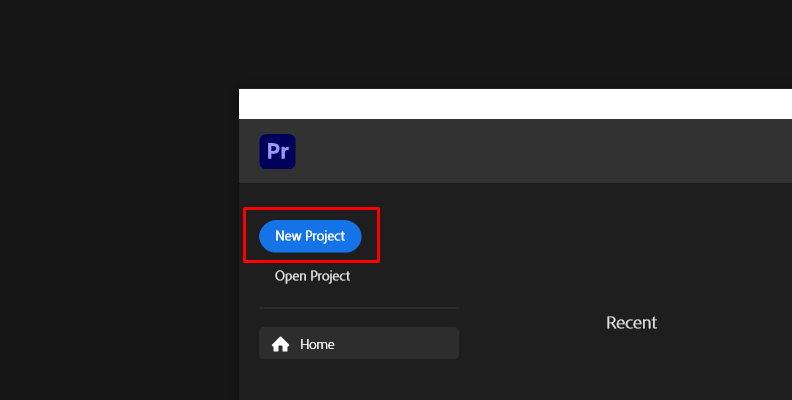
Choose your preferred project settings and finalize the project creation.
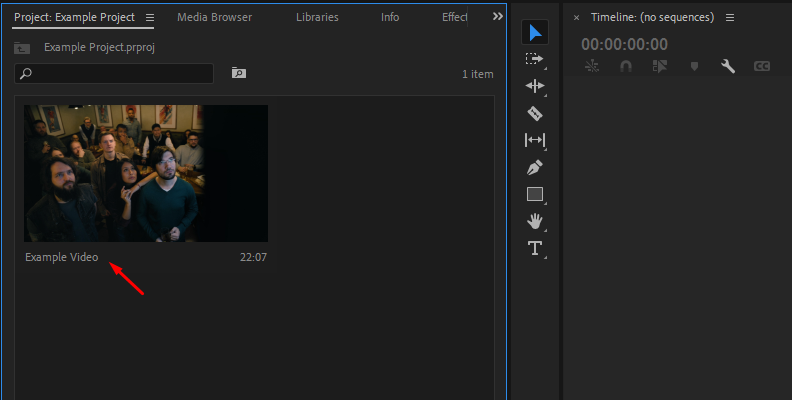
Once you're in the software, click the "Project" tab and then the blue "Import media" button. Find the video on which you want to apply the blur filter to a face or other sensitive information, and then import it within Premiere.
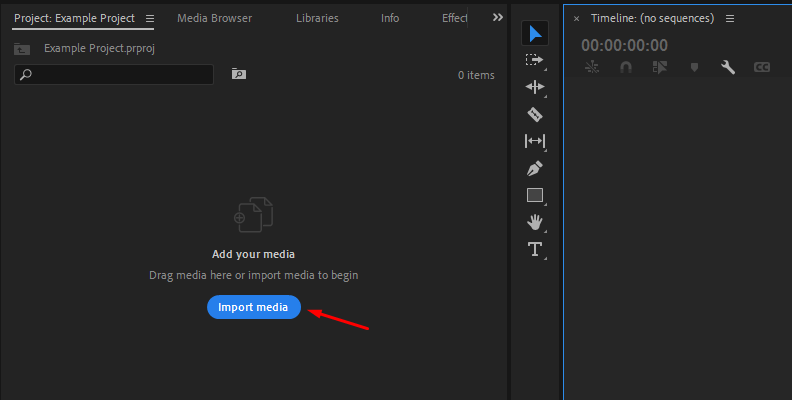
Once you import the files, you will be able to see them in the same Project tab.
Step 2: Create a Sequence/Timeline and Add the Effect
Now, you need to create a sequence/timeline (the term may vary depending on which video editor you're using) so that you can make any modifications, such as applying the face blur effect.
To do this in Premiere Pro, all you need to do is drag and drop the video you just imported from the "Project" tab over to the timeline area.
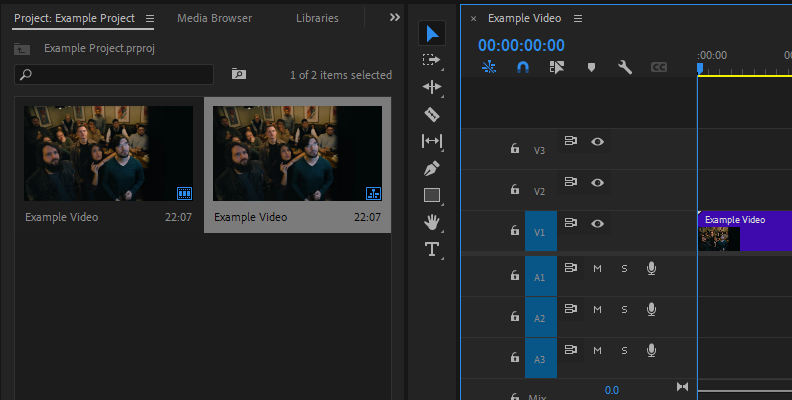
Now, you've created a sequence, and you're ready to make changes and edits to your clip.
Step 3: Adjust Based on Your Project's Needs
The next step is to open the "Effects" tab and find the BCC+ Witness Protection ML effect using the search bar.
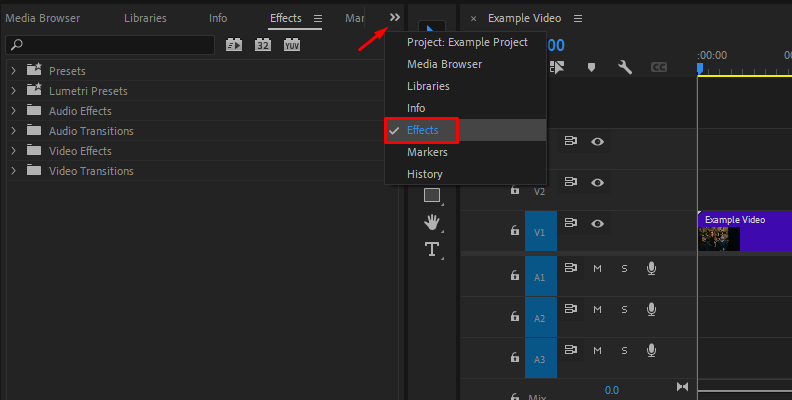
Then, upon finding it, drag and drop the effect over your video clip.
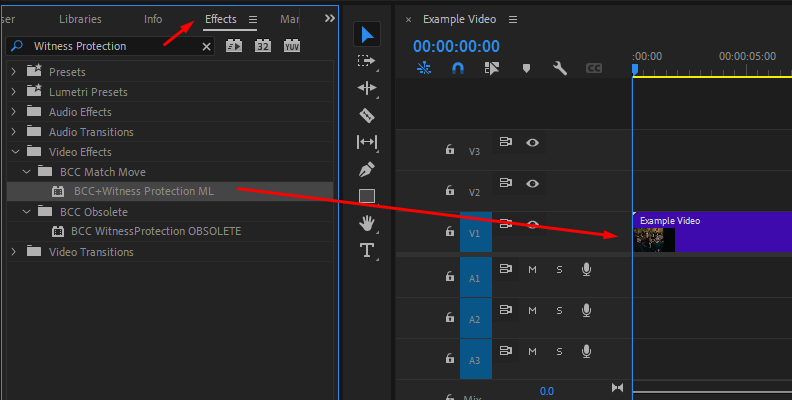
You'll immediately notice that the effect will automatically detect and blur faces in videos using AI, which is already a huge time and effort saver compared to what you would need to do if you were to take the manual approach.
Not only that, but if you play the video and the subject's face(s) move within the shot, you'll notice that the blur effect follows perfectly, keeping all subjects safe throughout the whole video. This would take hours, and hundreds of keyframes would be acquired in a shot like the one we just used as an example.
Here's the before and after of just dragging and dropping the effect over the clip.
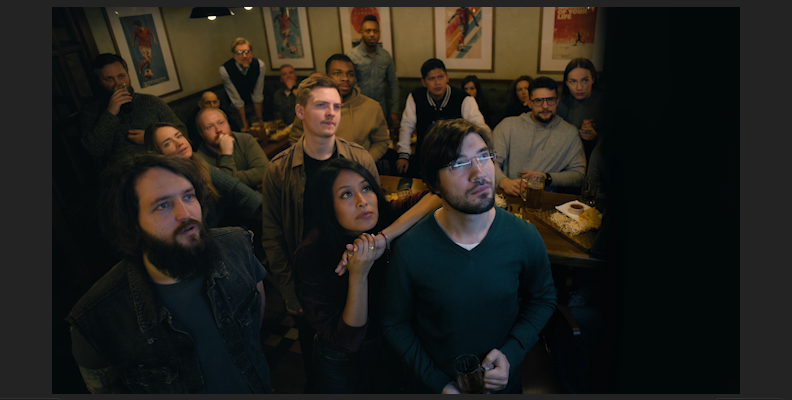
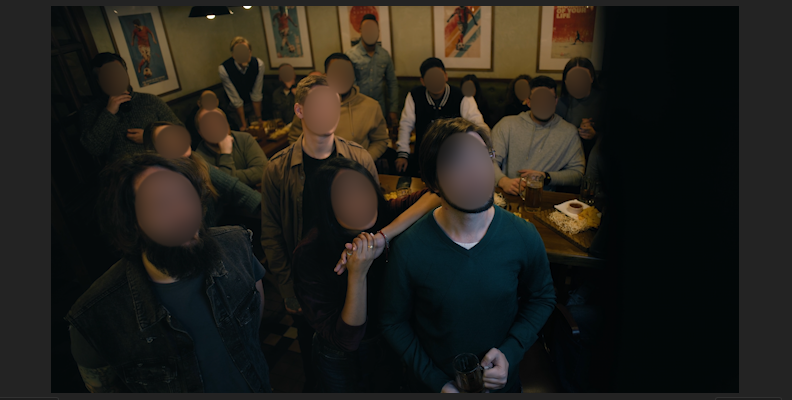
To further modify the effect based on your project's needs, you can access the Effect Controls panel and change things such as the amount of face blurring applied, adding a mosaic effect, the feathering, the scale of the blur feature, and lots more.
As with Continuum's other effects and tools, Witness Protection ML has lots of room for customization.
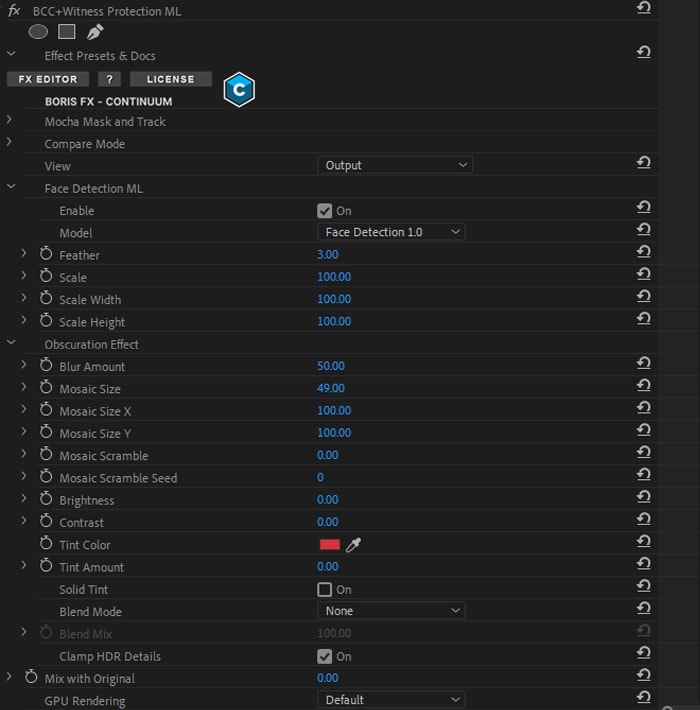
As you can see, applying the blur feature or the mosaic feature, based on your preference, takes under a minute, even in complex shots where you need to protect the identity of multiple subjects, without having to spend dozens of hours keyframing and positioning frame after frame.
Final Words
That's all there's to it!
Hopefully, what you learned in this guide about blurring faces in videos will help you create more professional-looking videos as well as help you be able to post your videos online without worrying about putting someone in danger when covering more sensitive topics.
We wish you the best of luck with all your future work, and thank you for reading!


