


Are you looking to add text to a photo? Adding text is a common thing to do when editing photos. You can add the names of the people in the photo or provide extra information by inserting text. Depending on the tools you have, your text can be as simple as a black line or as complex as a title sequence.
In this article, you’ll learn how to add text to an image on Mac and Windows using Title Studio from Boris FX. I’ll also show you alternative options for adding text to a photo on both Windows and Mac systems.
For this tutorial, you must have Title Studio installed on your computer. Title Studio is included in Continuum but is also available as a premium filter. You can download the Continuum trial to follow this tutorial.

Let’s dive in!
How to Add Text to a Picture on Mac with Title Studio
Title Studio works with hosts available for Mac and PC, including Adobe After Effects, Premiere Pro, DaVinci Resolve and Avid Media Composer, among others. Start by creating a new project in your host of choice and importing the picture to which you want to add text.
Step 1: Apply Title Studio
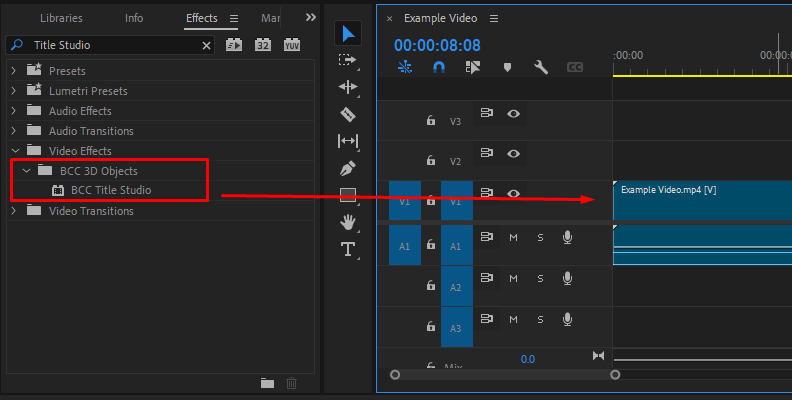
Search your host’s effects library for BCC 3D Objects > Title Studio. Apply the filter directly to the picture, a solid or adjustment layer.
Step 2: Launch the Title Studio UI Window
At the top of Title Studios parameters, click on Launch UI Window. It will take you to the Title Studio UI window.
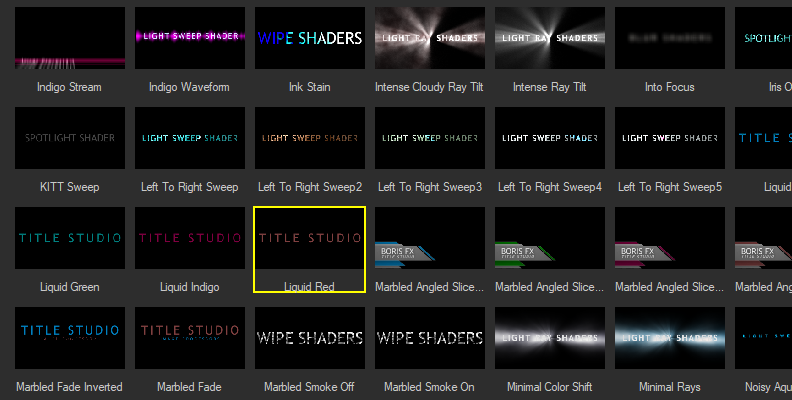
Before diving further, you can also check the FX Browser to see if there is a preset you want to use instead of creating text boxes from scratch. You can edit the text within the FX Browser and apply it to your image.
Click the Advance Mode button to launch the Title Studio UI Window from the FX browser.
Step 3: Adding Text in Title Studio
First, delete the default text track by selecting it and pressing Delete. Text tracks are on the bottom left corner of the Timeline window.
Look for the Text tool (T icon) in the Tool window at the center of the screen. The Text tool lets you add the text over the image in the Composite Window. If you don't see your photo in the background, change the Preview Background in the Composite window to "Composite Over Background."
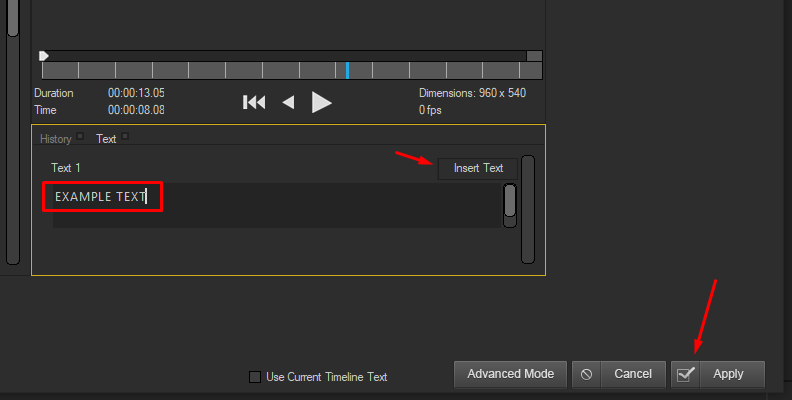
With the Text tool selected, click where you want to add text in the picture and start typing. It will create a new Text track in the Timeline.
Step 4: Adjust Text Format
You can edit the text you add with the Text tool from the Control window. Click on the Text tab next to “Controls.” In the Text Generator window, change the text’s style, color, border, and shadow.
Selecting specific characters with the Text tool allows you to modify only the selected text. Otherwise, the changes will apply to the whole Text track.
When you finish editing and formatting your text, click Apply to your host.
Step 5: Composite Settings
You will notice you can see the text, but not over your image. Scroll down the effects settings and display the Composite parameters. Choose a blending mode and adjust the opacity, brightness, and contrast of the overall blend between the text and the picture.
Finish by exporting the image to your Mac.
Alternative Methods for Adding Text on Mac
Sometimes, all you want is to add simple text to your photos. So, here are some other popular apps to add text to your photos on your Mac.
Preview App
The easiest way to add text is using the pre-installed Preview app on your Mac.
- Search for the photo using the Finder.
- Right-click the photo and click Open with Preview.
- From the upper menu, choose Tools > Annotate > Text.
- Double-click the text box and type your words.
- Add a text box and place it exactly where you want the text to be.
- Change the text's color, size, and font by clicking the A icon.
- If you need to resize the text box, click and drag the points around it.
- To save the photo with the text, click File > Save.
Adobe Express Online
Adobe Express is a free online tool similar to Canva and Microsoft's Designer. If you have an Adobe subscription, you can log in with your user. However, you don't need to subscribe to add text to your images. Choose Get Adobe Express Free and log in.
- Click "Start from your content" to upload the photo and add text.
- Browse the photo in your Finder, click Open, and choose the aspect ratio you want to work with.
- Click the Text tab in the left panel to display all the text tools.
- You can choose a preset or click "Add your text" for basic text.
- Click the text box to change the text words, font type, color, style, and add effects.
- Click the Download button at the upper right corner, choose a file format, and click Download again to save the image with text to your computer.
How to Add Text to a Picture on Windows with Title Studio
Start by creating a new project on your favorite Windows host. Title Studio is available for Premiere Pro, After Effects, DaVinci Resolve, VEGAS Pro, and many more. Import your picture and set up your project before applying the Title Studio filter.
Step 1: Apply Title Studio Filter
Select the image and find BCC 3D Objects > Title Studio on the effects browser.
Step 2: Title Studio Settings
Launch the UI window to shift to the Title Studio user interface in the Title Studio settings. Here, you can build titles for your images and clips from scratch. Additionally, you can start with a preset from the FX Browser if you need a starting point for your text style.
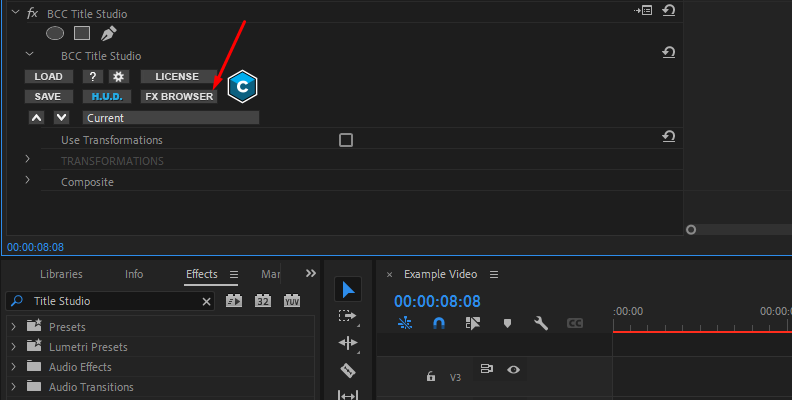
You can alternate between the Title Studio UI and the FX Browser by pressing the Advance Mode and FX Browser buttons.
Step 3: Add a New Text Track
When the UI window launches, you’ll see the default text. To start from scratch with a new text track, click on the text track on the bottom left and delete it.
Click the T icon on the center toolbar to add a new Text track. The Text tool lets you add words directly over the background image. To see the picture on the background, ensure you have selected “Composite Over Background” in the Preview Background option. These options are above the Composite window.
Step 4: Formatting Text
The Controls and Text windows are on the left side of the screen. Click on text to access all the formatting options for the text and change the font, size, text alignment, and scale settings.
You can modify the words in your text from the Text Generator Window. Or paste text from your clipboard. A pro tip for using the Text tool is to select a character in the text word to modify only those words.
Click Apply and return to your host application.
Step 5: Final Touches
Title Studio features native host compositing controls from your host effects settings. It allows you to composite the Titles into your picture using blending modes, opacity, contrast, and brightness controls.
Finally, export your image to save it to your computer.
Alternative Methods for Adding Text on Windows
Windows has many built-in tools and pre-installed applications that allow you to easily add text and edit photos, from the free app Google Photos to the good-old Microsoft Paint.Using the tools you already have is often the best choice.
Microsoft Photos
As a Windows user, you should have pre-installed Microsoft Photos on your computer. However, the app might differ between Windows 10 and 11, so I'll provide steps for both versions.
Windows 11 users with the latest Microsoft Photos app won’t see the Text tool anymore. However, you can edit using the Designer tool built into the Photos app.
- Launch the Microsoft Photos app. You can use the search tab and type “Photos.”
- Browse your picture in the Photos app and double-tap it to open it.
- Right-click it and tap Edit in Designer Online. When the Designer app launches, add the text from the left panel.
- Choose your style, type the word text, and adjust the color, font type, size, etc. You can rearrange the text box to place it exactly where you want.
- Click Download on the upper right corner of the screen. Select the format, and click Download again to save the photo with text to your computer.
Designer has many features to help you add stylish text to your pictures. The only drawback is that it works online only, just like Canva.
On Windows 10, you edit in Paint 3D from the Photos app.
- Open the Photos app and browse the image.
- Click Edit & Create and select Edit with Paint 3D.
- When Paint 3D opens, click Open > Browse files to search for the photo.
- Click the T icon to add Text. You can add 2D and 3D text.
- Click wherever you want the text to be placed.
- Write inside the text box.
- You can select the font type, adjust the size, and choose a color from the right panel.
- If you need more colors, click Add Color and choose a different one from the spectrum.
- To save your photo with text, display the menu and select Save to save the original picture with the text, or choose Save As to save a copy of the photo with text.
Paint 3D on Windows 11
Paint 3D is also available for Windows 11.
- Search Paint 3D from the search and launch it.
- Go to the menu in the top left corner and Click Open > Browse files. Search for the picture you want to add text and click Open.
- Click the Text icon, then click on the part of the photo where you want to apply the text.
- Type your text in the text box and adjust the font type, style, and color in the panel on the right. To see more color choices, click Add Color.
- You can add multiple text boxes in 2D and 3D.
- Once you finish editing the text, go to the Menu and click Save or Save As to save the changes in the original photo or create a copy of the image with text.
Microsoft Paint
Windows veterans remember the classic MS Paint program as the go-to tool to edit photos and drawings. Though it’s not as complete as Photoshop, it has all the basic tools, like adding text to a picture, and its user interface is very straightforward.
- Type Paint in the search tab to open Paint.
- Import the photo from File > Open. Browse the picture to add text and click Open.
- Find the text tool (A icon) in the toolbar menu and click on the part of the image where you want to add the text box.
- Enter the text you want in the image.
- You can change the text's font, size, and style in the Font toolbar and the color from the Colors toolbar.
- Save your photo from File > Save to save the changes to the original image. To save a copy of the original photo with the text, select Save As instead.
Final Words
Add text to a picture to create invitations, infographics, social media posts, thumbnails, or memes! Both Windows and Mac have built-in tools for basic editing and text. There are some online alternatives for adding text easily to a photo. However, for professional text and titles, choose Title Studio, which will enhance your images and video clips in the blink of an eye.
Have fun!


