


Adding text to a video is an indispensable video editing skill you'll need to learn sooner or later. Text can be used as titles to present the video or to add extra information and enhance engagement, and when done right, they can turn a raw video clip into viral content.
Today, I'll show you how to add text in DaVinci Resolve using two methods. I'll also demonstrate how to create animated titles and text to make them more engaging to your audience.
Let’s dive in!
Why Use Text in DaVinci Resolve
Adding text to video clips is a way to attract the viewer's attention. Films use titles to create expectations, which can help you add information about the film and present the cast. In informative videos, text can help explain more of what the speaker is saying with labels and banners. Additionally, subtitles help people who speak in a foreign language to understand what’s being said.
How to Add Text and Titles in DaVinci Resolve
In DaVinci Resolve, the Text+ feature can make your text more engaging thanks to a wide selection of controls, layout, and keyframing options. To use Text+, go to the Effects library in the Edit tab, choose Titles, and then drag Text+ onto the timeline.
However, there are several ways to add text in DaVinci Resolve, depending on whether you need to add text as subtitles, captions, lower thirds, or titles. I’ll start this guide with basic text and then proceed with titles, fusion titles, and subtitles.

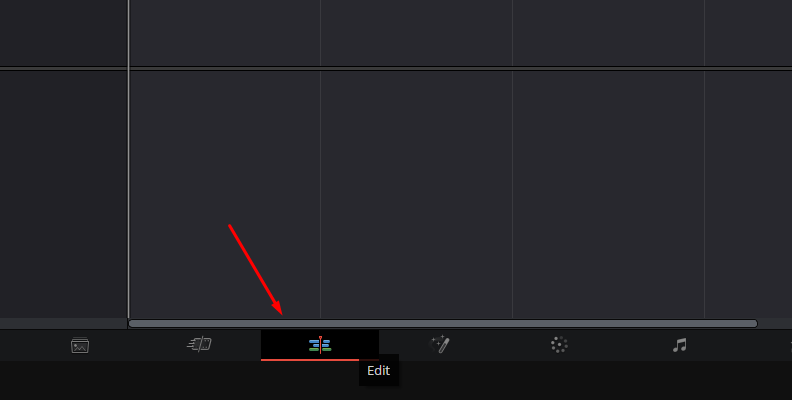
Start by importing your footage to create a new Timeline and move to the Edit page.
Basic Title in DaVinci Resolve
Step 1: Add Basic Title Text
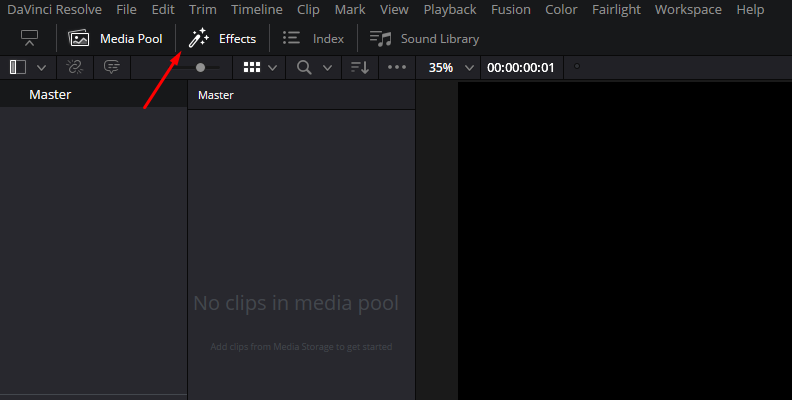
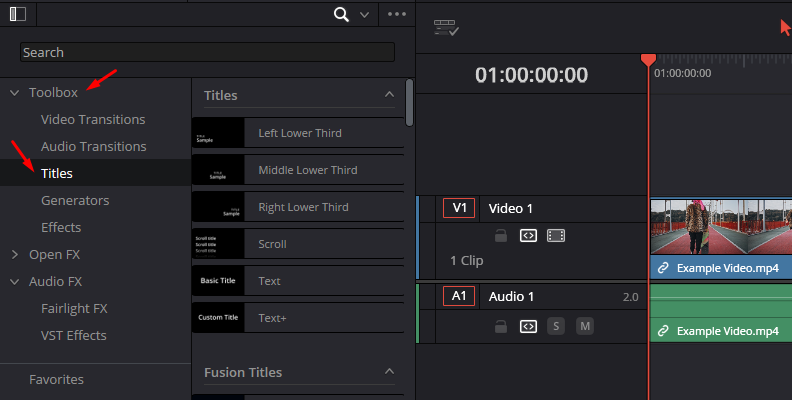
In the edit tab, click Effects on the top left corner to display the effects library. Click the Toolbox > Titles category to access all the types of title options within DaVinci Resolve. To add basic text that can be used as a caption, lower third, or title, use "Text." You can hover the mouse over each title to see a text sample.
Drag the Text effect above the video track, and it will add a new video track with the text. You can move the title clip to where you want the text to appear and extend it as much as you need it in the timeline.
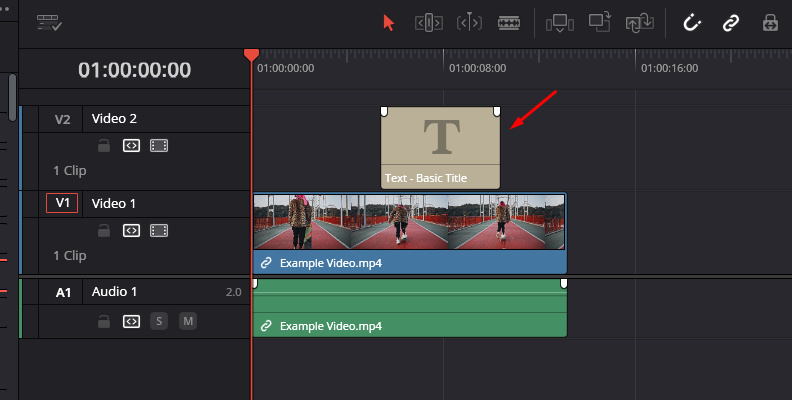
If you want the text to appear between your clips rather than over your clip, you can place it in the same video track as your video.
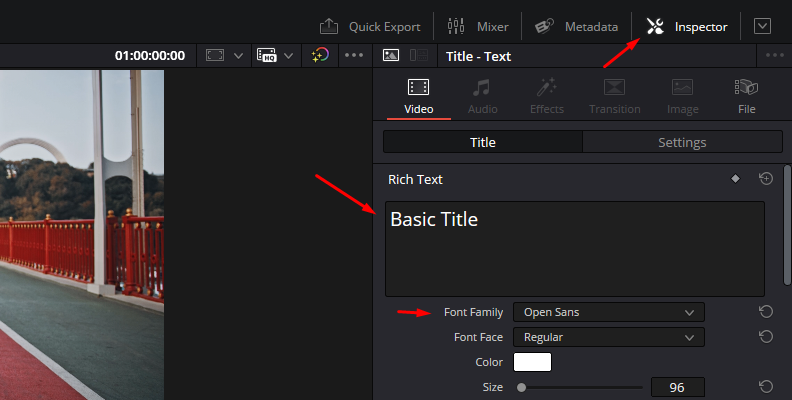
Step 2: Edit Text in the Inspector
Now, let's add text and edit the format. Open the Inspector from the top right corner of the Edit tab. You can start adding text by typing it into the Rich Text box. Below the text box, select the type font, font face, color, size, alignment, position, stroke color and size, drop shadow settings, and add a background until you have the text the way you want it to look.
You can adjust the settings for position, rotation, and zooming or enable the Open FX Overlay to move and adjust the textbox manually from the preview window.
Text+ Titles in DaVinci Resolve
Text+ is another text effect included in DaVinci Resolve. What’s different from the basic Text tool is that Text+ offers more personalization for your titles, including 3D rotation, transform, and shading settings.
Step 1: Add Text+
Go to the Effects library and browse through Toolbox > Titles > Text+. Drag the effect to the timeline on a track above the clip in a new video track. Remember, you can add it between your video clips on the same video track or above to add text as an overlay.

Step 2: Customize Your Text
Click the Text+ clip and open the Inspector. When you open the Inspector, you'll see more tabs within the Text+ effect settings. You have the text box where you add text and other settings similar to the basic Title effect and other settings like transform, shading, and more advanced options.
Fusion Titles
If you want to take your titles one step further, you can use Fusion Titles to add text with effects, animation, motion graphics, and more complex styles for a more cinematic outcome. Fusion Title has more ready-to-use presets, but you can still modify the look in the Inspector.
Step 1: Add a Fusion Title to the Timeline
Browse the Effects library for the Fusion Titles category. DaVinci Resolves comes with different Titles for callouts, lower thirds, and credits. These titles already have effects and animations like fade-outs, glitches, reveals, jitter, flips, and more. Preview a title by hovering your mouse over each title. When you find one you like, click and drag it to the timeline.
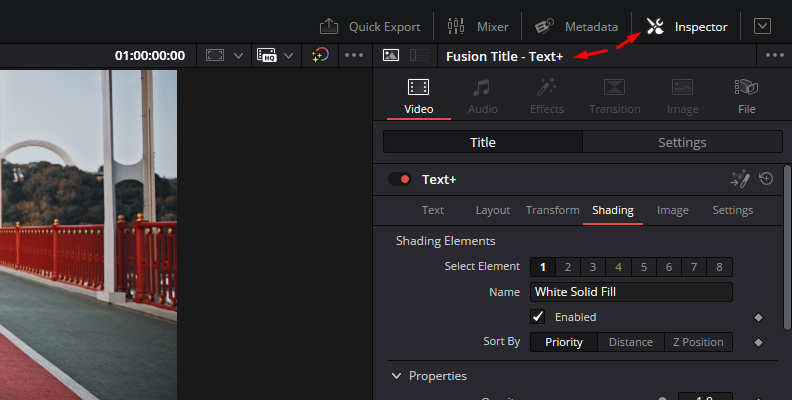
Step 2: Edit Fusion Titles
Click on the Inspector to open the Fusion Title. Depending on the Fusion Title, it may have additional settings such as upper and lower text, settings for boxes, and other motion graphics in the Fusion Title.
Subtitles
Another way to add text in DaVinci Resolve is with subtitles. Today, creating subtitles for your videos is crucial for accessibility, especially if you upload them for social media, online video content, commercials, safety videos, or other informative videos. DaVinci Resolve features a subtitle effect to add text that is more suited for subtitles than titles or captions.
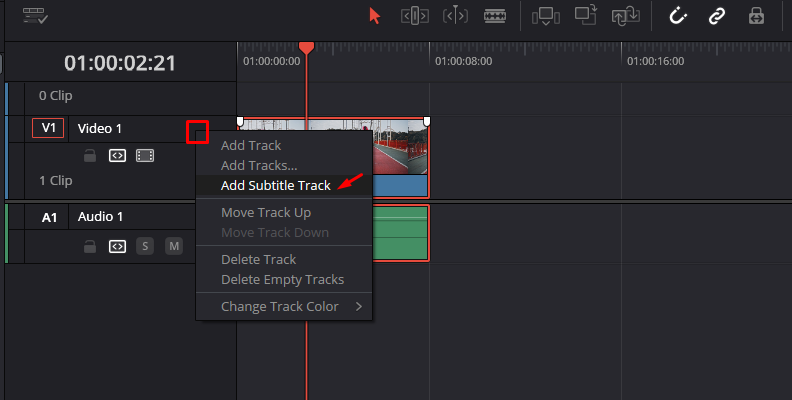
Step 1: Create a New Subtitles Track
The first step is to add a new subtitle track in the timeline by right-clicking the track header and selecting “Add Subtitle Track.” Remember, we are still working on the Edit page.
Another way to create the subtitle track is by adding the effect Subtitle from the Effects library. Go to Effects > Toolbox > Titles and scroll down to the Subtitles category. Drag the Subtitles effect above the last track to create a new subtitle track.
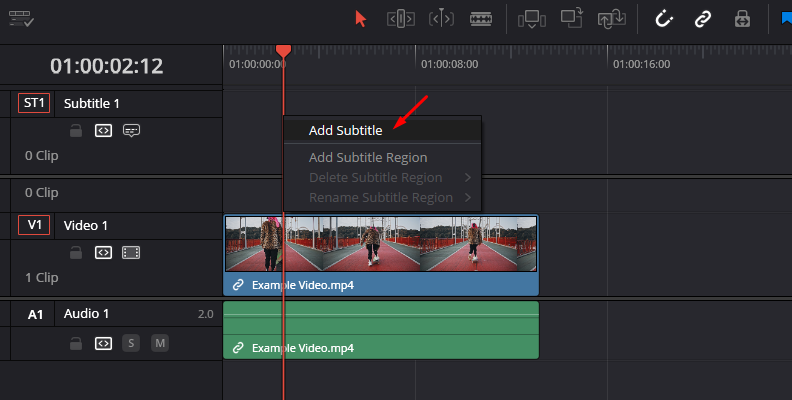
Step 2: Add the Subtitle Clip
Move the playhead to the part where you want the subtitles to start. Right-click in the subtitle track area and select "Add Subtitle." The subtitles clip will be added from the playhead, but you can adjust it by moving it wherever you want in the timeline.
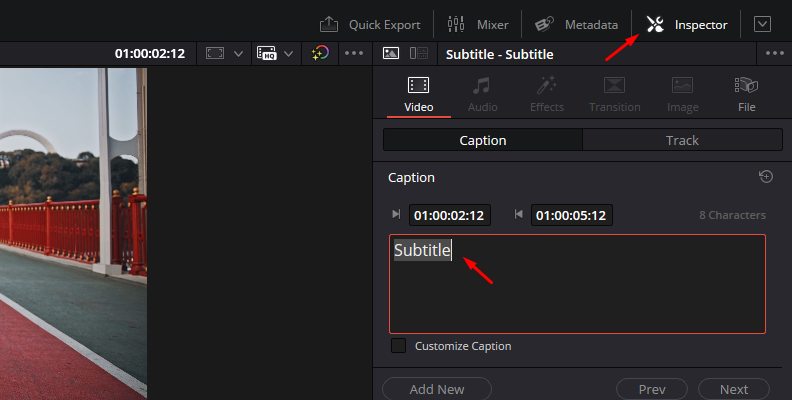
Step 3: Edit Subtitles Text
Select the text clip and open the Inspector. Under Caption, type in the text and adjust the format, duration, and position. You can modify each subtitle independently by checking Customize Caption below the text box. At the bottom, you can add and move to the previous or next subtitle to customize them.
Under the Track tab, you edit the general settings for the subtitle track, such as position.
Add Text and Titles in DaVinci Resolve with Title Studio
Title Studio is a plug-in included in the Continuum Plugins suite or available as a Continuum Premium filter. It allows you to add text titles in DaVinci Resolve in just a few clicks.
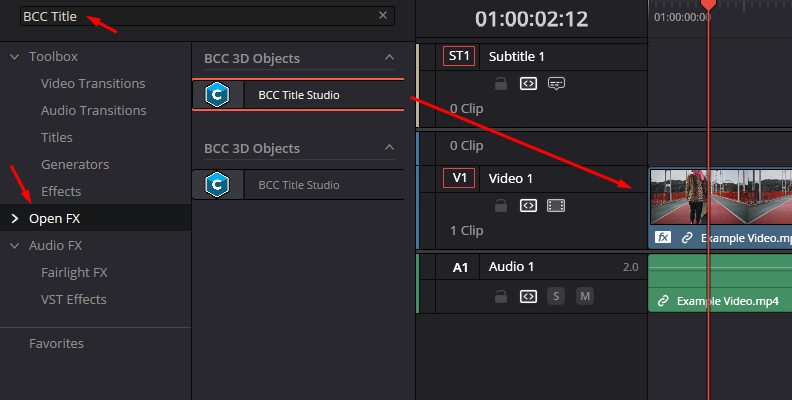
Step 1: Apply BCC Title Studio
Go to the Effects library and search Open FX > BCC 3D Objects > BCC Title Studio. You can drag the effect directly into the clip where you want to add text or apply it to an adjustment clip to create an individual Title Studio Clip at a specific timestamp.
Step 2: Add Text in Title Studio
Title Studio is a powerful tool for creating basic titles, 3D titles, and animated text. I’ll go over each scenario, from adding basic text to 3D titles.
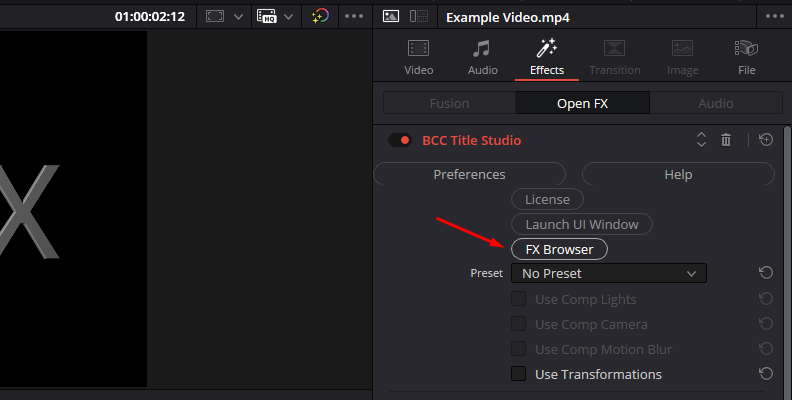
Quick Text Using Presets
Using the presets is the quickest way to add text with Title Studio. Open the Inspector to display the filter's parameters, and click FX Browser to open the preset browser.
You can browse by the categories on the left. You have a lot of presets for banners, callouts, motion titles, countdowns, infographics, loaders, and so much more. The best part is that you can adjust the preset to suit your needs in Title Studio.
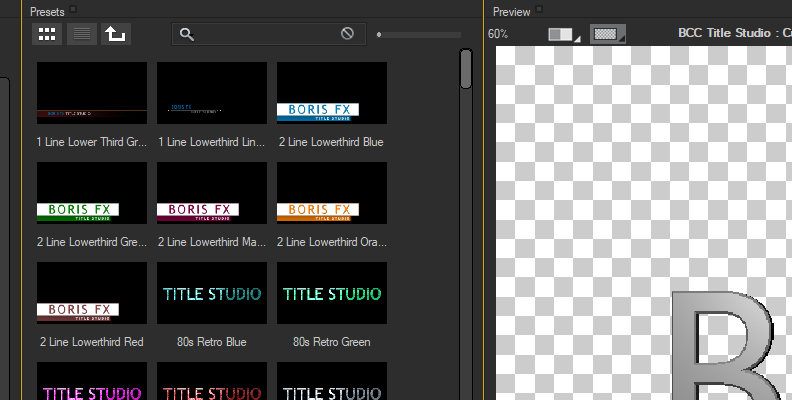
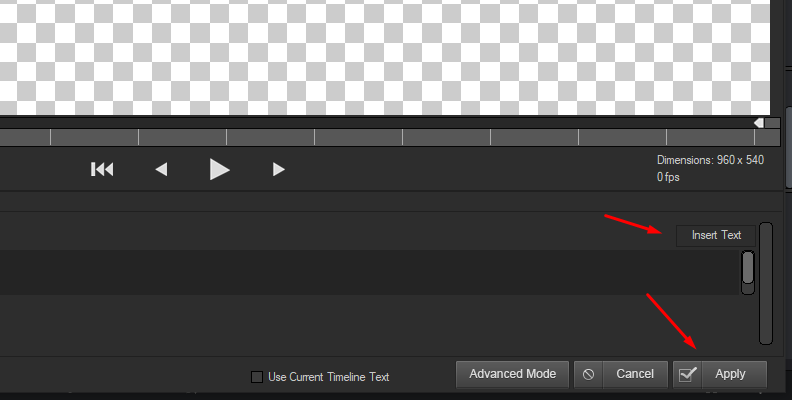
To use a preset, select it, change the text below the preview window, and click Insert Text to apply changes to the text. Then click Apply to return to DaVinci Resolve. Open the Inspector and display the Composite settings in the Title Studio parameters. Choose the Apply Mode and adjust opacity, brightness, and contrast.
Advanced Text in Title Studio
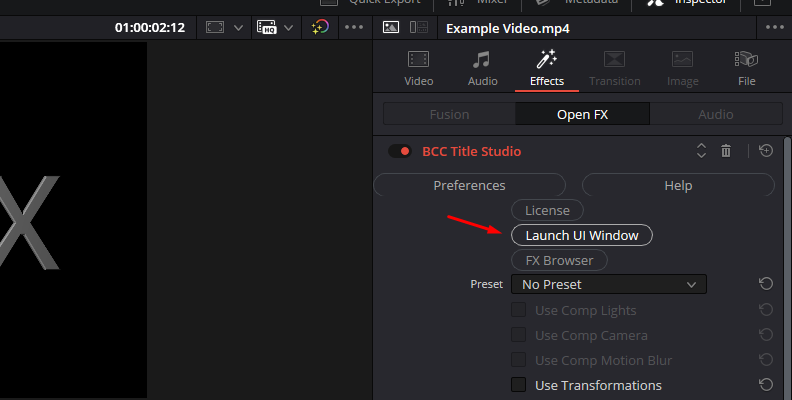
If you want to modify presets or create a title from scratch in Title Studio, open the Effect settings in the Inspector and click Launch UI Window. The Title Studio UI is divided into three sections: the Controls Window (left), Composite Window (right), and Timeline Window (bottom).
To modify a preset, display the layers at the bottom left and select the text track you want to edit. Then, make the changes in the Controls Window. You can add more text or shapes, delete tracks, and change the color and format.
Add BCC Title Studio and launch the UI windows from the inspector panel to create a title from scratch. You can delete the default text to add the text and shape tracks from scratch. When you add text or shapes from the Toolbar in the middle of the screen, a new track layer will be added to the Timeline area. There, you can rearrange them or select them to edit them in the Controls Window.
When you’re done editing, click Apply to return to DaVinci Resolve.
Animating Text in DaVinci Resolve
Animated text can add life to your text and titles. I’ll show you how to animate text using DaVinci Resolve features and Title Studio.
Animating Text with DaVinci Resolve Built-in Tools
The first method is using keyframe animation. You can animate parameters from the Title and Settings tabs.
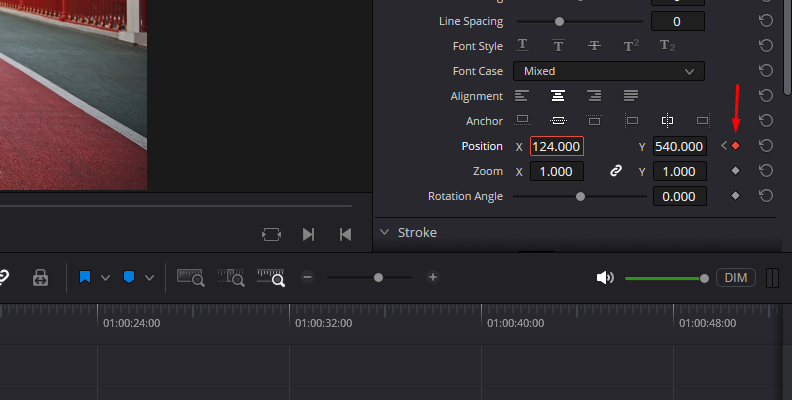
Select the text clip and open the Inspector. Then, move to the parameter you want to animate, such as positions, zoom, rotation, cropping, or a drop shadow.
Click the diamond icon to enable animation for that setting.
Move the playhead to the beginning and adjust the initial settings, then move the playhead, and modify the settings.
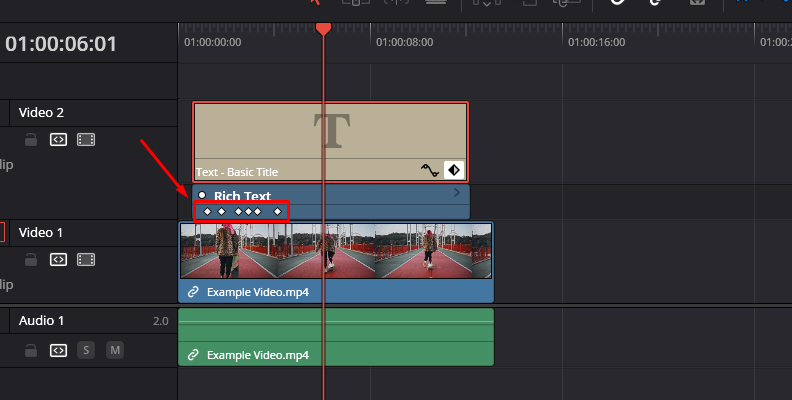
You can see all the keyframes added to the text by clicking the diamond icon in the text clip in the timeline. You can then move them to rearrange them.
Repeat the process with every parameter you want to animate. You’ll know it can be animated if it has the diamond icon at the right to add keyframes.
An easier way to animate text is by using video transitions.
In the Effects panel, click Toolbox > Video Transitions.
Choose a transition and drag it to the text clip. You can add one at the beginning and one at the end of the clip.
Transitions will only animate how the text appears and disappears from the scene. Keyframes are the best option if you want to add animation within the scene.
Animating Text with Title Studio
When working in Title Studio, you can animate the titles using keyframes.
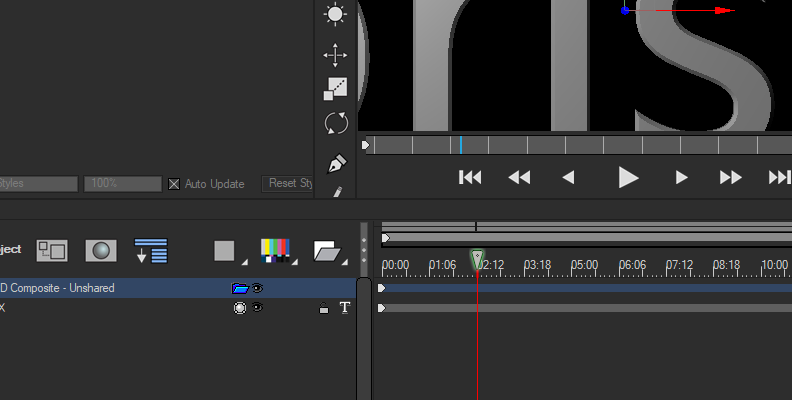
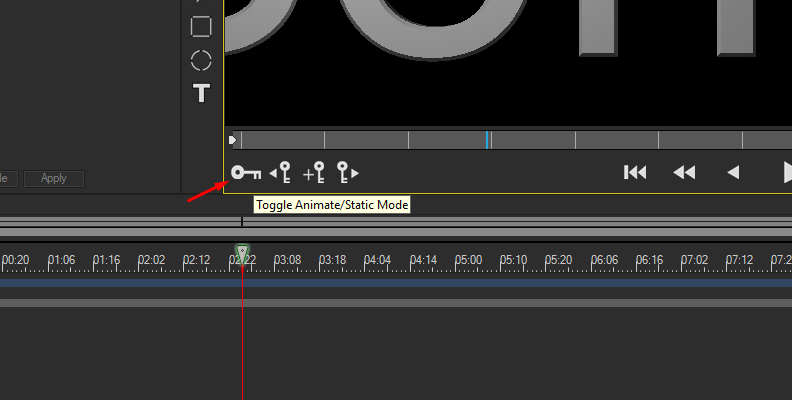
To enable animation, click the key icon that reads "Toggle Animate/Static Mode" below the Composite Window.
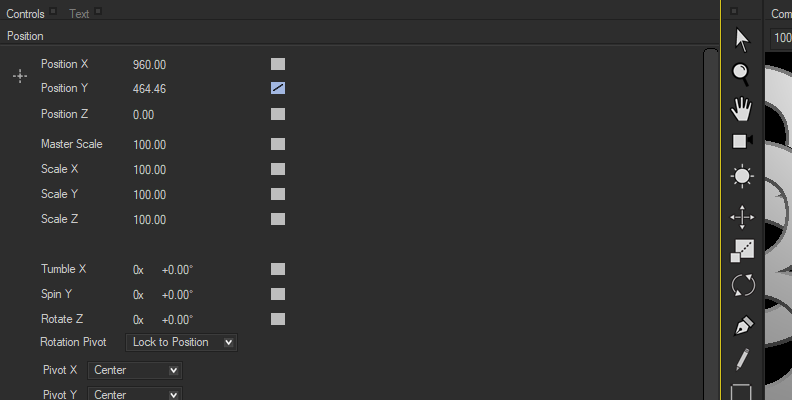
Now, choose the track you want to animate and place it at the start.
Move the playhead in the timeline and make the adjustments from the Controls Window to the parameter you want to animate.
Click the key icon to turn off the animation mode.
Click Apply to return to DaVinci Resolve.
Final Words
Now you know how to add text in DaVinci Resolve using its built-in title effects and BCC Title Studio! Both tools are easy to use and can help you make title and text as complex as you want. However, BCC Title Studio provides that extra to create more attractive 3D titles for films and videos.
Get Title Studio now to start experimenting and improve your editing skills. You have a free trial available to explore before buying, and you can download the Continuum free trial to explore more possibilities for using effects and filters for your video clips.
Good luck!


