Blurring is one of the most useful, versatile, and commonly used effects in both photo and video editing.
Whether you want to soften distracting details, draw attention to your subject, create a dreamy, cinematic look, or protect sensitive information and identities, a blur filter or effect can help you accomplish all of those tasks.
Among the different types of blur, such as Radial blur, Motion blur, Field blur, Tilt-Shift blur, Directional blur, and others, Gaussian blur is arguably one of the most popular.
Through the application of a mathematical function, it works as a type of low-pass filter—a process that softens sharp detail while keeping the overall image smooth—producing a natural result that feels easy on the eyes.
In this guide, we’ll go over what Gaussian blur is, why it’s so widely used, and how you can apply it in your own editing workflow to improve your photos and videos with just a few simple steps.
Without further ado, let's get straight into it!
What is Gaussian Blurring?
Gaussian blurring is a common way to make an image or video look softer. Instead of leaving edges sharp and detailed, it smooths them out by gently mixing each pixel with the colors around it. The trick is that it doesn’t treat all nearby pixels equally. Pixels closest to the center are given more importance, while those farther away matter less. This creates a smooth, natural-looking blur rather than a flat or artificial one.
How strong a blur looks depends on a setting often called radius or amount (technically “sigma”). A small value gives just a light softening, while a larger value creates a heavy, dreamy blur.
People often use Gaussian blur to reduce noise across an entire photo, soften backgrounds in portraits, or create simple visual effects like glowing edges and smoother transitions. In video editing, it’s also handy for blurring out text, logos, or parts of the frame you don’t want the viewer to focus on.
Because it mimics how real camera lenses naturally scatter light, Gaussian blur usually looks cleaner and more natural than other types of blur. That’s why it’s one of the most popular blur effects you’ll find in editing tools.
Reasons Why You Might Need to Use Gaussian Blur
In this section, we present you with a list of many possible use cases for the Gaussian blur filter/effect, along with an explanation for each.
Here's why the Gaussian blur tool/effect is so versatile and helpful, as you can use it to:
Reduce Image Noise and Grain
Photos and videos taken in low brightness conditions or with high ISO settings often show tiny speckles or look grainy. Gaussian blur smooths out these distracting details by averaging nearby pixel values, making the final image look cleaner and more professional without completely losing its sharpness.
It can also help mask other small visual artifacts, softening flaws that might otherwise stand out and pull attention away from your subject.
Soften Harsh Edges
Sometimes edges between objects or shapes can look too sharp, jagged, or computer-generated. By gently softening them, a Gaussian blur creates smoother transitions that look more natural to the eye, especially in digital art, graphics, or edited photos.
It can also reduce the appearance of bright spots or colored fringes—those thin red, blue, or green outlines (also sometimes referred to as chromatic aberration) that sometimes show up around high-contrast edges—making them far less distracting in the final image.
Create Depth of Field Effects
Professional cameras blur the background when focusing on a subject, creating a cinematic depth-of-field effect. Gaussian blur can mimic this look in editing by keeping the main subject clear while softening the background, helping the subject stand out more, also known as the shallow depth effect.
Hide Sensitive Information
If you need to obscure personal details like faces, license plates, brand logos you aren't allowed to show, or text in a document or video, Gaussian blur is an easy solution. It hides the information without covering the entire area, keeping the image context intact while protecting privacy.
Smooth Out Skin in Portraits
Portrait editing often involves reducing small imperfections such as blemishes, wrinkles, or uneven texture. A light Gaussian blur can soften these details, giving skin a smoother and more flattering appearance while still looking natural if applied carefully.
Prepare for Edge Detection
In design or technical work, for example, sharp noise can confuse tools that detect outlines and edges. A Gaussian blur smooths out those random details so that edge detection filters pick up only the meaningful lines, improving accuracy.
Blend Layers Together
When combining multiple images, videos, or graphics, cutouts and added elements can look out of place. Adding a slight Gaussian blur around the edges helps blend layers seamlessly, creating a more cohesive and realistic final result.
Create Glow and Light Effects
By blurring bright areas and layering them back onto the image, you can create soft glowing effects, halos, or dreamy light streaks. This is especially useful in video editing, digital art, and photography when you want highlights to pop.
Direct Viewer Focus
If a video or a photograph has too many competing details, viewers may not know where to look. Blurring the less important areas helps guide the viewer's attention to the subject or main element, improving storytelling and visual impact.
Stylize Backgrounds
Busy backgrounds can distract from your subject or make text difficult to read. Gaussian blur transforms them into smooth, soft surfaces that highlight your subject and provide a clean backdrop for overlays like captions, graphics, or logos.
Transition Between Shots
In video editing, sudden cuts between scenes can feel jarring. Adding a Gaussian blur during the transition softens the change and creates a smoother, more professional flow between clips.
Add a Cinematic Look
Digital footage is often very sharp, sometimes too sharp compared to film. A touch of Gaussian blur can take away the “digital edge” and give your videos a softer, more cinematic feel, making them look more polished and intentional.
Add Gaussian Blur in Photoshop

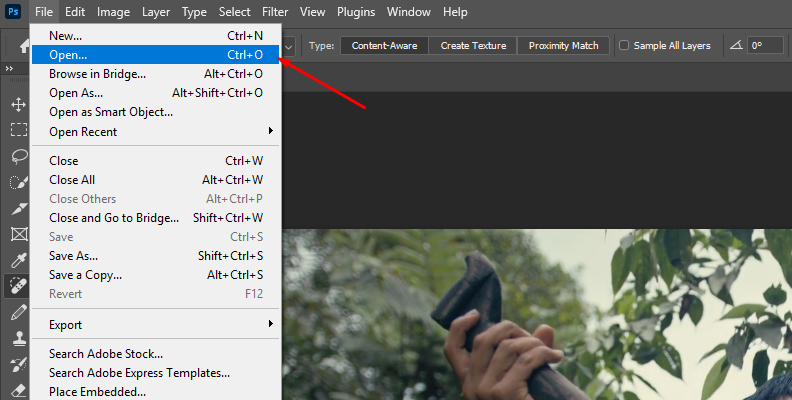
Step 1: Open Your Image
Open Adobe Photoshop and load the photo you want to add the Gaussian filter to using the File > Open approach from the menu bar.
If your image opens as a Background layer, that’s fine—you can work directly on it after making a copy.
Step 2: Use The Duplicate Layer Function
Press CTRL + J (or CMD + J on Mac) to duplicate the image layer or do it manually by right-clicking it and choosing "duplicate layer" from the toolbar, as you can see in the image below.
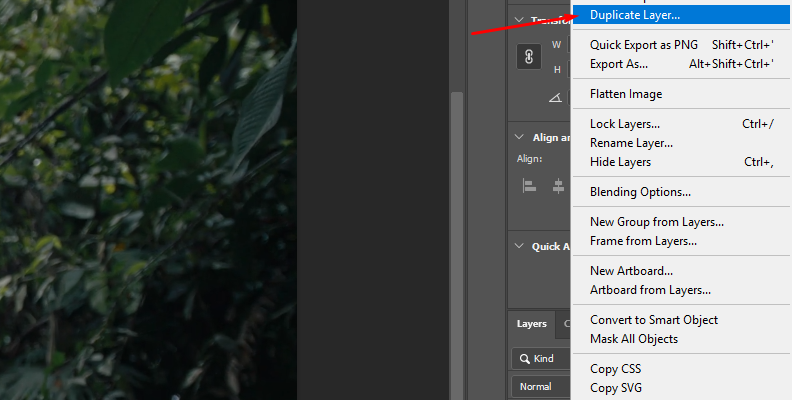
This keeps your original image safe by creating a new layer, so you can compare before and after or roll back if needed, sort of like using adjustment layers in other software.
Step 3: Convert to a Smart Object
Right-click the duplicated layer (which should be above the original layer) and choose Convert to Smart Object.
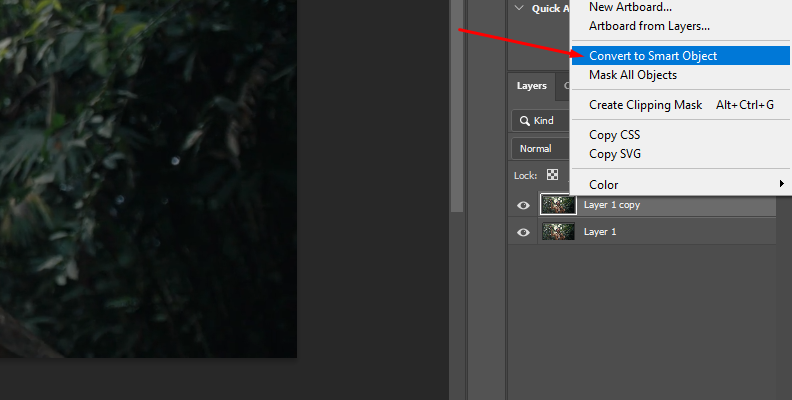
This makes the Gaussian Blur effect editable later as a Smart Filter, meaning you can tweak the strength anytime.
Step 4: Add the Gaussian Blur Filter
Go to Filter > Blur and select Gaussian Blur from the list of options.
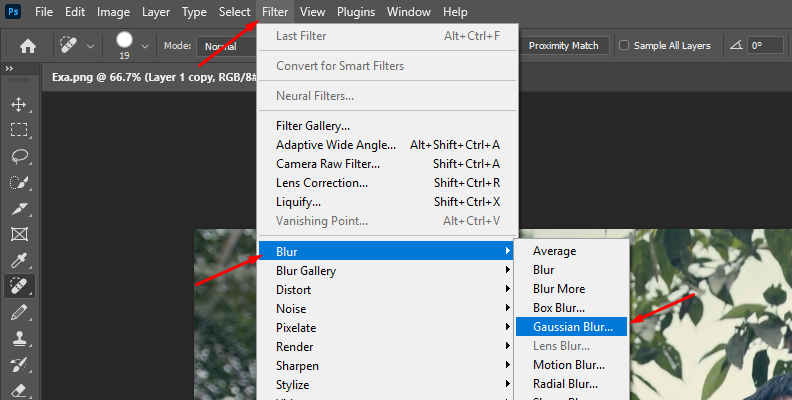
Once you choose Gaussian Blur, A dialog box appears with a preview window and a Radius slider that controls how strong the blur is.
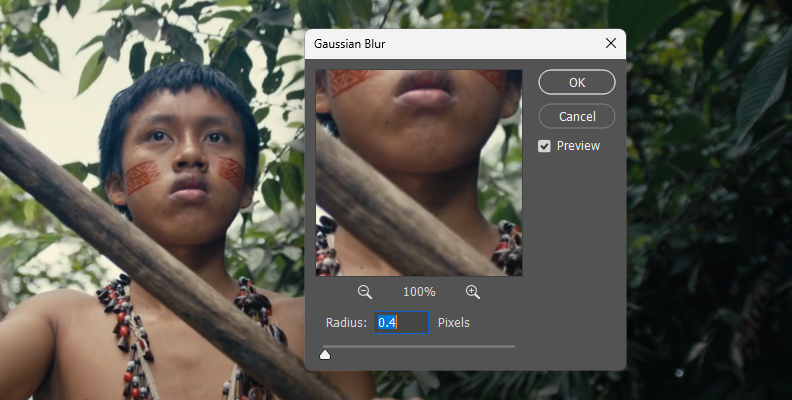
Step 5: Choose a Radius Value
Drag the Radius slider slowly and watch the image preview.
Small values gently smooth noise and edges, medium values soften backgrounds, and high values can create a strongly blurred background or a dreamy blur look. Adjust the amount to provide just enough blur depending on your creative goals.
Step 6: Check the Image At 100%
Set your zoom to 100% so the preview reflects true sharpness. Toggle the Preview checkbox to compare the before and after of the entire image, then click OK when you’re happy.
Step 7: Add a Layer Mask to Apply Selectively
If you only want certain areas blurred, click the Smart Filter mask thumbnail under the layer.
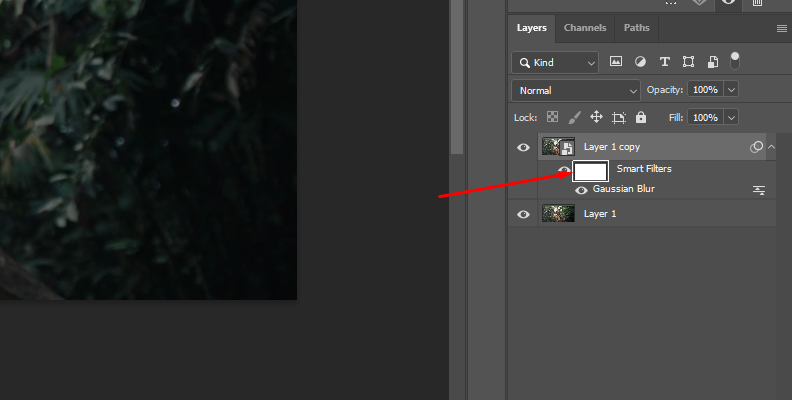
Paint with a soft black brush or the pen tool on the mask to hide blur where you want to keep sharp detail, and paint with white to reveal blur.
Step 8: Refine the Mask Edges
Use lower Brush Opacity for smoother transitions and build up the effect gradually. Use a larger, softer brush around edges like hair, text, or important details to avoid halos.
Step 9: Adjust the Blur Anytime
To change the strength later, double-click “Gaussian Blur” under the layer to reopen the dialog. Fine-tune the Radius without quality loss because you used a Smart Object.
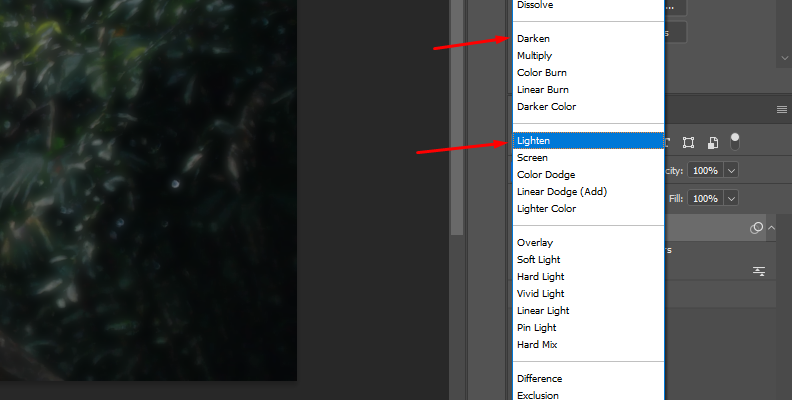
Step 10: Balance the Look with Opacity or Blending
If the blur feels heavy overall, reduce the layer’s Opacity in the Layers panel for a subtler result. You can also try blend modes like Lighten or Darken for creative styles.
Step 11: Optional Background-Only Blur
Select your subject with Select > Subject, click Add Layer Mask on the smart object to protect the subject, then invert the mask if needed so only the background shows blur. Clean up the mask with a soft brush.
Step 12: Save and Export
Save your working file as PSD to keep masks and Smart Filters. When you’re done, export a copy for sharing with File > Export > Export As or Save a Copy.
That's all there's to it!
How to Add Blur in Photoshop with Optics

Optics by Boris FX is both a standalone software and a plug-in for Adobe Photoshop and Lightroom that you can use for all your image-editing tasks. Applying filters, effects, and masks is very easy with Optics, and it also comes with hundreds of different presets that will help you take your image editing to a whole new level.
If you have Optics installed, here's how you can use it to add blur to your image:
Step 1: Add Your Image to Adobe Photoshop
Like with every other Photoshop task, you first need to import your image into the software. Then, duplicate the original layer and convert the new duplicated layer into a smart object.
Step 2: Open Your Image in Optics
Now that you have the duplicated layer made into a smart object, select it and then go to Filter -> Boris FX -> Optics.
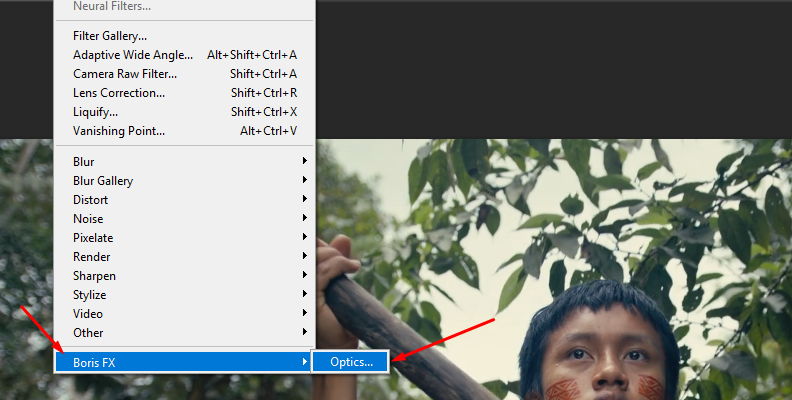
Wait a few seconds, and Optics will launch.
Step 3: Apply the Blur to Your Image
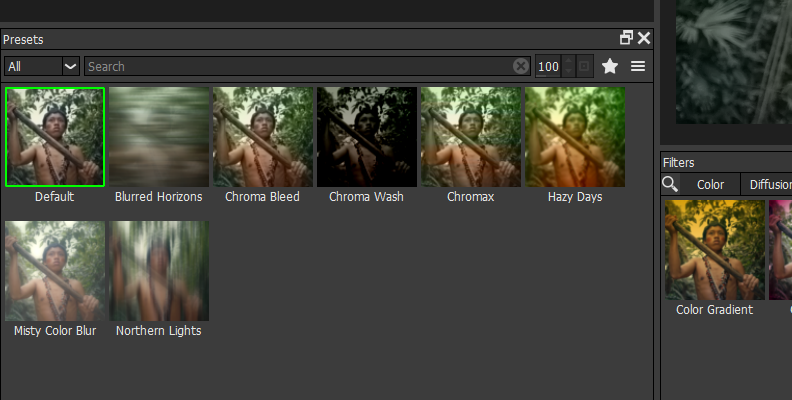
Now that you are into Optics, you can use the search bar to type in "Blur" and you will see numerous results come up, all of which offer various customizable presets.
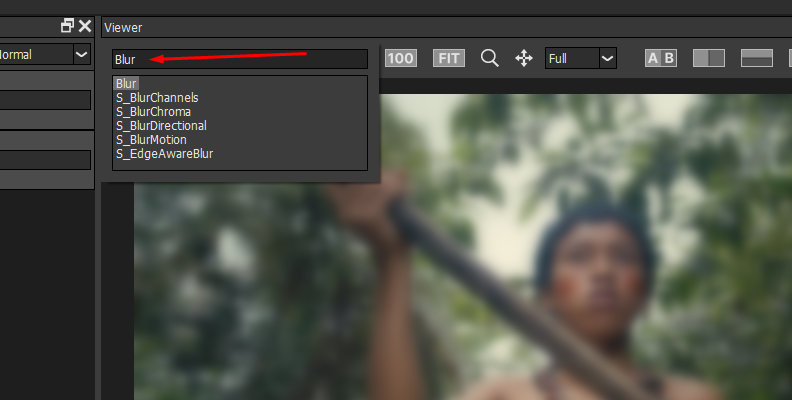
Select the blur effect you want to use by clicking on it, and you will see its available presets on the bottom-left.
Step 4: Adjust and Save
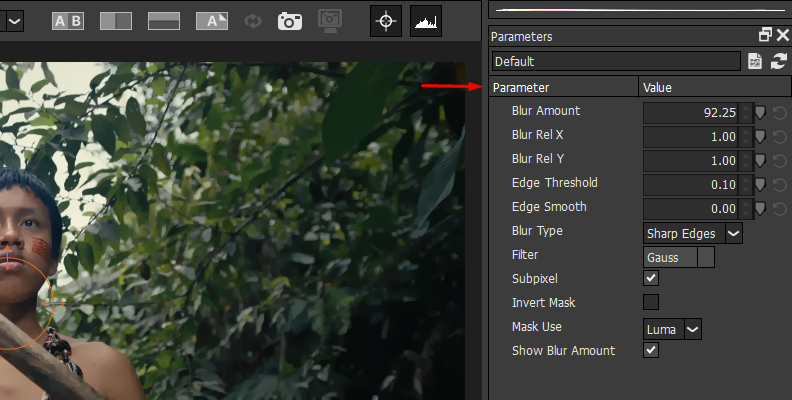
Once you choose an effect and a preset that comes along with it, you can customize the parameters in the panel on the right.
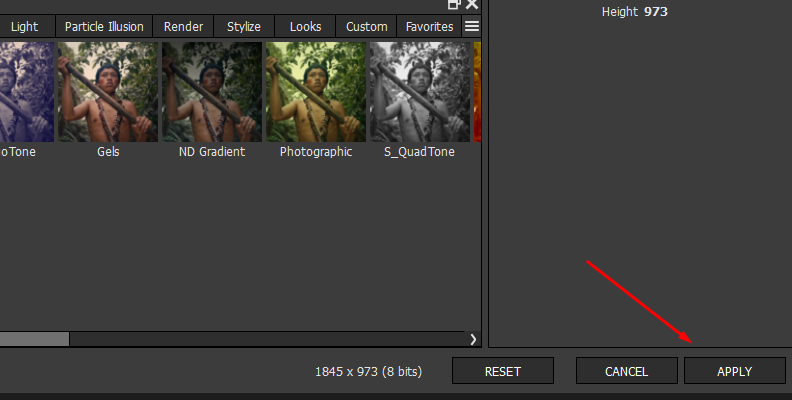
When you're satisfied with the results for your specific goals, click the "Apply" button in the bottom-right corner.
That's all there's to it!
Final Words
That concludes our guide on adding a Gaussian blur in Photoshop, along with all the reasons you may need to rely on this effect in your future projects.
Hopefully, the information listed will help you master this widely used tool, and if it does, we'd be more than glad to have helped. We wish you the best of luck, and thank you for reading!