Night vision is an effect that can be used in many ways. It can be used in horror movies, a documentary, or as a filter for vlog content. This effect looks great for footage of hunting or military scenes where the actors use a night vision camera or to simulate surveillance footage.
In this tutorial, you'll learn how to create professional night vision in After Effects using Adobe built-in tools and a second and more customizable method using a plug-in from Continuum.
Let's dive in!
How to Create Night Vision in After Effects

Step 1: Setting up the Night Vision Effect
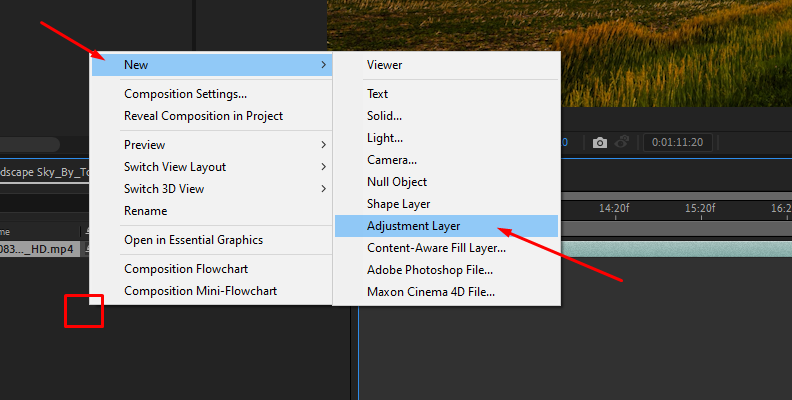
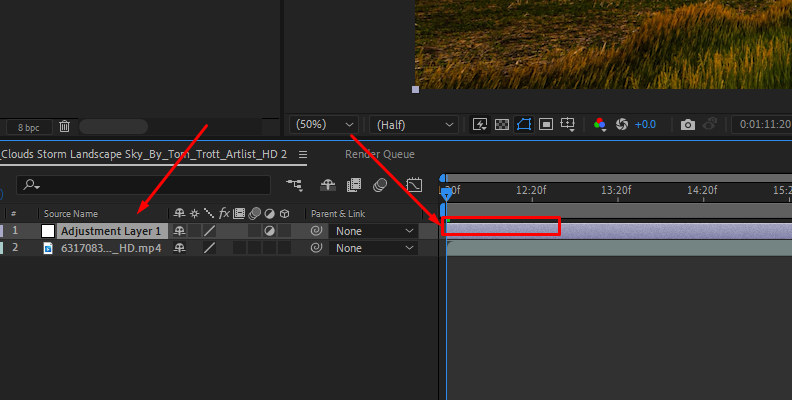
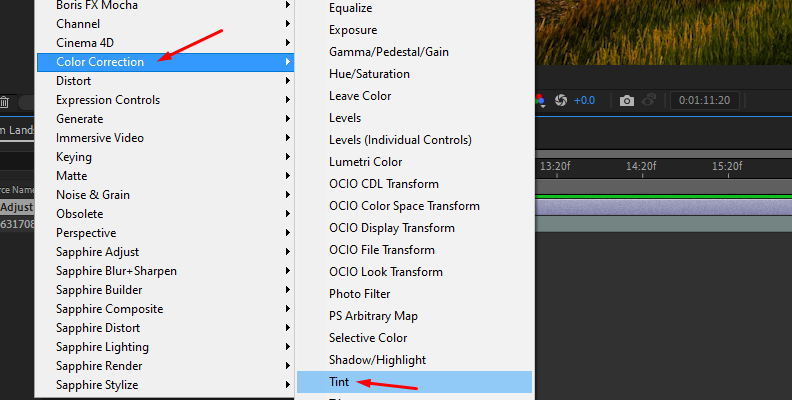
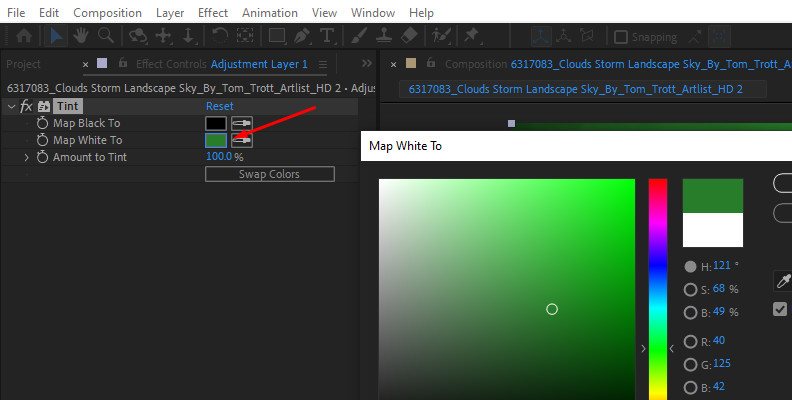
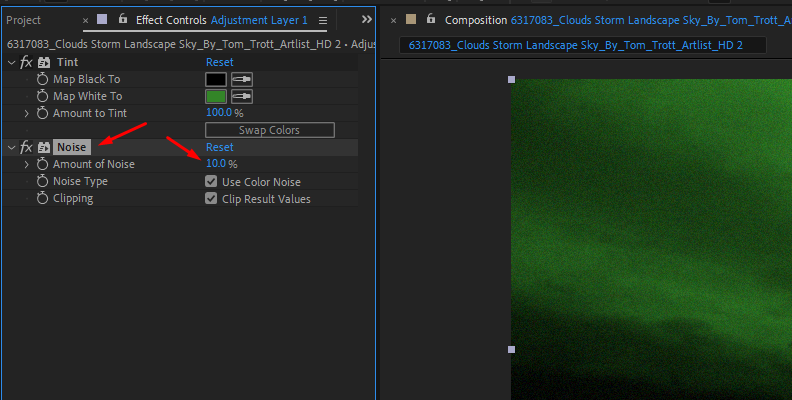
Start by importing your video footage and creating a new composition. Add a new adjustment layer and place it above the original video layer. From the menu Effects> Color Correction> Tint, add a Tint effect to change the video's color to the characteristic green of the night vision goggles. Change the “Map White To” to a green shade.
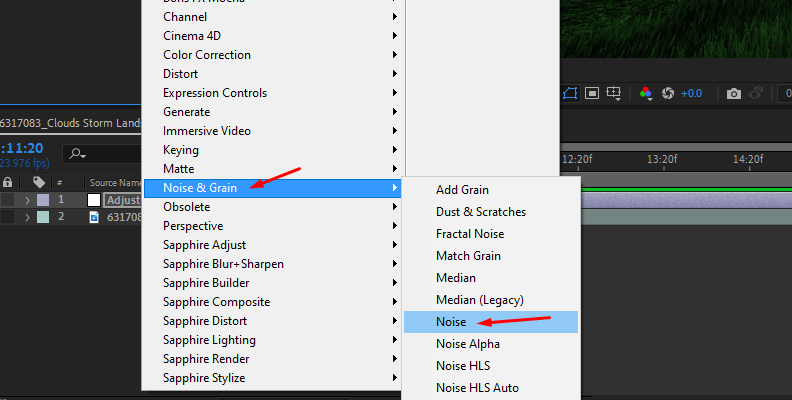
Night vision goggles are known for their noisy effect, so let’s add some grain. Go to Effect > Noise & Grain > Noise. You can get creative with the amount of noise to give your video the look of an older night vision camera.
Step 2: Style Effects
Add a Glow effect from the menu Effect > Stylize > Glow to replicate the glowing effect from night vision footage. Play with the threshold, radius, and intensity settings to shape the glow effect.
Another option is to add a vignette to draw attention to the subject or a part of the scene. Select a vignette from Effect > Stylize > CC Vignette and adjust the amount and angle of view to darken the frame's edges.
How to Create Night Vision in After Effect with BCC Night Vision
Now, you’ll learn how to create a Night Vision goggles effect using one of the Continuum plug-ins. BCC+ Night Vision is an easy way to make a vivid night vision effect in Adobe After Effects. It has all the parameters we used in the previous method but in one plug-in!

Step 1: Apply the BCC+ Night Vision Filter
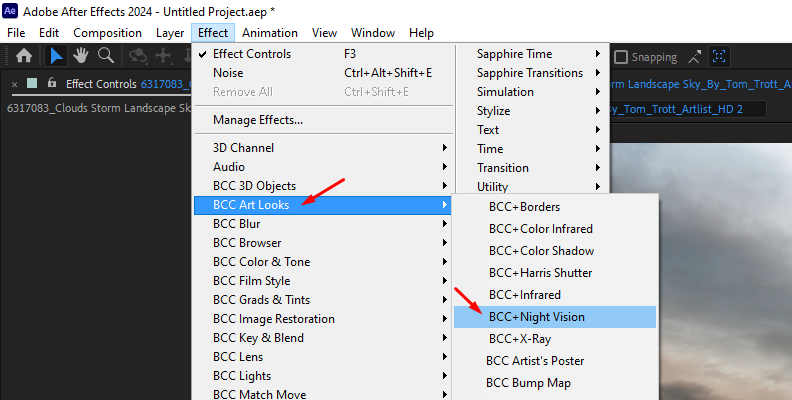
To apply the filter, select the layer video and go to Effect > BCC Art Looks > BCC+ Night Vision Filter.
Step 2: Try the Night Vision Presets
Let’s start by looking at the filter’s presets. Open the Effect Controls panel and click on FX Editor at the top of the parameters to launch the preset library. You have several presets for night vision effects in blue, red, orange, and red tints. Select one from the left side and preview it on the center viewer.
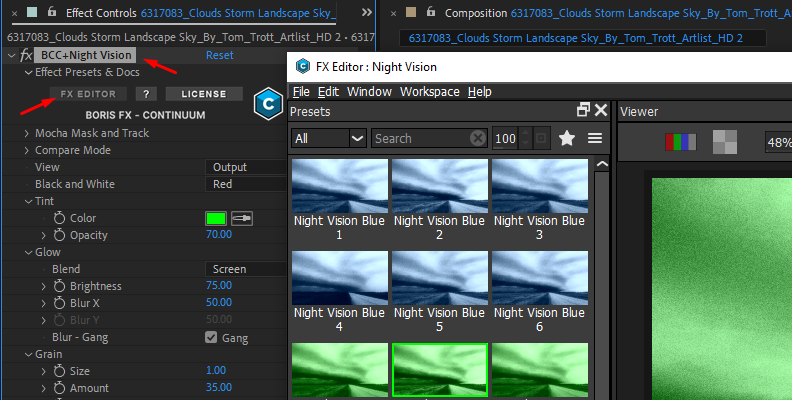
Every preset is customizable, so you can choose one as the base for the night vision effect and modify it later. Click Apply to exit the FX Editor.
Step 3: BCC+ Night Vision Settings
From the View menu, you can change Output to Matte. The Matte view displays the glow matte, which is useful when adjusting the Matte settings to determine the best-looking parameters for the effect and fine-tune details.
The next step is to choose the black-and-white filter for the color image. Click the Black-and-White dropdown menu to choose between Normal (monochrome image), Red, Green, Blue, Yellow, and Orange. If you’re unsure which one to use, try them all, as they can significantly change the effect.
Moving to the Tint settings, click the color to choose a tint different from the night vision green if you're going for a different shade of green or a different tone. Choose from the Color window or use the eye dropper to hand-pick colors from pixels. Adjust the opacity controls for the tint color. Decreasing the opacity will reduce the video image to black-and-white, and increasing it will make the tint more intense.
Next is the Glow parameter to control the glow of the image. For blending, you have "Add" to add the glow to the video image and "Screen" to combine the light in the image and retain the highlights. The Brightness control adjusts the intensity of the glow, and the Blur controls its softness.
Step 4: Fine-Tuning the Night Vision Effect
The image from night vision goggles can look grainy. BCC+ Night Vision features a Grain parameter, where you can add grain and adjust the size and intensity of the noise with the Grain Size and Grain Amount controls. The Grain Softness controls how soft or sharp the noise pattern will look.
The Color Correct group adjusts the video's brightness, contrast, and gamma before processing the Glow settings and the Black and White filter. Play with these settings to find different looks, depending on how dark or light you want the night vision camera to look.
The last fine-tuning parameter is the Matte group, where you can customize the generated matte by modifying the Position, Range, and Blur controls.
Change to the Matte view when adjusting these parameters to preview the matte. Adjust the Position to establish the values to include in the matte and add or decrease the range of values the matte uses with the Range control. You can also add a blur effect to soften the matte.
The white areas in the matte are where the glow effect will be applied. Find the Position and Range that best works for your video. When you finish editing the Matte parameter, change the view back to Output to see the final result. You can also add extra effects such as glows or vignettes to make the night vision more complex.
Final Words
With BCC+ Night Vision, you can easily customize your video with a night vision effect, create multiple looks, and save them as presets to maintain consistency across your scenes and with other collaborators.
Get your Continuum free trial today and have fun!


