Vintage photos have their own unique vibe, but when it comes to old black and white photos, they can often deteriorate and lose their quality over time. Colorizing black and white photos can bring a photo to life, highlighting landscape, subjects, and even evoking a different emotion than the original one.
Today, we have at our disposal various tools designed to enhance colors, color correct, and colorize black and white images. In this article, we'll explore two methods for colorizing your black and white photos in Photoshop.
Let’s dive in!
How to Colorize Black and White Photos in Photoshop Step by Step

For this first method, we’ll work with Adobe Photoshop Neural Filters. These AI-powered filters use machine learning to enhance your photos quickly and easily, all with just a few clicks.
Step 1: Import Image into Adobe Photoshop
Select a black and white photo from your vault or memories that you want to colorize today. Import the original image into an Adobe Photoshop project.
Step 2: Enable the Colorize Neural Filter
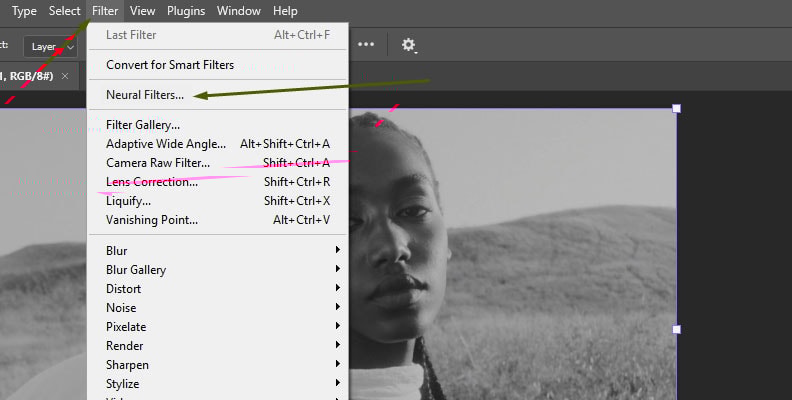
Navigate to the menu bar and click Filter > Neural Filters.
Next, click on the Colorize option. If this is your first time using the Colorize Neural Filter, click the download button to automatically download and install the neural filter.
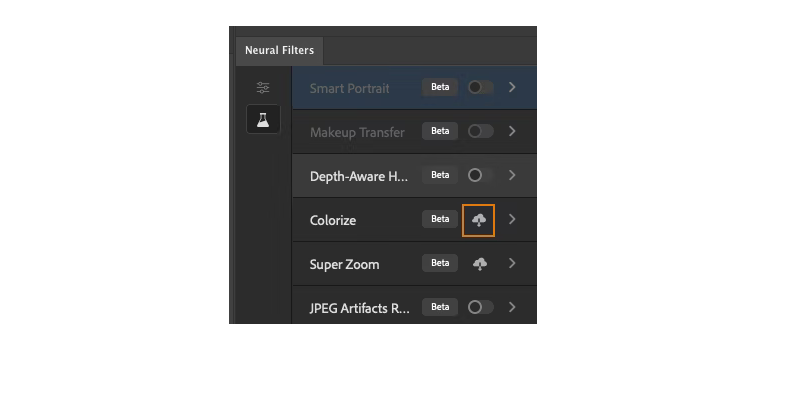
Once it's ready to use, click the toggle button to activate it.
Let the neural filter process and colorize your photo. The colorize neural filter is smart enough to identify elements such as the sky, grass, and water, and colorize them accordingly. Using the "Auto Color Image" option usually does a good job, but sometimes you may want to make adjustments.
Step 3: Adjust the Colorize Neural Filter
To make manual adjustments to the Colorize Neural Filter, use the options in the Colorize Neural Filter panel. Let’s say you want to change the color of something in the image, like the color of a car, the sky, or the clothes of a person.
Click the area where you want to change the color in the small viewer in the Neural Filter panel to add a Focal Point, and then select a different color from the Color Picker window.
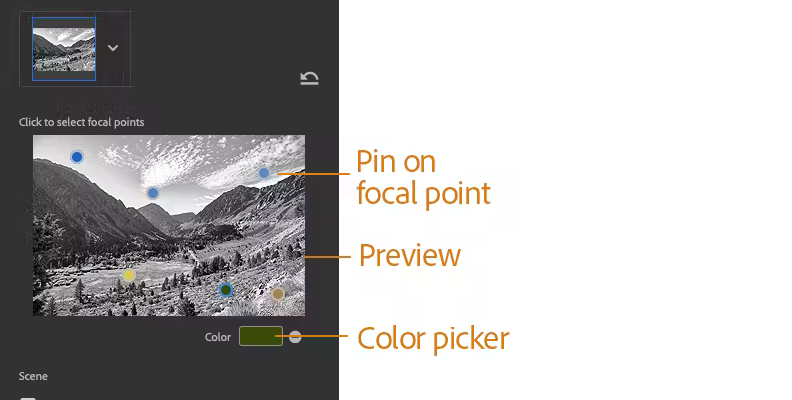
Press OK and adjust the color strength as needed. You can add more focal points or remove the ones you don’t need.
Down the neural filter panel, you have another set of adjustments. You can change the Saturation and adjust the Cyan/Red, Magenta/Green, and Yellow/Blue sliders to achieve more realistic hues. The last option allows you to reduce color artifacts and noise, which is particularly helpful when you need to colorize old black-and-white photos.
Once you've obtained the desired colorization, select Smart Object as the Output to create a new Smart Object layer with the Colorize neural filter.
Step 4: Fine-Tune Details with the Brush Tool
The Neural Filters may not always yield the best solution, but they can serve as a great starting point for refining and manually editing parts of the image using the brush tool.
There are two routes to take here. First, select the smart filter mask and use the brush tool to bring back some of the original black and white image, reinstating detail.
The second route is a slower process that involves manually painting areas you want to refine using the brush tool.
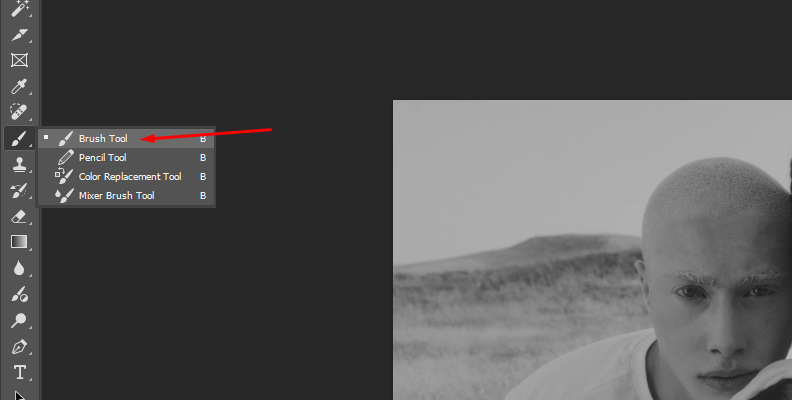
Start by creating a new layer and selecting a color. Press B to select the brush tool and adjust its size, hardness, and feathering as needed for the image and the areas you are painting.
Begin painting over the image with the selected color. In the layers panel, change the blending mode to “Color”. To adjust the details of other colors, create a new layer, select the new color, and repeat the process. Remember to set the blending mode of each new color layer to “Color”.
Step 5: Save Image
If you reach this step, it means you have finished colorizing your black-and-white photo. Congratulations! Now, it’s time to export the image. Select all layers except the original one and merge them into a single layer by pressing Ctrl+E (Windows) or Cmd+E (Mac).
Navigate to the menu bar and click File > Save As. Select the desired file format for exporting the image and the destination folder. Enter a name for the new photo and click Save to export the colorized photo to your computer.
Colorize Black and White Photos with Optics
Optics is a Boris FX filter for Adobe Photoshop, Lightroom and standalone app with hundreds of filters and effects to enhance your photos. For this second method, ensure you have installed the latest version of Optics. You can follow the tutorial with the free trial.
Step 1: Set Up the Photoshop Project
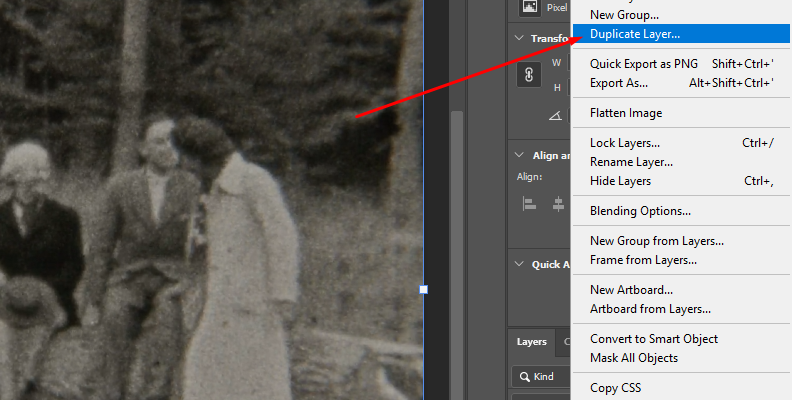
Start a new Photoshop document and import the image you want to colorize. Duplicate the layer, right-click it, and select the "Smart Object" option to make both the layer and the filter editable.
Step 2: Apply Optics Filter
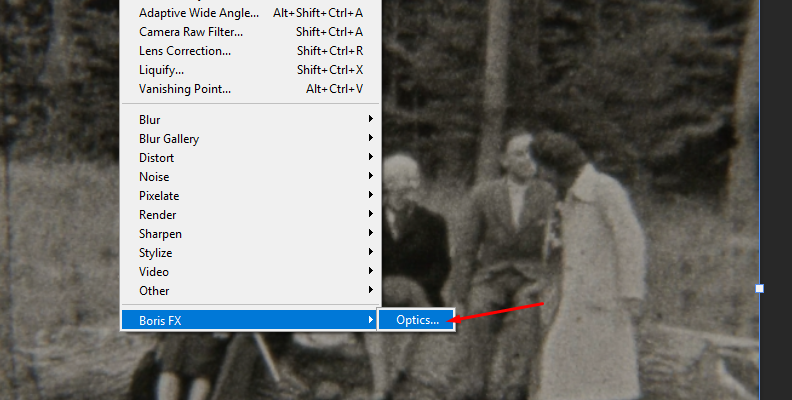
Select the smart object layer and navigate to the Filter menu. Find Boris FX, click it, and select the Optics filter from the list.
Wait for the Optics interface to launch and automatically import the image to the Optics workspace.
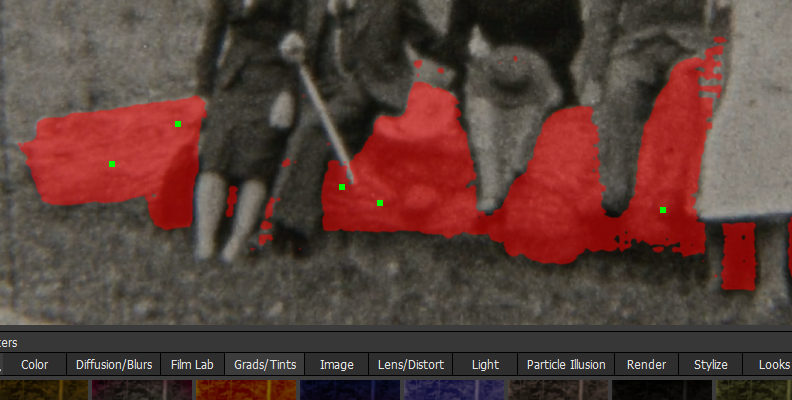
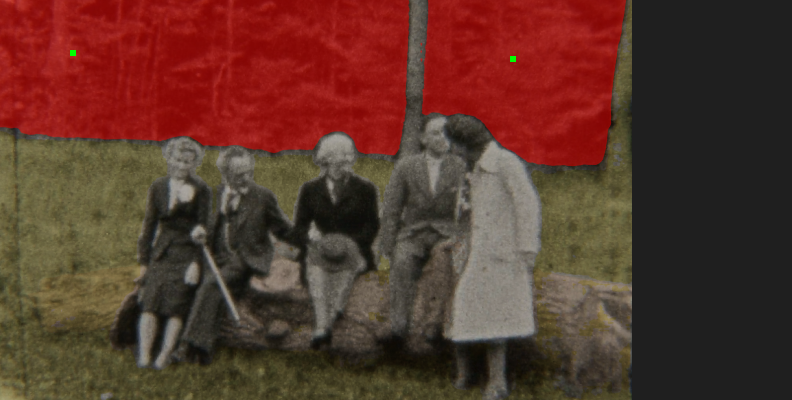
Step 3: Mask Objects
Similar to Photoshop, you could manually paint the image, but it would take longer, and the colors could look unrealistic. Let's create a mask to select objects, such as clothes, a car, or a house. Click the "Add Mask" icon located on top of the layer panel and choose a mask tool from the list.
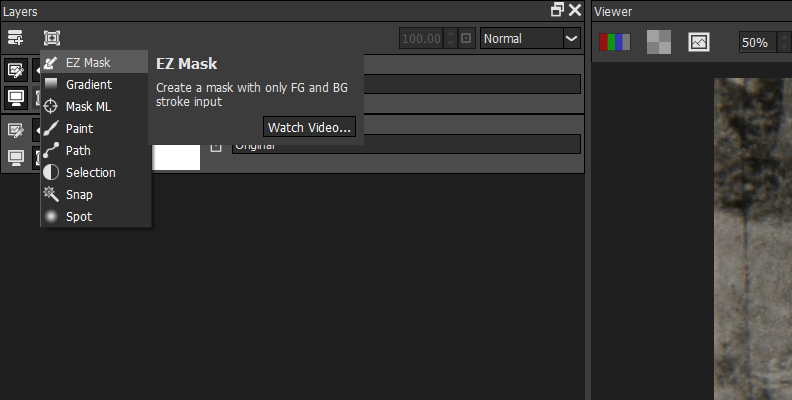
I recommend using the Mask ML for detailed objects or the EZ Mask when separating the background.
To generate the mask with Mask ML and EZ Mask, press Enter and wait for Optics to process the mask. You can press M to view the mask in the viewer and ensure the subject has been isolated correctly.
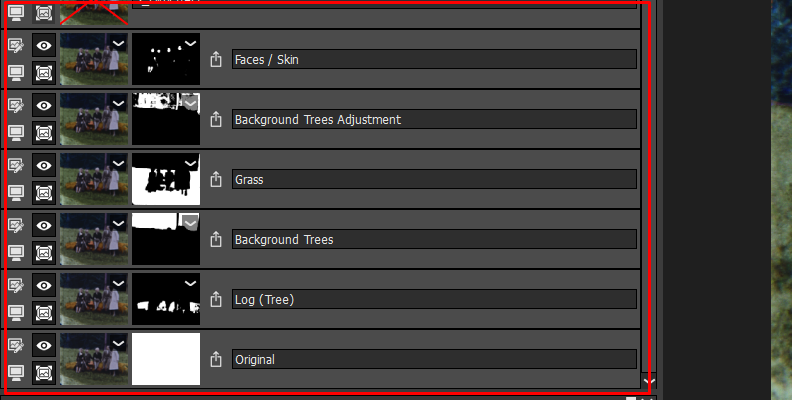
If there are multiple subjects to colorize in different colors, you can add a different layer and create a separate mask to apply the colorize filters to each element.
Step 4: Colorize the Image
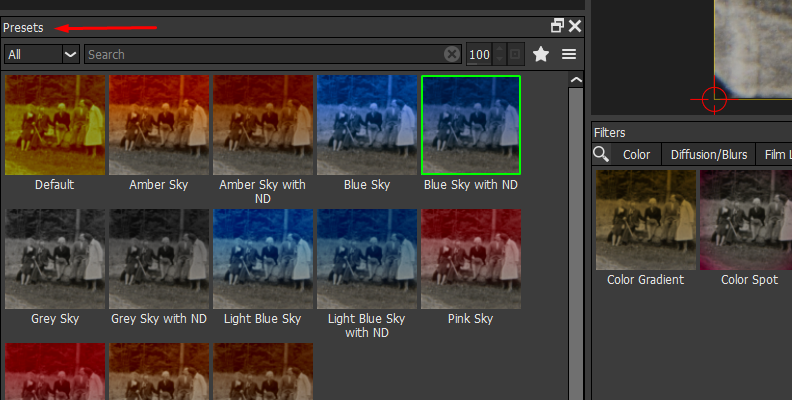
Select the layer with the mask, navigate to the filter library below the viewer, and select the Grads/Tints category.
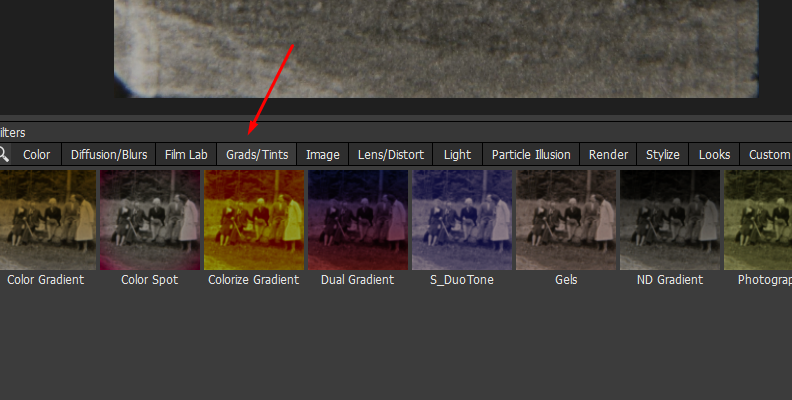
Any filter in the Grads/Tint category will work. I suggest trying the Photographic or Gels filter for subjects and the Color Gradient filter for landscapes or backgrounds with skies.
Choose a preset from the preset library to choose the color.
On the right panel of the parameters filter, you can also modify the color and adjust the Opacity, Preserve Highlights, and Exposure Compensation adjustments to achieve a natural colorization.
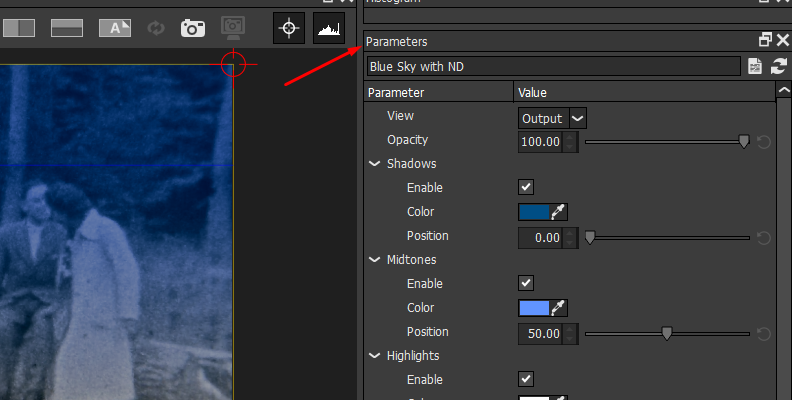
Additionally, you can enable the Grad option to limit where the filter is applied. This option is helpful when working with backgrounds such as the sky.
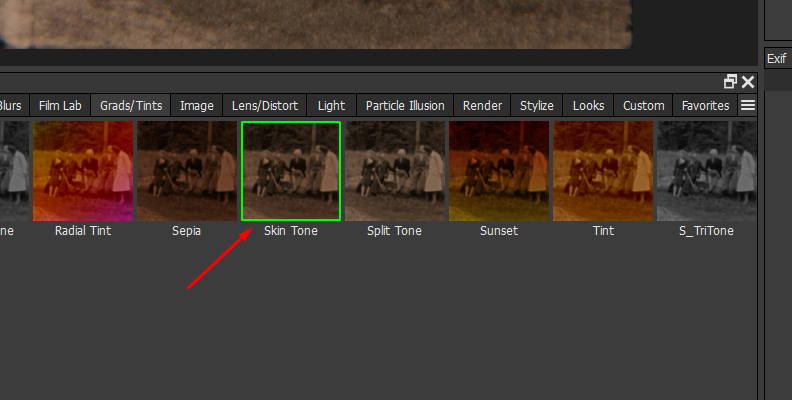
For skin tones, use the Skin Tone filter from the Grads/Tints category and complement it with the Beauty Studio filter from the Diffusion/Blurs category to enhance facial features from old white and white photos.
If you want to go further, add a new layer and apply the Enhancing filter to improve the colors of the overall image.
Keep experimenting with the filters and parameters to colorize and restore your old photos.
Step 5: Render
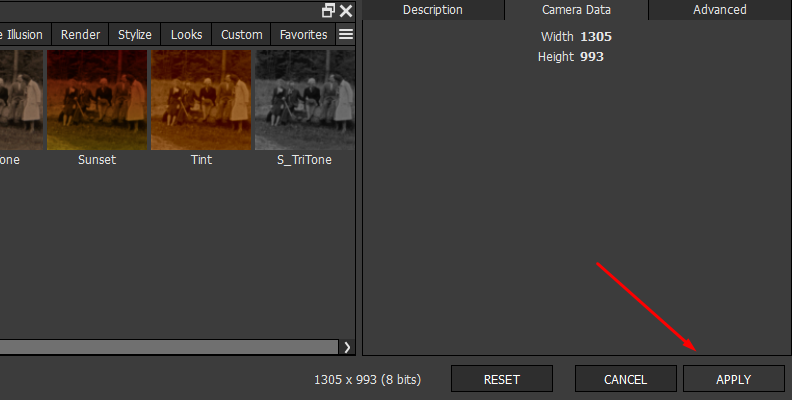
To render all the filters and changes made in Optics and return to Photoshop, click the Apply button.
In Photoshop, go to File > Save As and choose the file format of your preference to export the image. And you’re done!
Final Words
With these two tools in Photoshop, you can now colorize your favorite old black-and-white image and breathe new life into it.
In short, the Photoshop colorize neural filter provides a quick solution, while the Optics filter offers more customization for coloring and restoring your old photos. You can do so much more with Boris FX Optics, so don’t hesitate to get the free trial and experiment with all the features and filters to upgrade your photography tools!
FAQ
Can Photoshop Automatically Colorize Black and White Photos?
Yes, you can colorize photos automatically using the Neural Filter in Adobe Photoshop. To access the neural filter library, you need the latest Photoshop update. Apply the Neural Filter from the Filter menu, and then download each available neural filter before using it for the first time. Once you have downloaded them, they'll be ready to enable the next time you use the colorize neural filter.